There is something deeply nostalgic about a Christmas village. It is not just a collection of miniature houses. It is a whole world you get to build and arrange every year.
Whether you have three pieces or thirty, the way you display them makes all the difference.
A crowded table looks like clutter. A thoughtfully arranged village looks like a scene pulled from a storybook.
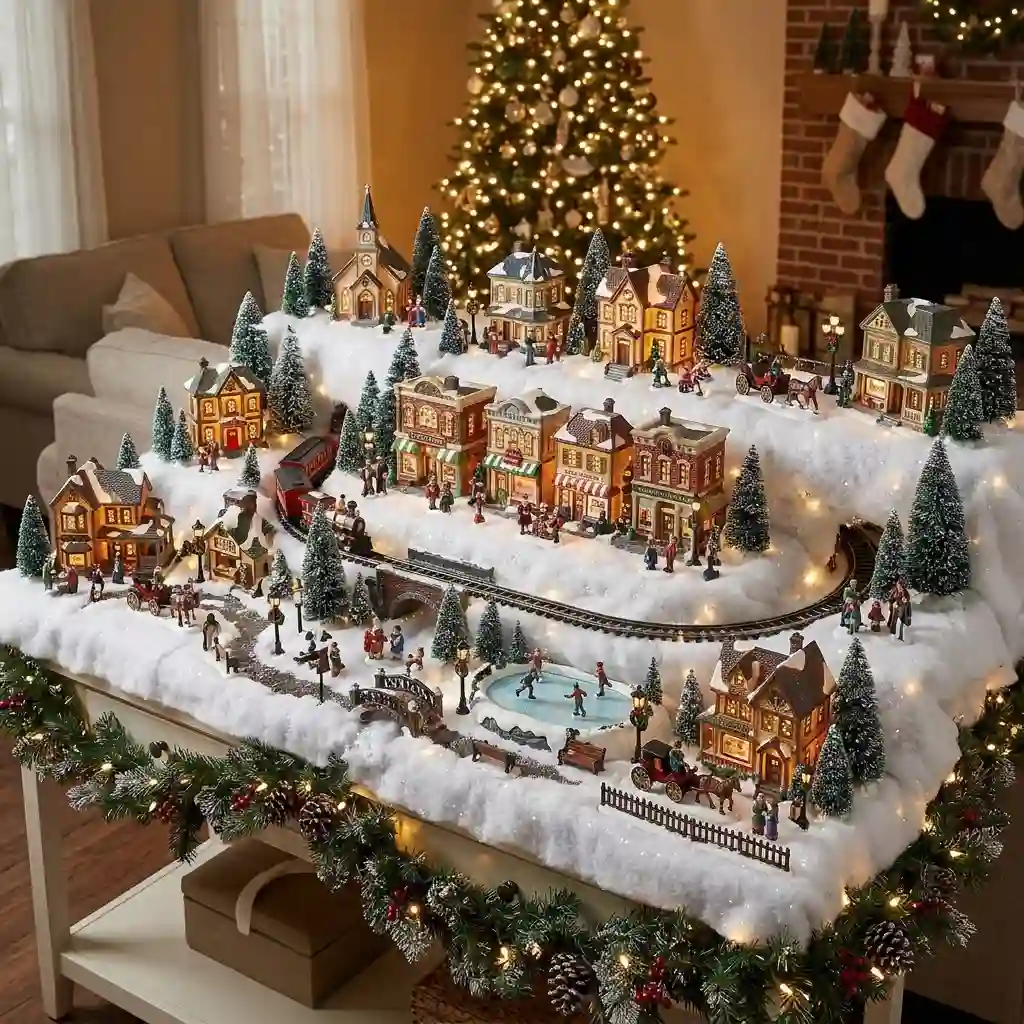
These 30 Christmas village display ideas cover everything from sprawling multi-level landscapes to single-shelf setups for small spaces. Here is how to make your village the best part of your holiday decor.
1. Use levels: Flat tables are boring. Stack books or boxes to create hills.
2. Hide the cords: Fake snow and miniature trees are great for hiding lights.
3. Tell a story: Group pieces into scenes (a market, a neighborhood) instead of lining them up.
1. The Multilevel Tiered Village
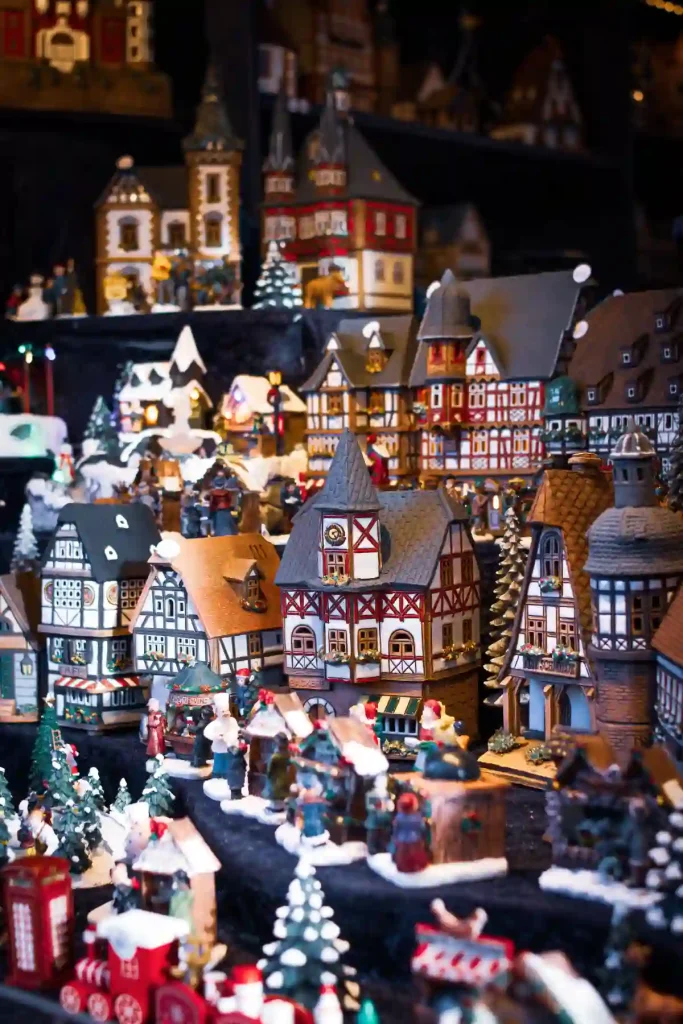
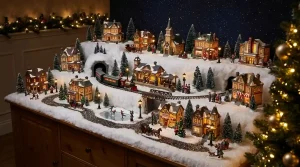
The easiest way to make a village look like a real landscape is to use varying heights. This setup uses fabric-covered platforms to create a hillside effect, with houses stacked on different levels.
The classic half-timbered houses with steep roofs and red trim sit at the center. Smaller pieces, like the baker and the market stalls, populate the lower streets. The result is a scene with incredible depth.
What makes it work:
- The fabric base: Black or dark green fabric hides the seams between platforms and looks like night sky or shadow.
- The tree placement: Miniature trees are tucked into the corners and between the levels, softening the edges.
- The lighting: Warm glow from inside the houses draws the eye to the center of the scene.
2. The Glass Shelf Village
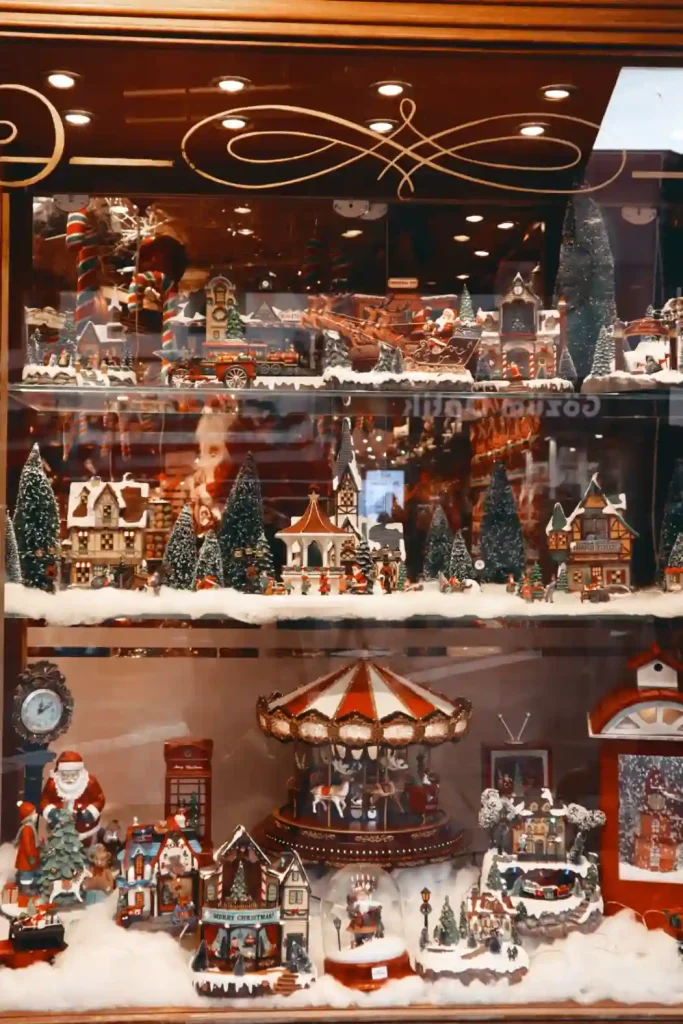
If your village lives inside a display cabinet or a china hutch, you have a huge advantage. The glass shelves let you use vertical space without the risk of knocking pieces over.
This display uses three shelves, each with its own theme. The top shelf has a Santa sleigh and reindeer. The middle shelf is a wintry street scene with towering trees. The bottom shelf is all about festive activities, featuring a large carousel and a snow globe.
The trick for glass shelves: Use a layer of faux snow on every shelf. It grips the pieces so they do not slide when the door opens and closes, and it ties the whole cabinet together.
3. The Book Stack Mountain
You do not need expensive risers to create height. A stack of old hardcover books works better than almost anything else.
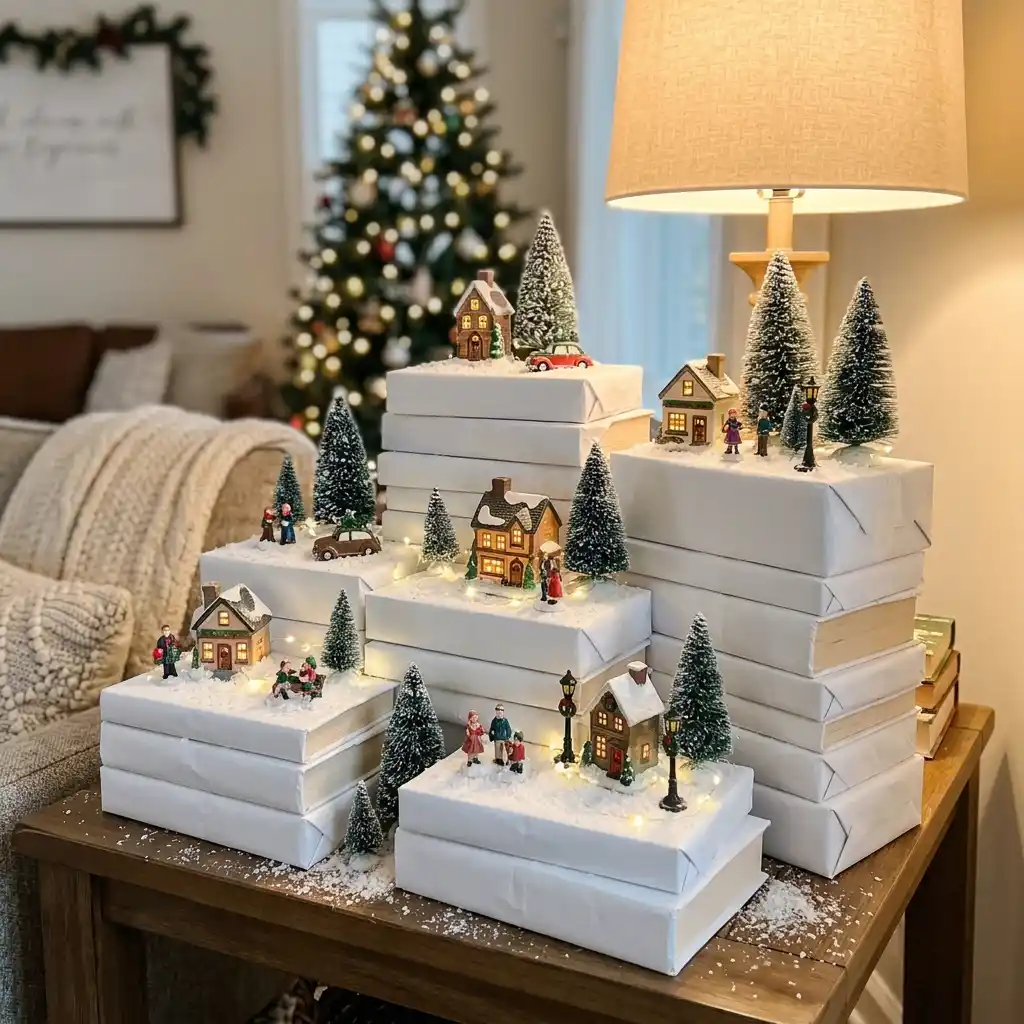
Wrap the books in white paper or fabric to make them look like snow-covered hills. Stack them in uneven piles, then place the larger houses on the highest stacks and the smaller figures on the lower ones.
- Pro tip: Use books with dark covers if you are going for a night scene, and white covers for a daytime scene.
- Stability: Make sure the stacks are flat and stable before you put any pieces on top.
4. The Mantel Display
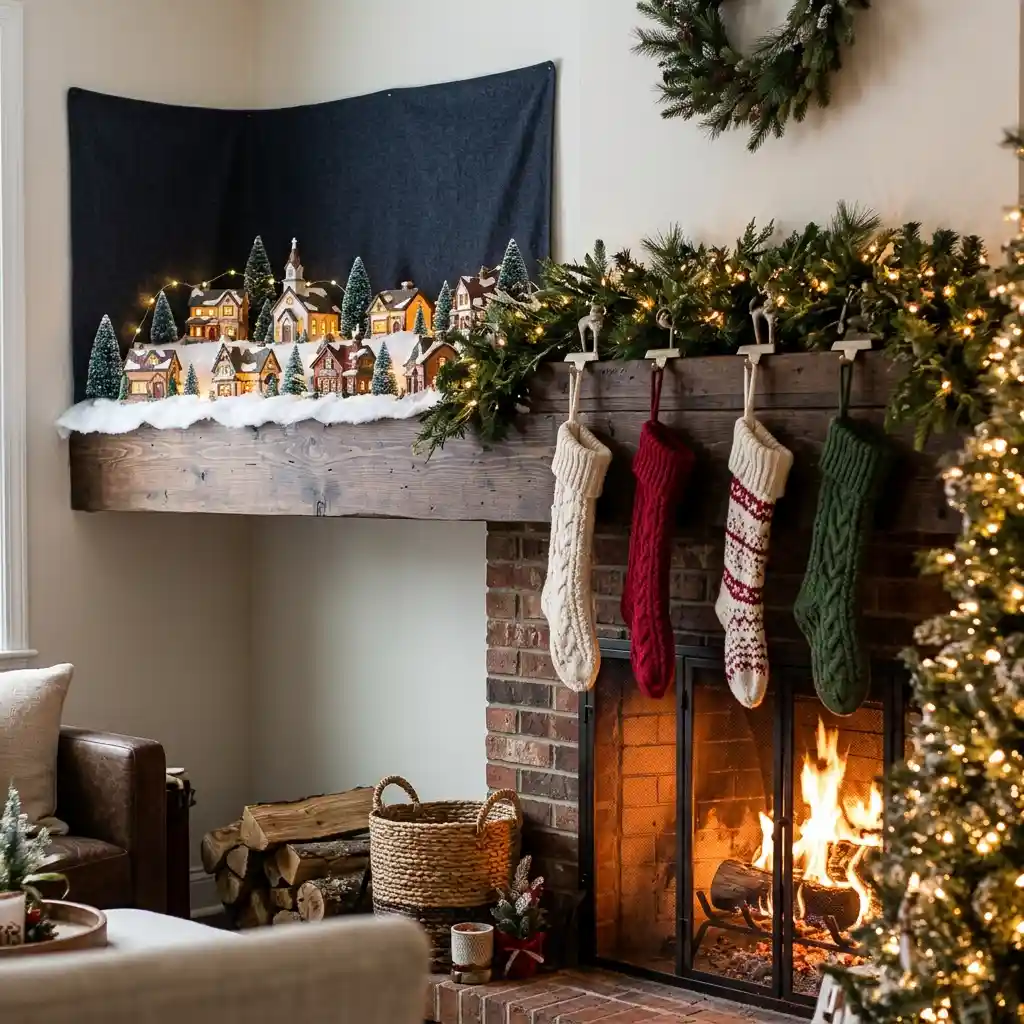
The fireplace mantel is one of the best spots for a village, but it comes with a challenge. You need to leave room for stockings.
Keep the village on one side of the mantel, or use a narrow garland to separate the village from the stockings. Use a small mirror or a piece of dark fabric behind the houses to add depth and reflect the light.
Keep it simple: A mantel display looks best with fewer, larger pieces. Save the tiny figurines for a table setup.
Narrow spaces, living rooms, and rooms with a fireplace.
Keep all pieces away from the actual fire and the heat.
5. The Wreath Surround
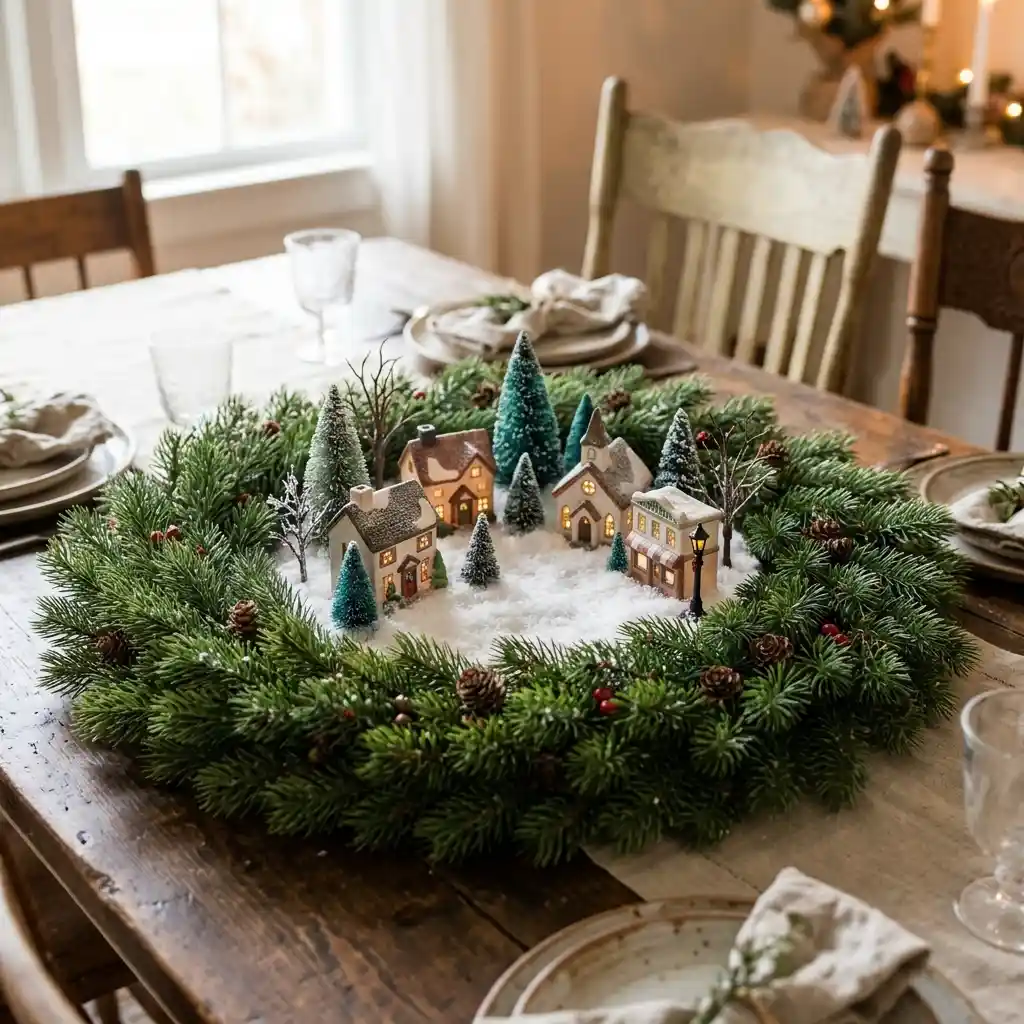
A large faux evergreen wreath laid flat on a table makes a beautiful, circular border for a village. Place the wreath down, then arrange the houses and figures in the center.
This is a great way to define a village zone on a large dining table without using risers. It also keeps the display contained, which makes it easier to move if you need the table.
6. The Under-Tree Village
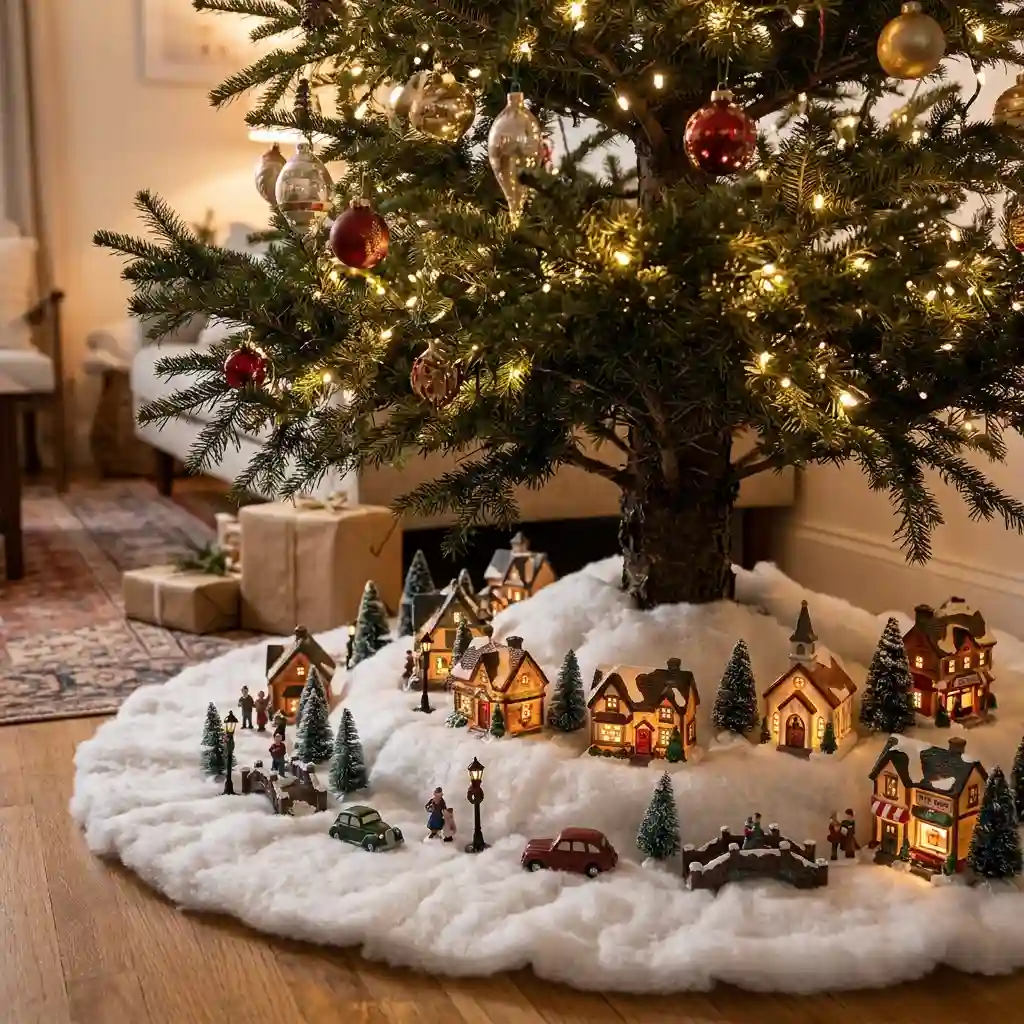
The space under the Christmas tree is usually empty or filled with a tree skirt. Why not put a village there?
Use a flat piece of faux snow or a white blanket as the base.
Place the smallest houses and figurines around the trunk, avoiding the tree stand. It looks like a tiny town at the foot of a giant forest, and it adds a layer of charm to the tree itself.
7. The Mirrored Base
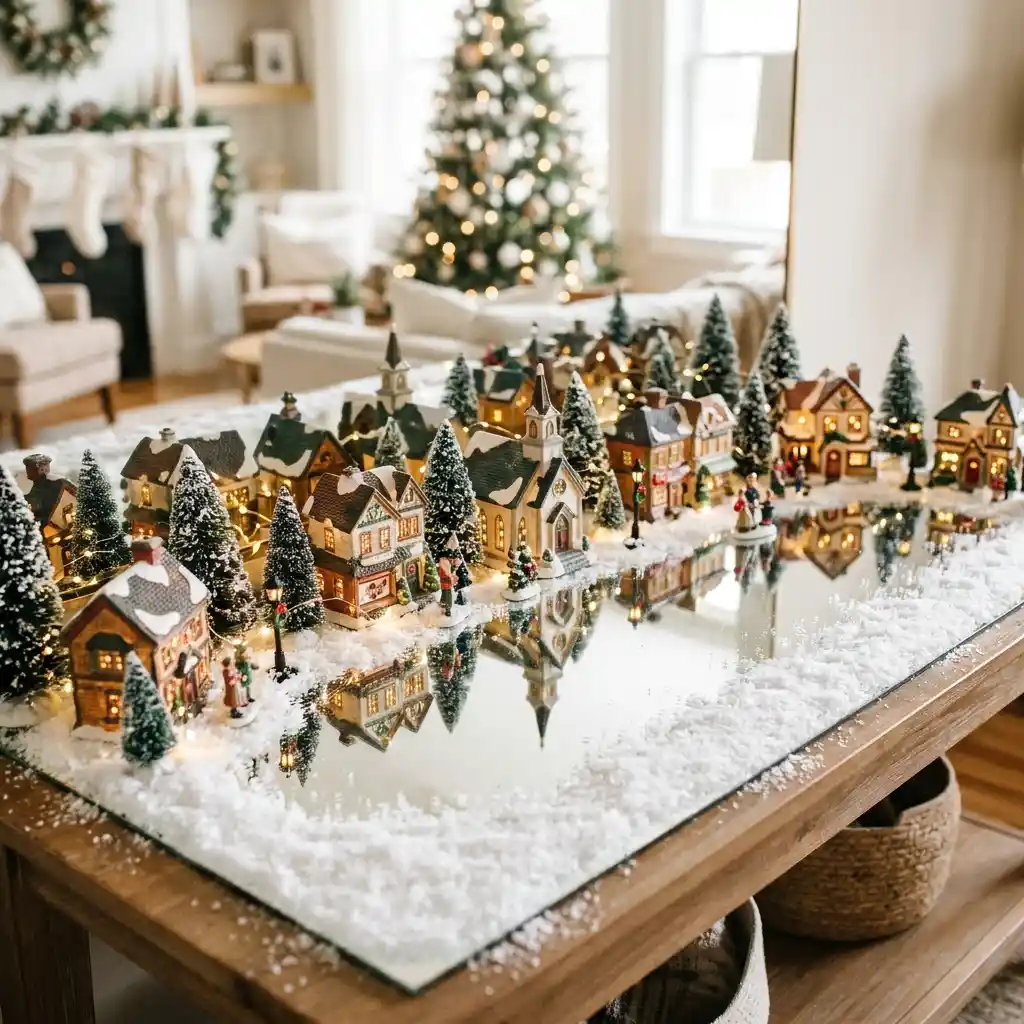
A mirror under the village changes everything. It doubles the lights, makes the scene look twice as big, and creates the illusion that your village is sitting on water or ice.
Look for a cheap rectangular mirror at a thrift store.
Lay it flat, then cover the edges with faux snow and trees. The center of the mirror stays clear to reflect the houses and the lights.
8. The Corner Shelf
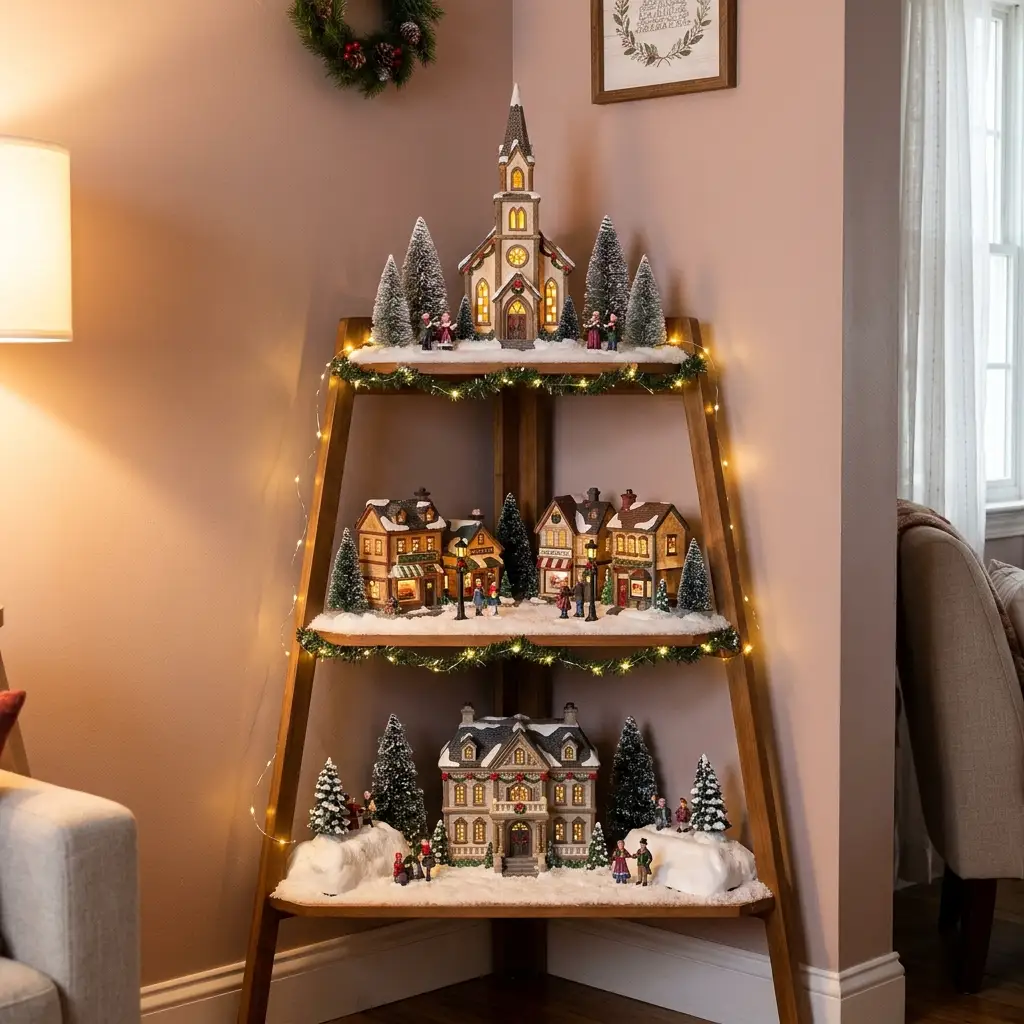
A three-tier corner shelf is a perfect village display unit. It uses dead corner space, it gives you built-in levels, and the triangular shape naturally frames a scene.
Put the largest piece on the bottom shelf to ground the display.
Put the tallest piece, like a church steeple, on the top shelf. Fill the rest with medium houses and small figures.
9. The Dining Table Centerpiece
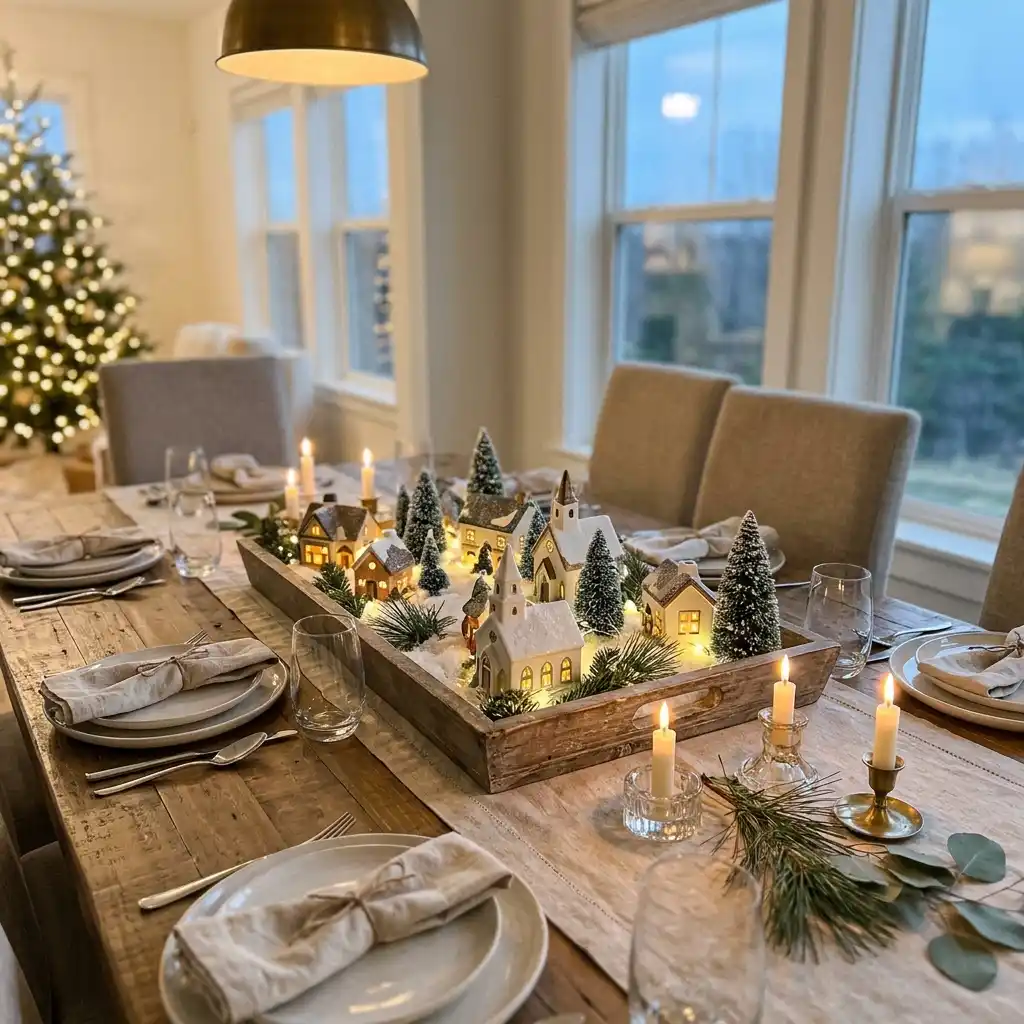
If your village is small, it can live right in the middle of the dining table.
This works best if you use a large tray or a mirror as a base so you can move the whole display when it is time to eat.
Use a table runner underneath the base to anchor it. Keep the pieces low so you can still see across the table. Small churches, cottages, and a few trees are all you need.
10. The Floating Shelves
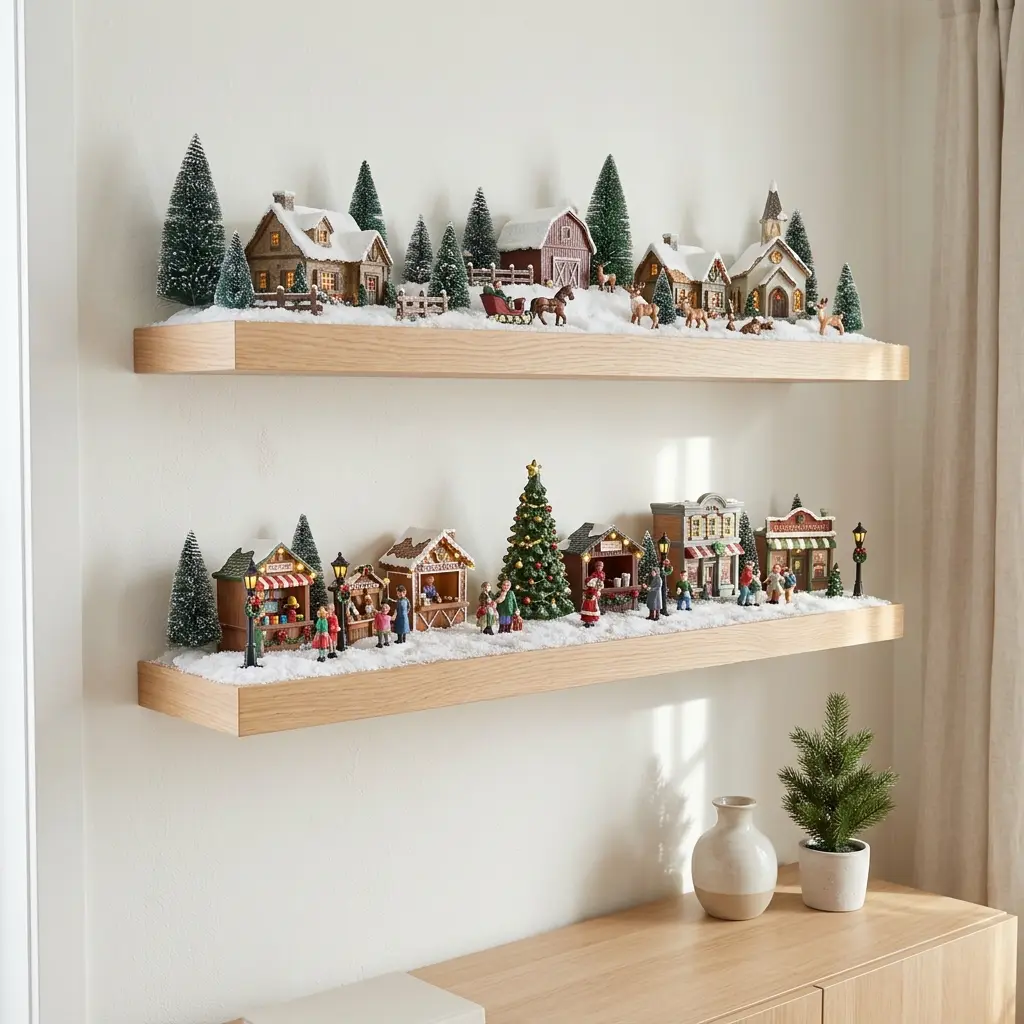
Floating shelves are a modern, clean way to display a village without taking up table space. Install two or three shelves on a wall, and treat each shelf like a street.
This works best with a consistent theme across the shelves.
Maybe the top shelf is the countryside, the middle shelf is the town center, and the bottom shelf is the market.
Use small command hooks to run the cords along the wall.
11. The Vintage Suitcase Base
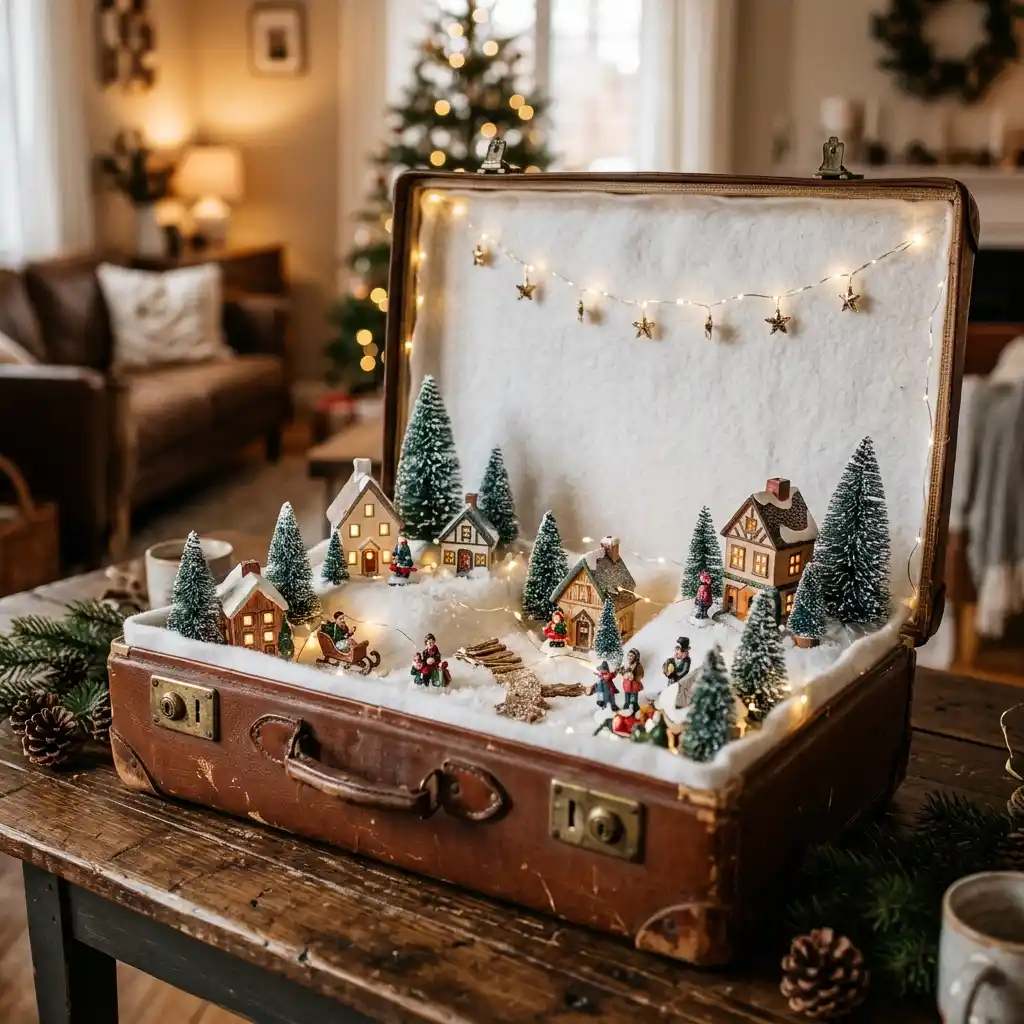
An old vintage suitcase, propped open, makes an incredible village display. It gives you a built-in border, a flat surface, and a nostalgic feel.
Line the bottom of the suitcase with a piece of white felt or faux snow.
Arrange the houses and figures inside. The lid can stay open as a backdrop, or you can drape a piece of fabric over it to create a snowy hill.
12. The “Frozen” Ice Base
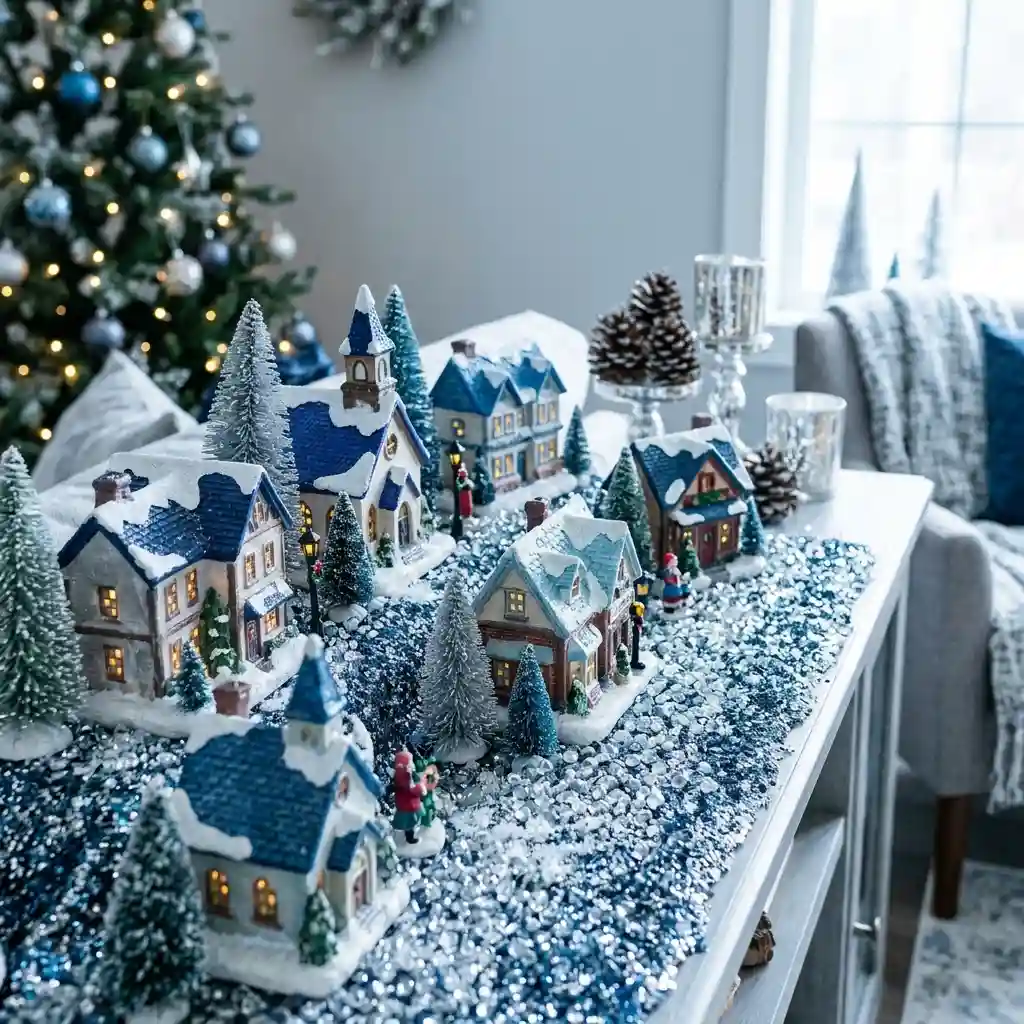
Instead of traditional white snow, use a base that looks like ice.
Blue and silver glitter, clear glass beads, or a piece of blue cellophane over a white base can transform the scene.
This works especially well with a village that has blue roofs or silver accents.
It turns a classic village into something a little more modern and wintry.
💡 Tip
If you use a glitter or bead base, secure it with a thin layer of double-sided tape underneath. Otherwise, it will migrate across your table every time someone walks past.
13. The Wall-Mounted Pegboard
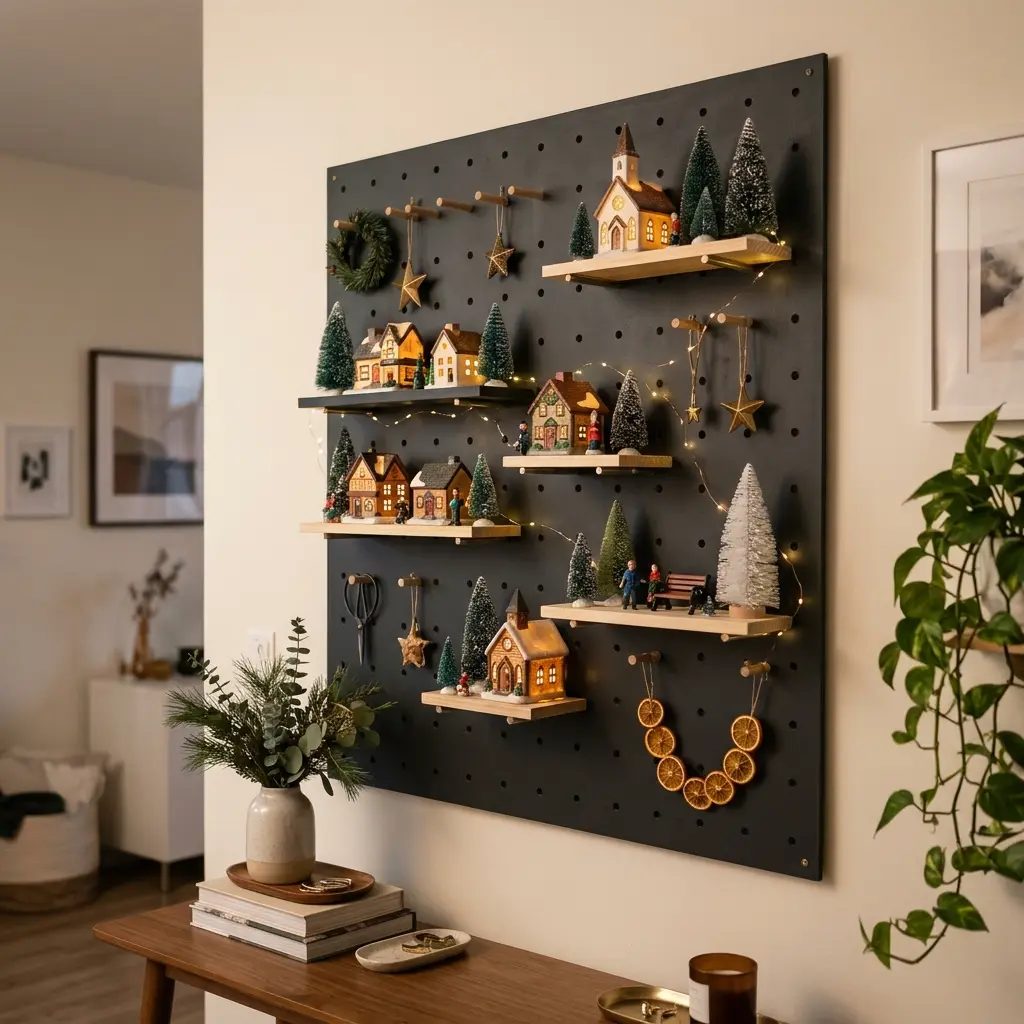
A painted pegboard is a fresh, modern take on a village display.
Mount the pegboard on the wall and add small floating shelves or hooks to hold the pieces.
This lets you build a village up a wall instead of across a table. It is perfect for a small apartment or a room where floor space is tight. Paint the pegboard a dark color so the lights and snowy houses pop.
See More Christmas village display ideas for your living room decoration.
14. The Box Town
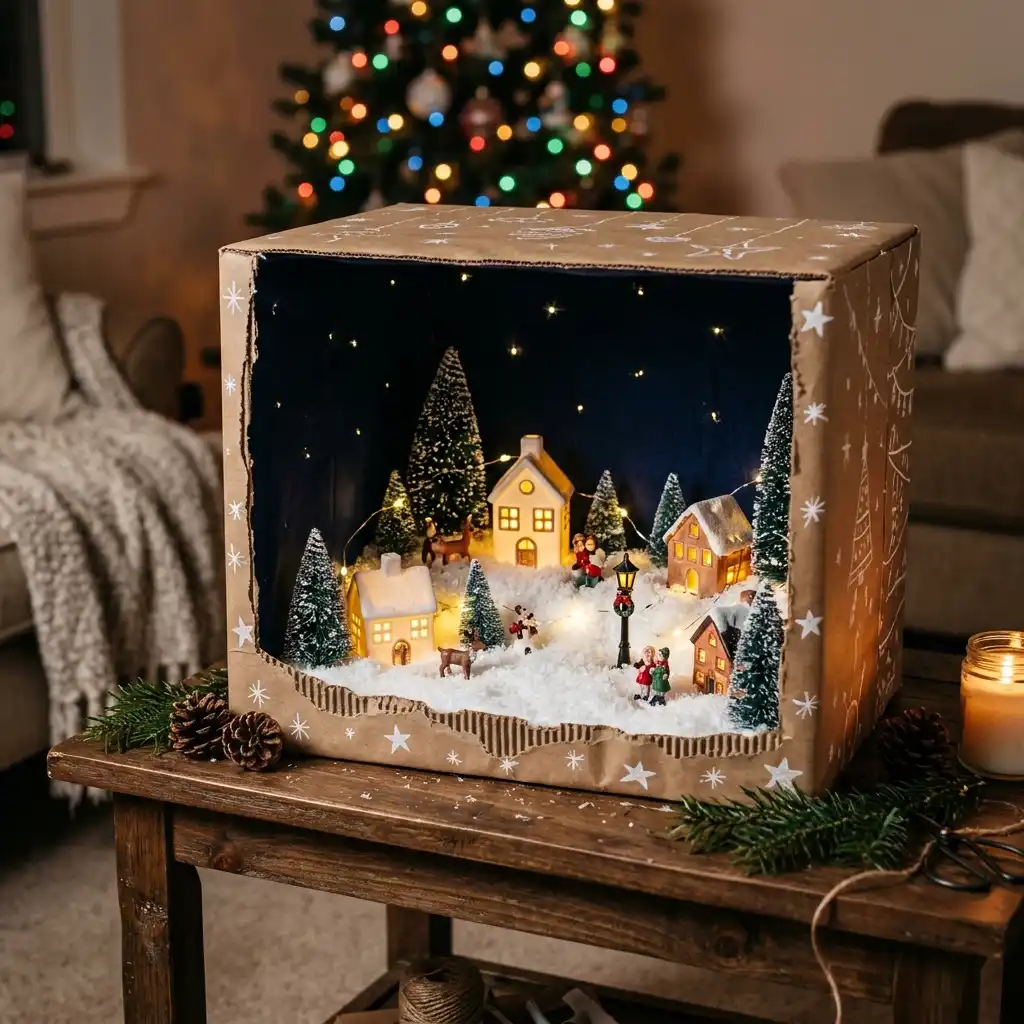
If you are short on space, build your village inside a decorated cardboard box.
Cut the front off a box and line the inside with dark paint or fabric. Arrange the houses and lights inside.
The box becomes the frame. It hides the cords, it keeps the snow contained, and it gives the village a cozy, enclosed feeling. You can set the box on a side table or a shelf.
15. The Coffee Table Display
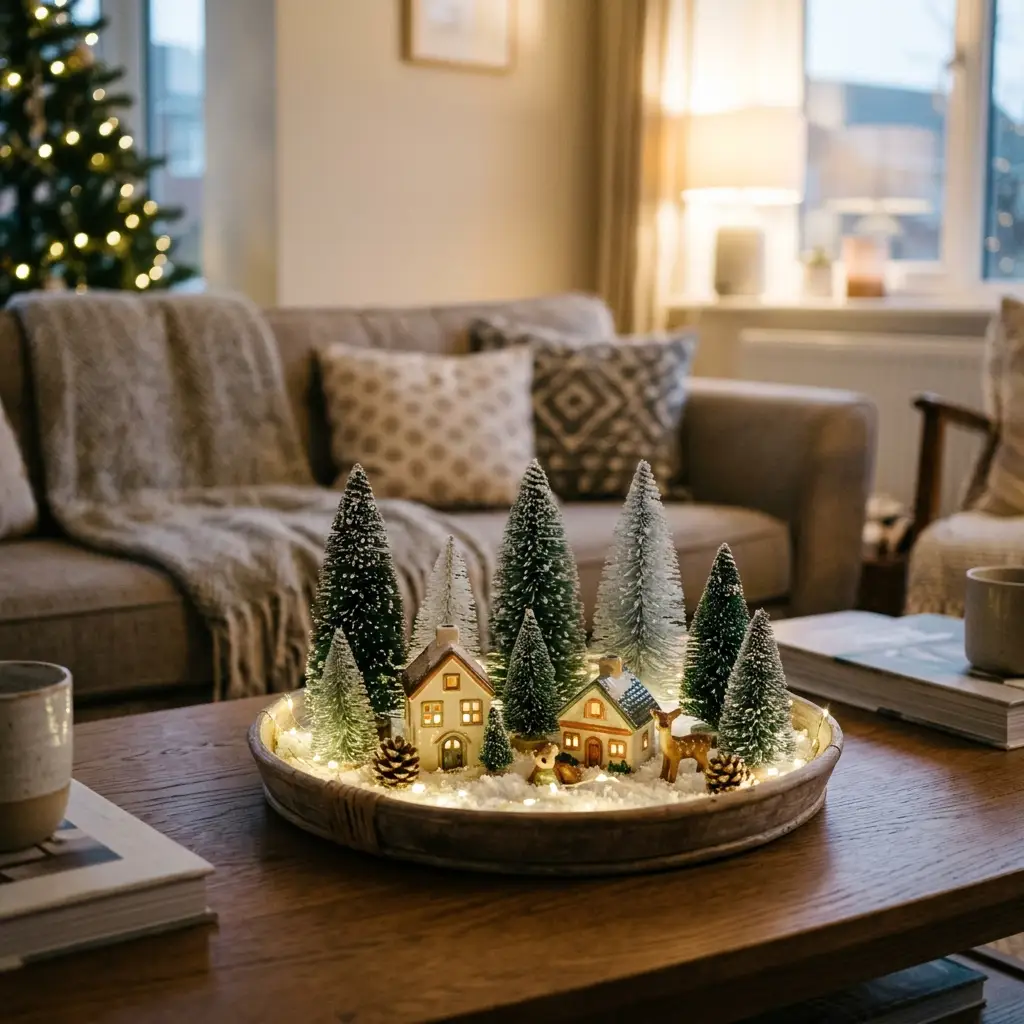
A coffee table is a natural spot for a village if you do not mind clearing it off.
Use a large, shallow tray to create a boundary so the pieces do not wander.
This works best for a modern living room with a smaller collection. A few houses, a church, and a tree or two are enough. Keep the heights varied so it does not look flat.
16. The Window Sill
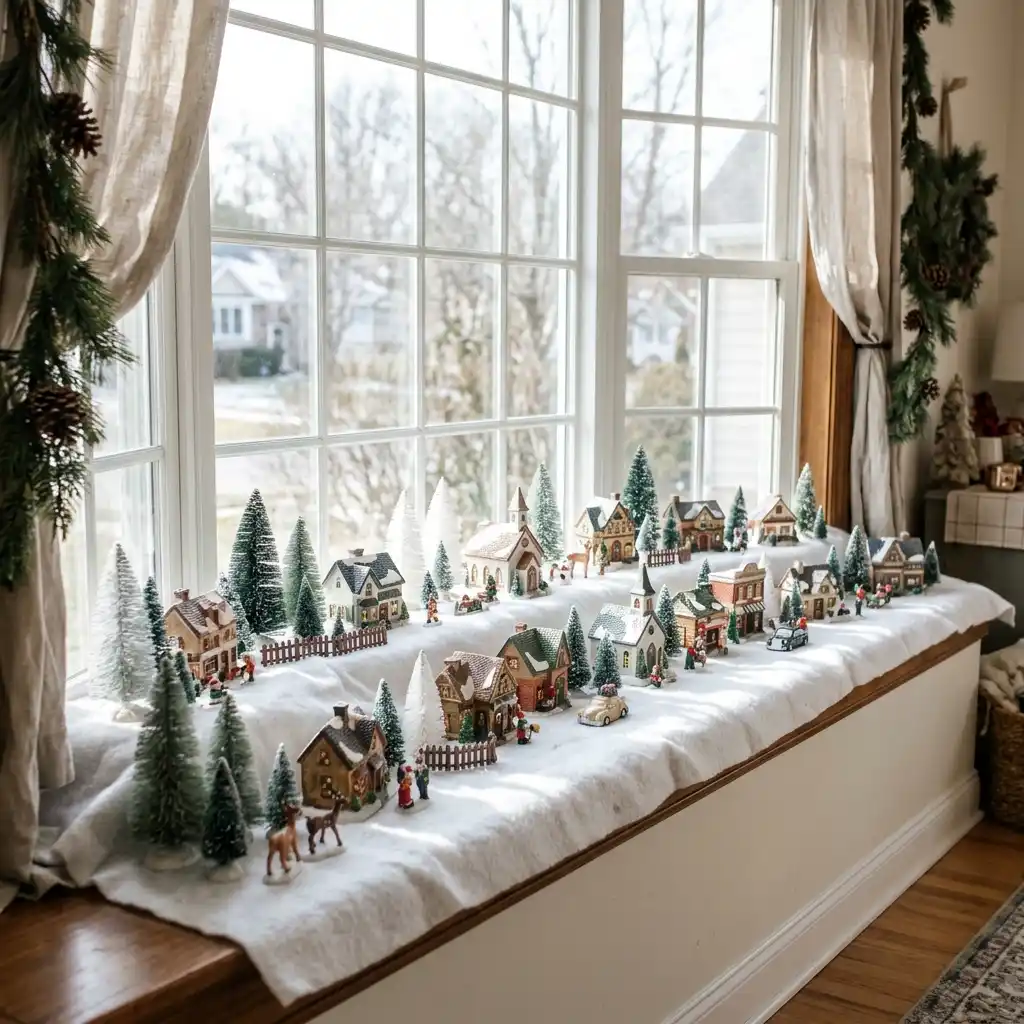
A wide window sill is an underrated display spot. It is off the floor, out of the way, and the natural light from the window makes the village glow during the day.
Use pieces that are small and lightweight. The window sill might not hold heavy houses.
Lay a piece of white felt down first to protect the sill and create the snow effect.
17. The Tiered Tray
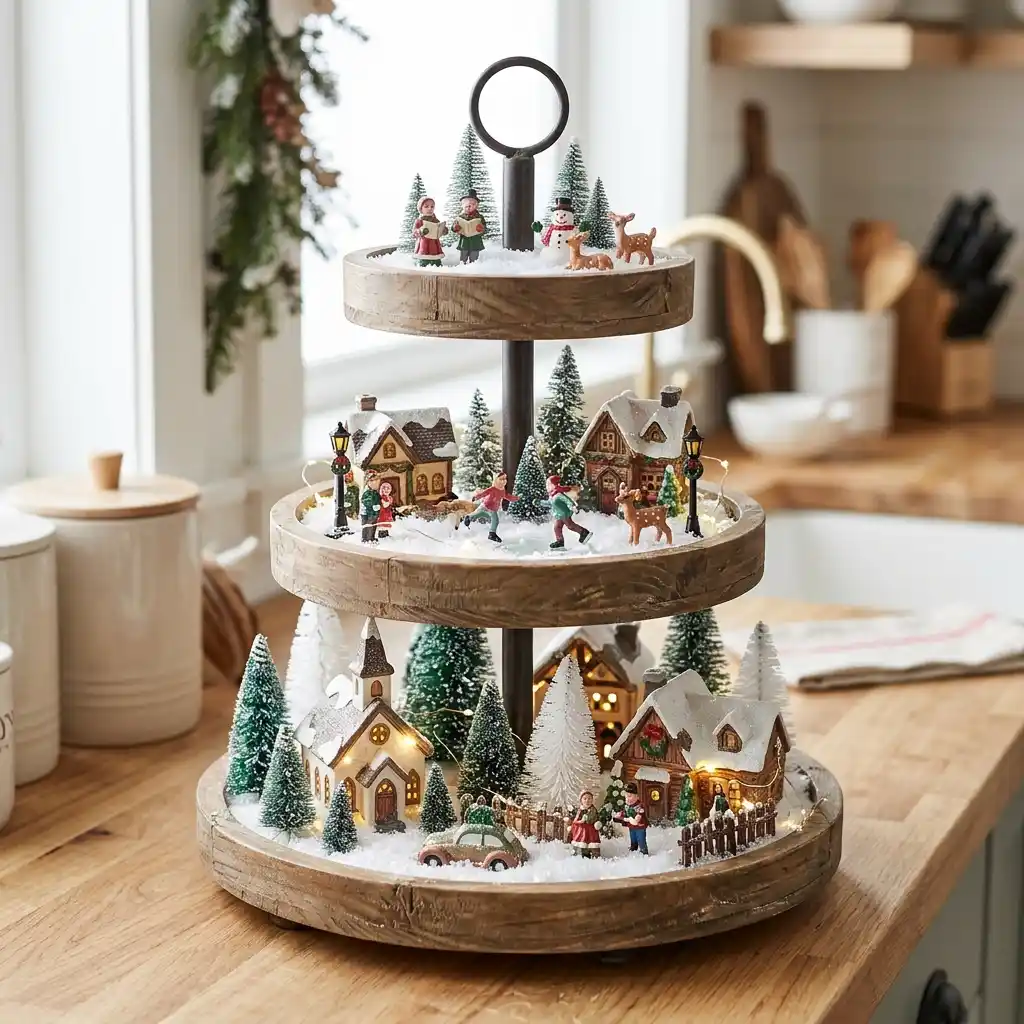
A tiered wooden tray, usually used for cupcakes or fruit, is a perfect miniature village display. Each tier becomes a different level of the town.
Put the largest pieces on the bottom tier and smaller figures on top. The round shape keeps the display contained, and the tiers add instant height without any extra work.
18. The Under-Stairs Alcove
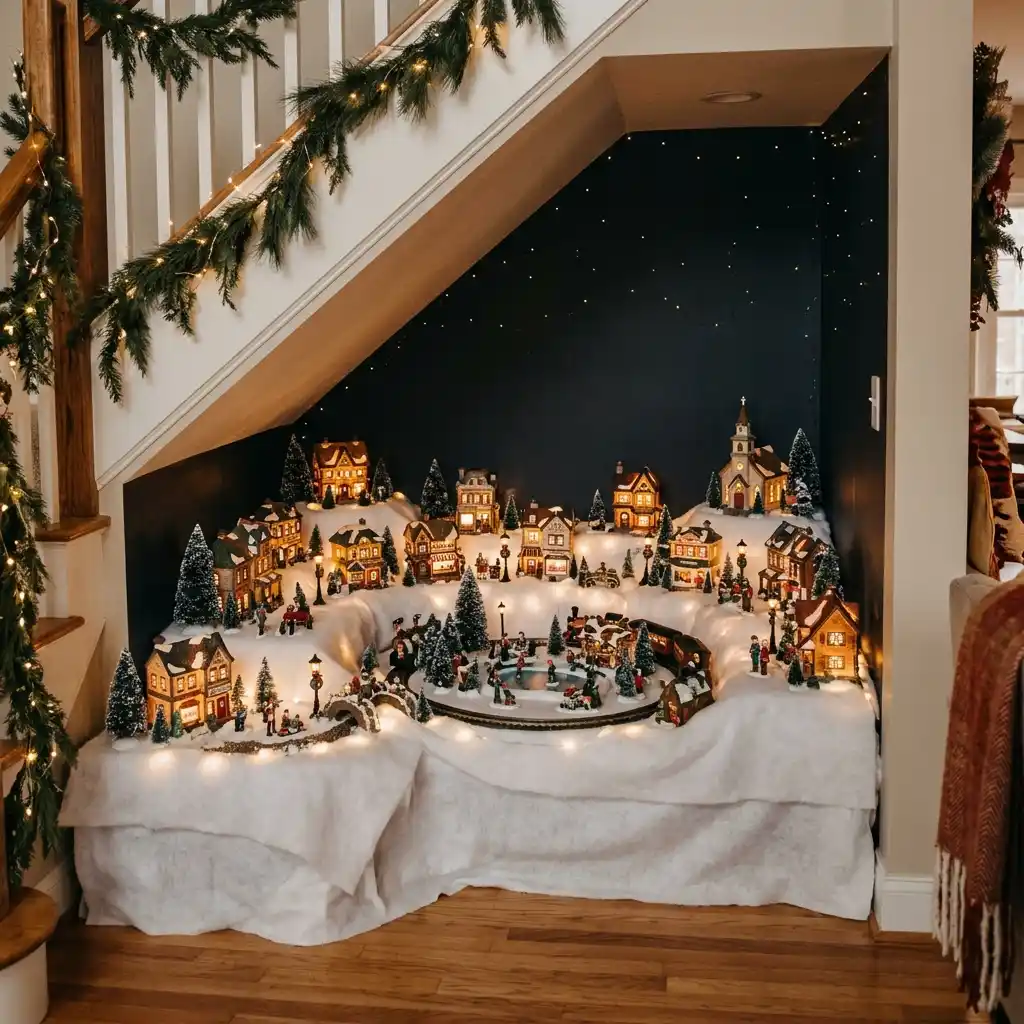
If you have an empty alcove under a staircase, you have a natural stage for a village.
The angled ceiling adds a sense of drama, and the alcove keeps the display out of the main flow of traffic.
Use a dark backdrop to make the lights pop. Arrange the houses in a curve following the angle of the stairs. This is one of the most dramatic places to put a village.
19. The Train Track Integration
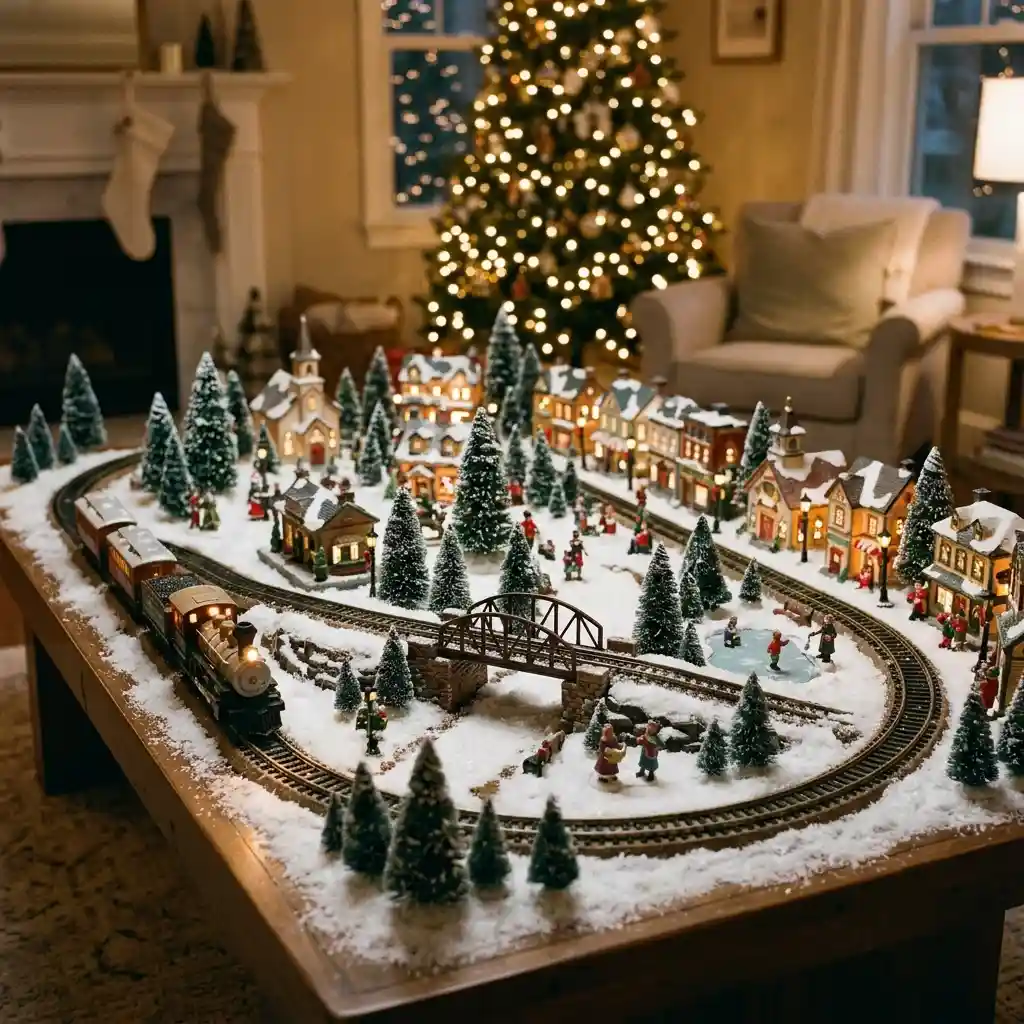
If you have a model train, run the track through the village. The train becomes the star of the scene.
Lay the track in a loop or a figure-eight through the center of the display.
Place houses and trees on the outside of the track so the train has a clear path. Use a low bridge or a tunnel to add interest.
20. The Wall Shadow Box
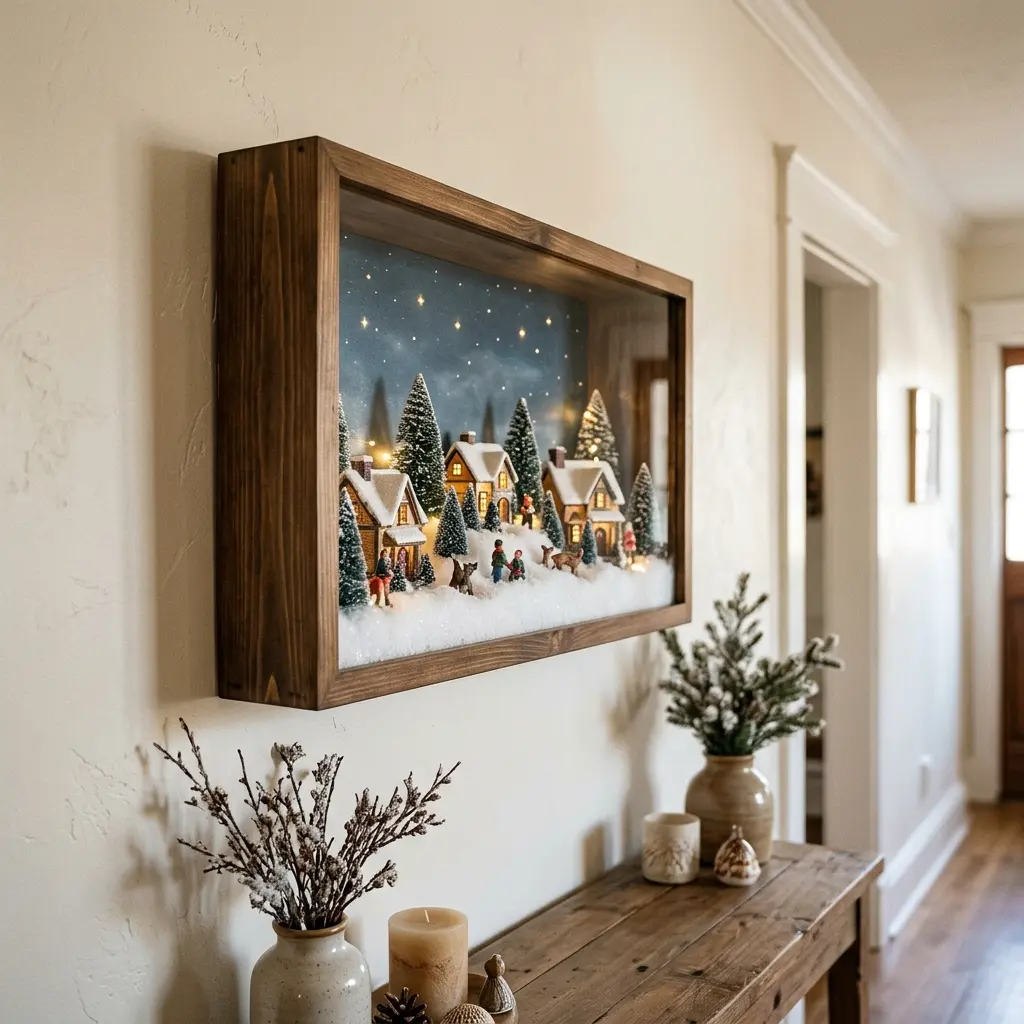
A deep shadow box frame can hold a small, contained village scene. Mount it on the wall like a piece of art.
Line the back of the shadow box with a winter sky background.
Arrange a few small houses, a tree, and a figure inside. This is a great option for a hallway or a small bathroom.
21. The Fabric Skirt
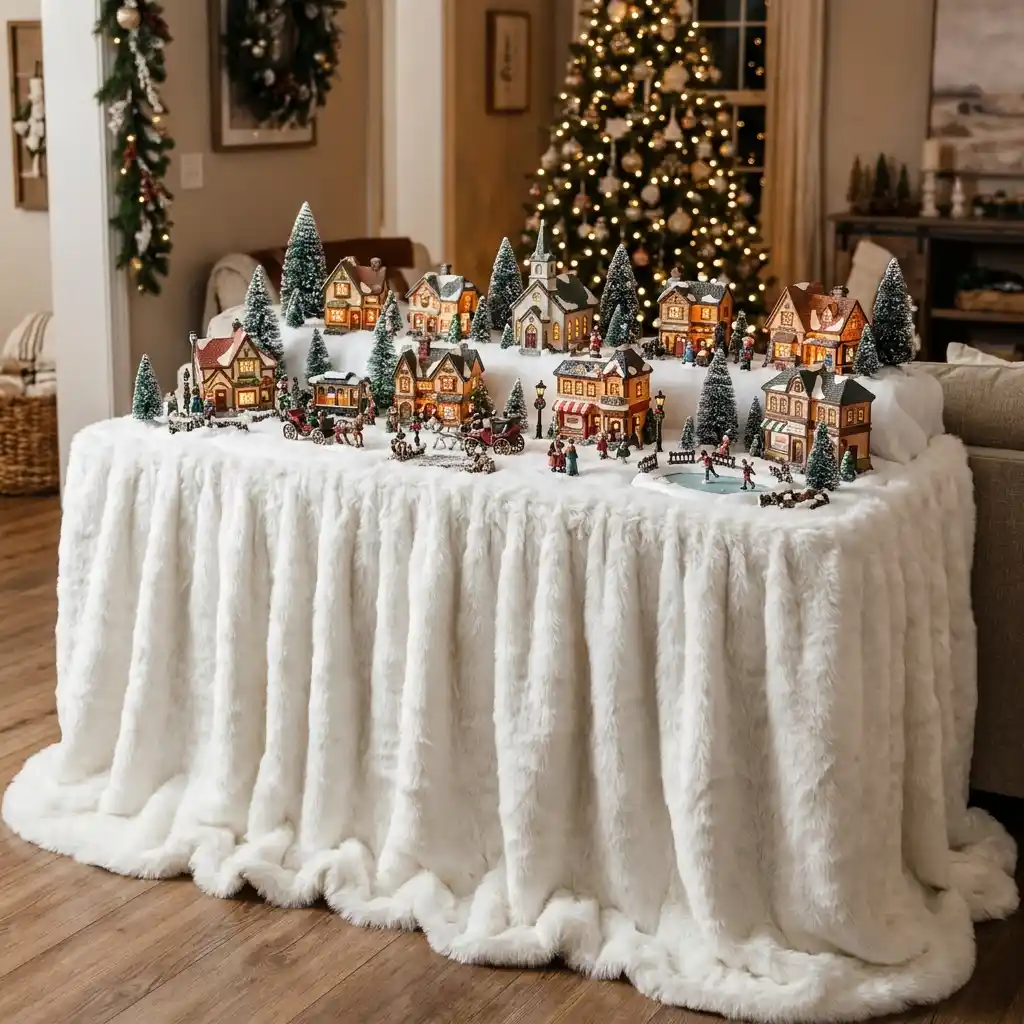
Instead of a hard table edge, drape a piece of white or dark fabric over the table to create a soft, snowy skirt. This hides the table legs and makes the display feel more integrated.
It also gives you a place to hide cords and power strips underneath. Choose a fabric with texture, like a faux fur or a heavy linen, to add warmth to the scene.
22. The Corner Cabinet
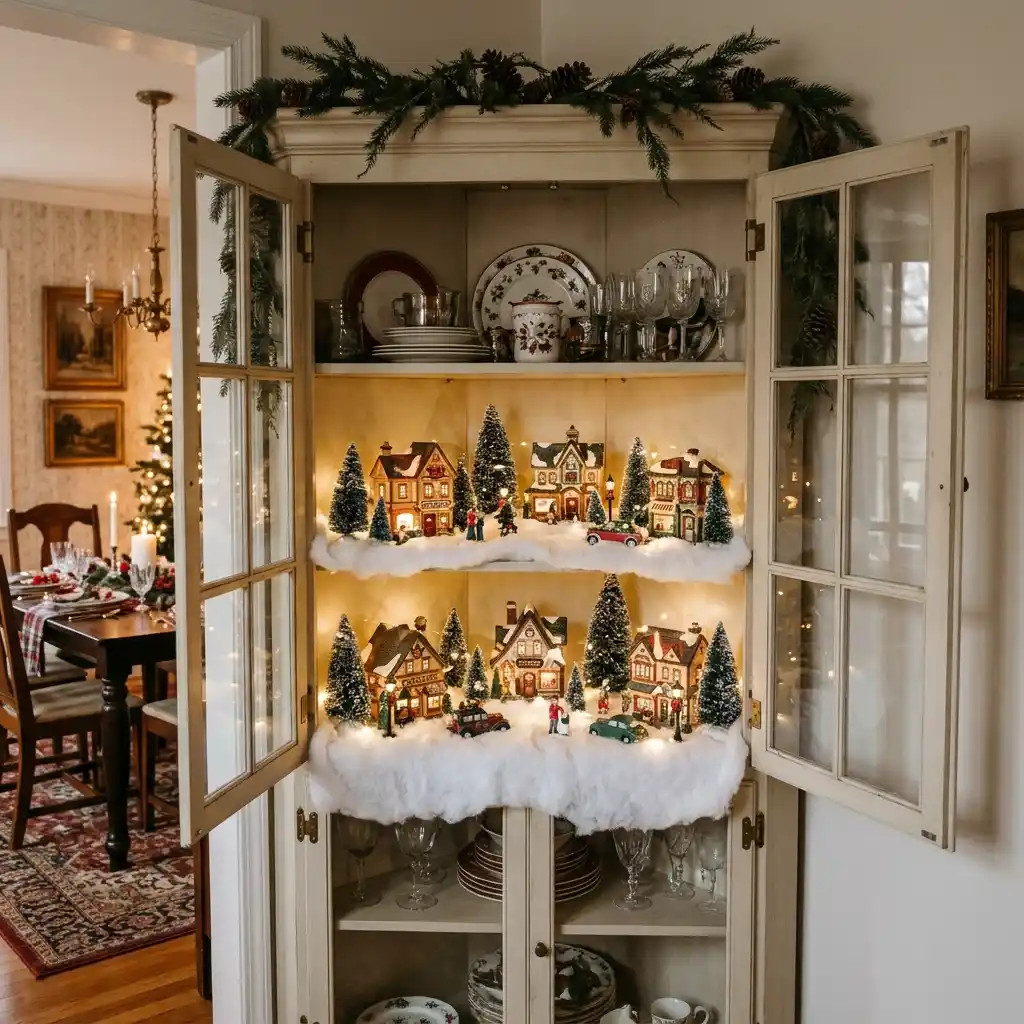
A corner cabinet, usually used for dishes or glassware, makes a beautiful village display for the holidays. Clear out one shelf and line it with faux snow.
The cabinet doors frame the scene and keep the dust off. It is a great way to display a village without taking up extra room, especially if you do not have a dedicated table.
23. The Wall Shelf Village
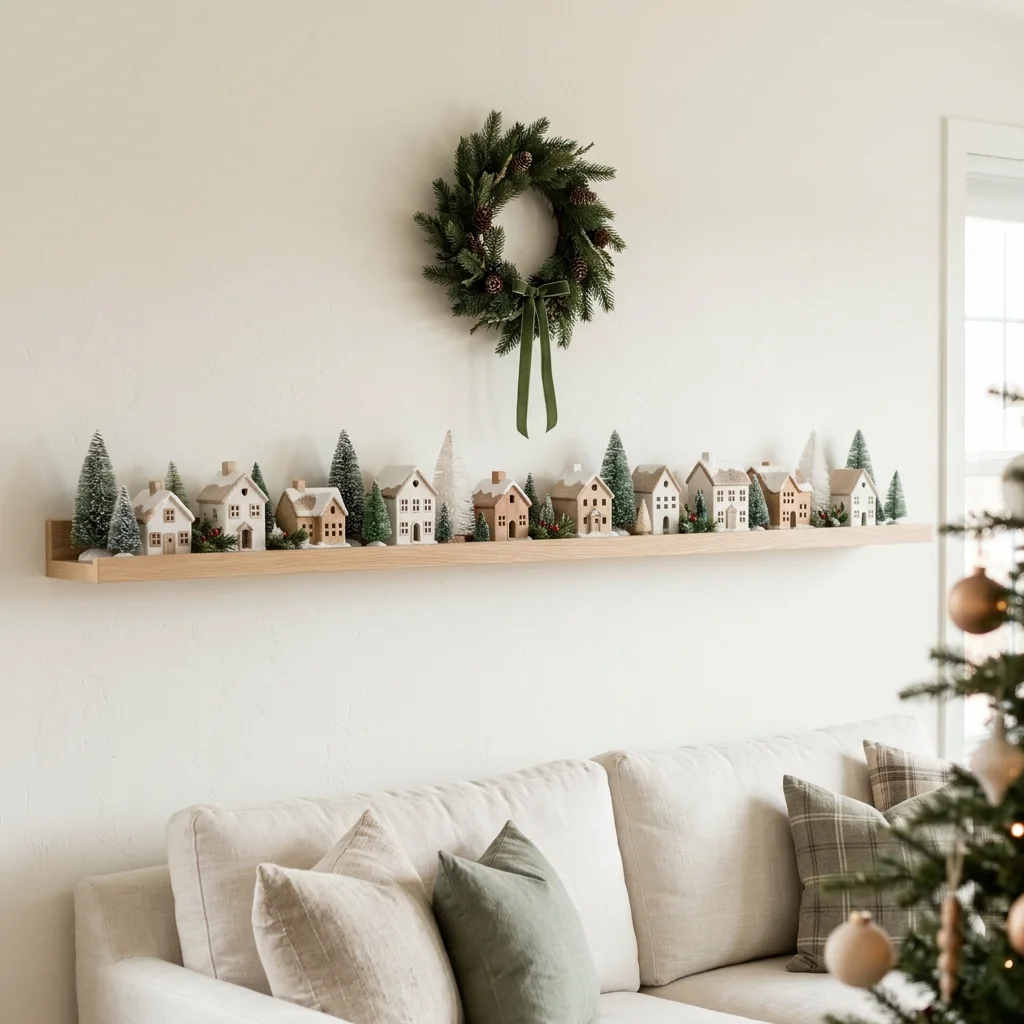
A long wall shelf, like a picture ledge, can hold a row of small houses. This works best with a single row, so the pieces do not block each other.
Use small pieces and a consistent theme. A row of tiny churches, or a row of small cottages, looks like a street scene. Hang a small wreath above the shelf to tie it into the rest of the room.
24. The Side Table
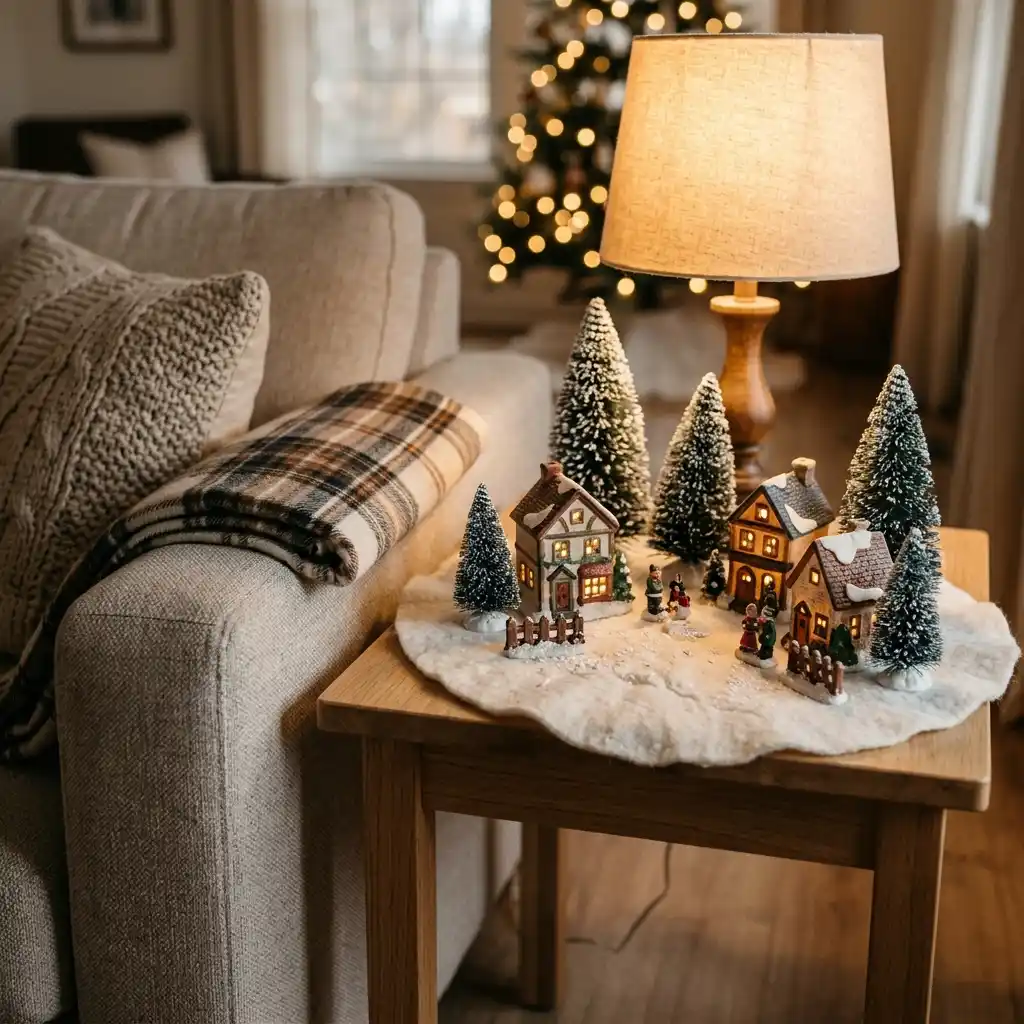
A side table next to a sofa is a perfect spot for a small village. It is at eye level when you are sitting down, so you can enjoy it while relaxing.
Keep the display low and contained. Use a tray or a piece of felt as a base. This is a good spot for a village that you want to enjoy daily, rather than just at parties.
25. The Bench
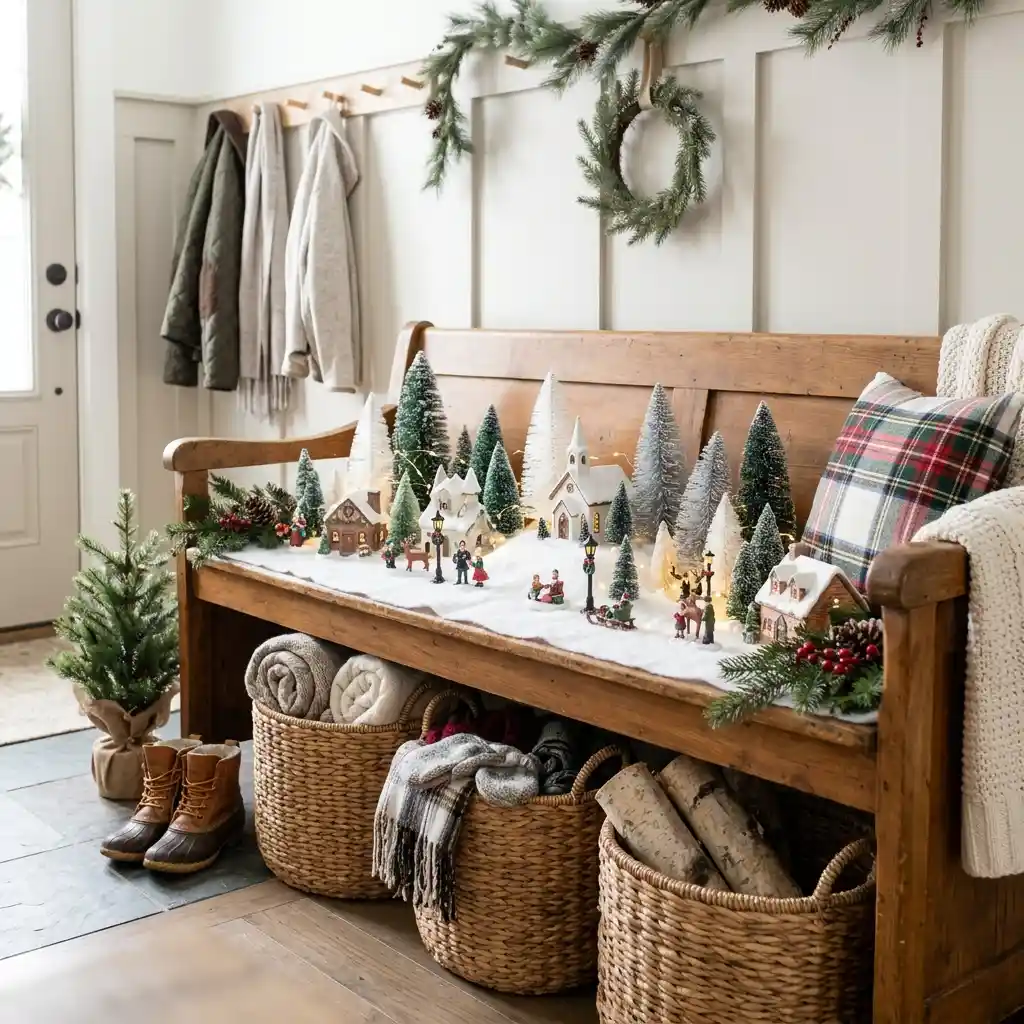
An entryway bench can hold a village display that greets guests when they arrive. Use the seat of the bench for the village and put baskets or boots underneath.
This works best with a display that is not too tall. Use small houses and figures, and keep the heights staggered so it does not block the view.
26. The Bookcase
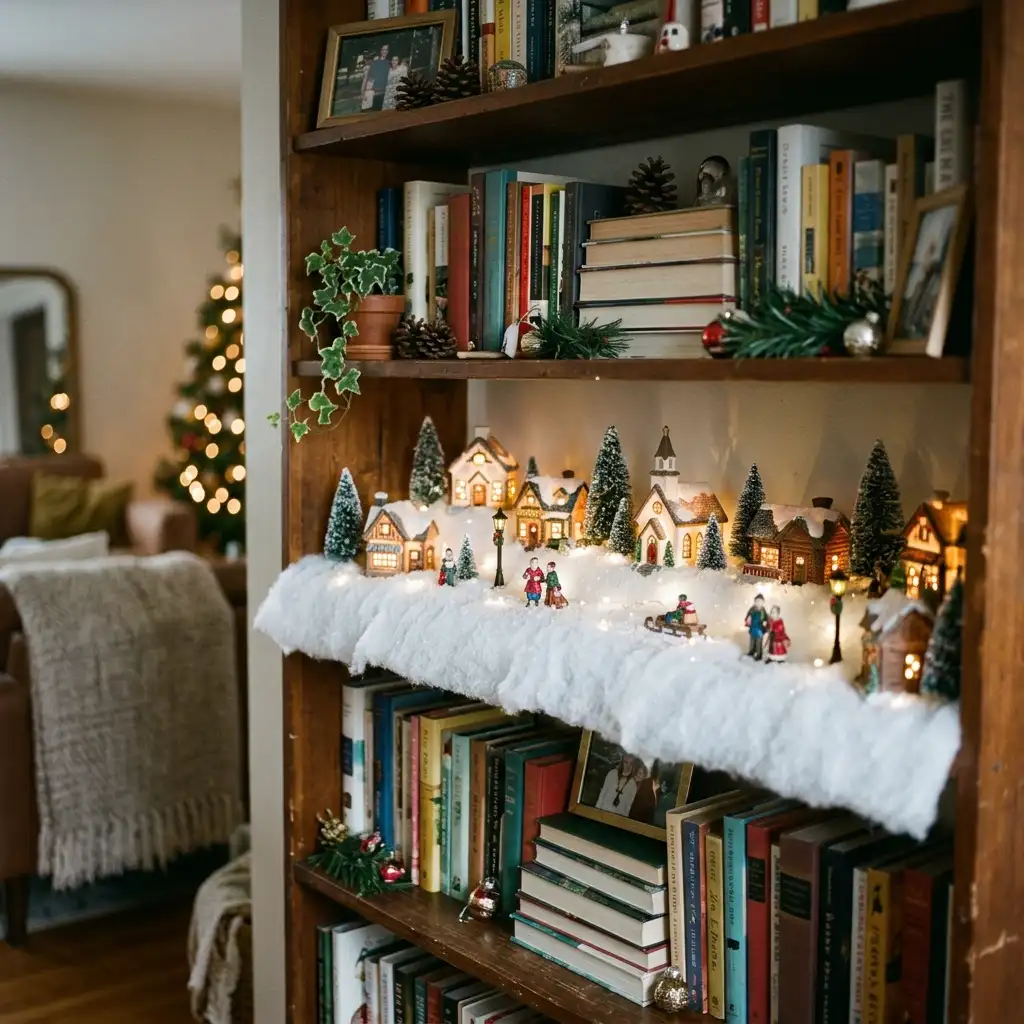
A bookcase with empty shelf space is an obvious but effective spot for a village. Clear one shelf, add a piece of snow, and arrange the pieces.
You can use multiple shelves for a larger village. The shelves give you built-in levels and keep the display contained. Just make sure the pieces are secure so they do not fall when you pull a book off the shelf.
27. The Dining Room Buffet
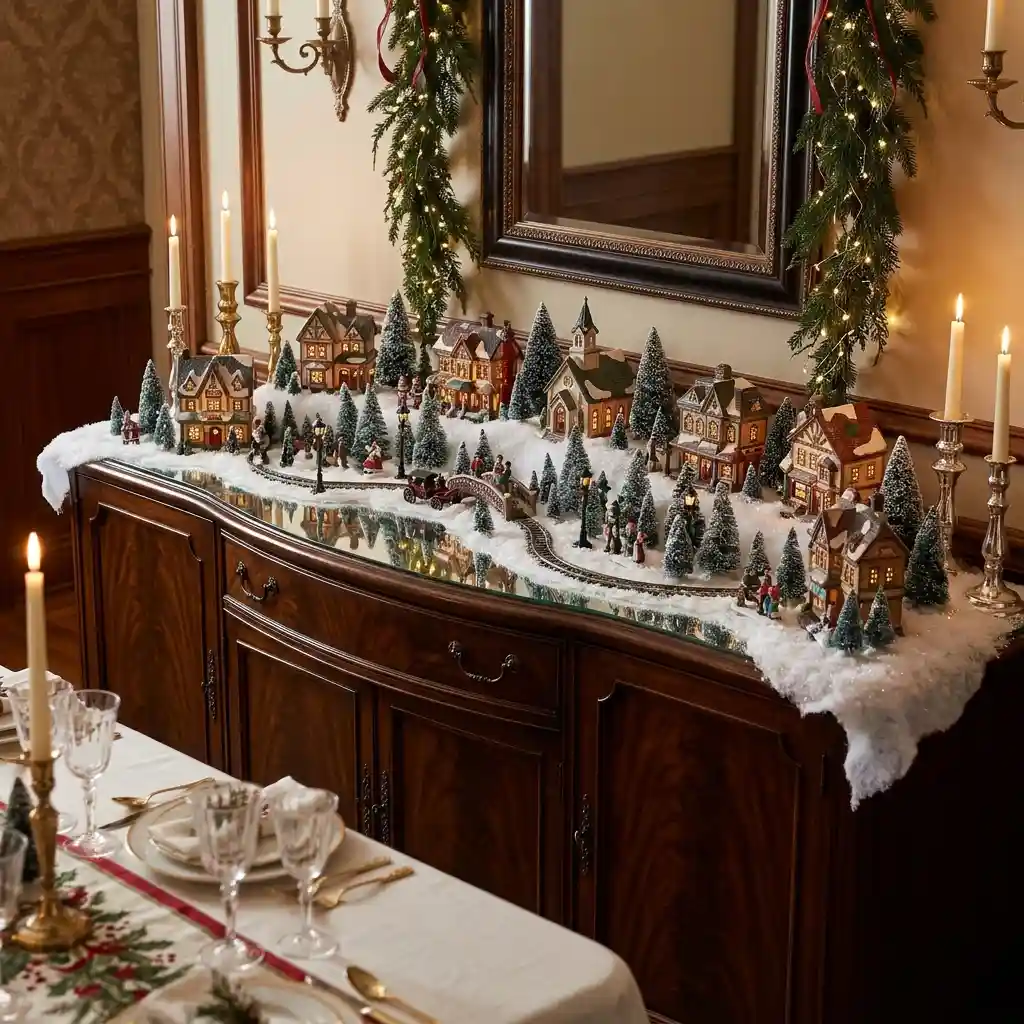
A buffet or sideboard is a classic place for a village display. It is a flat, wide surface with plenty of room for a larger scene.
Use a mirror or a dark fabric base to add depth. Arrange the houses in a curve so they are visible from both sides of the room. This is a good place for a village that is the centerpiece of your holiday decor.
28. The Fireplace Hearth
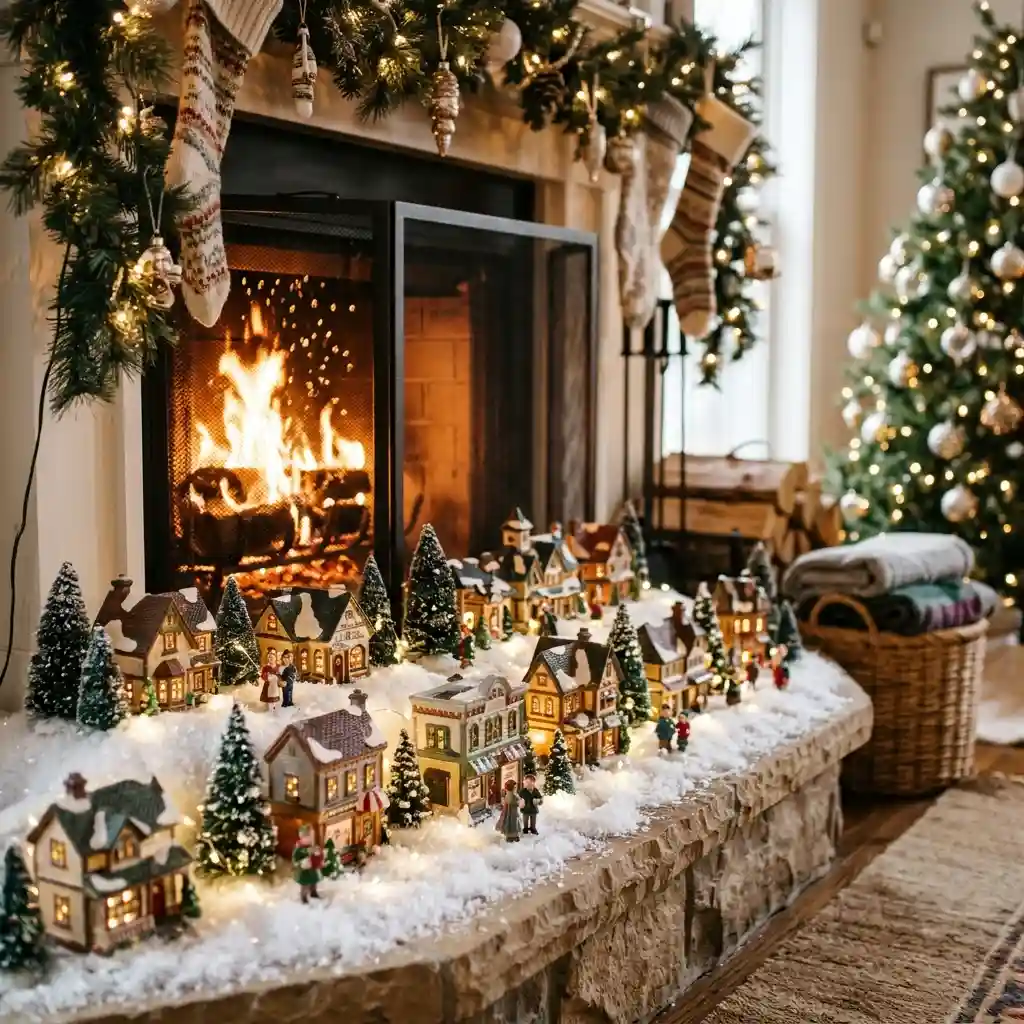
If your fireplace has a raised hearth, you have a natural stage for the village. The hearth is already a focal point, and the village adds to the festive feel.
Keep the pieces away from the actual fire. Use battery-operated candles or lights inside the houses so the display glows without needing a plug.
29. The Train Table
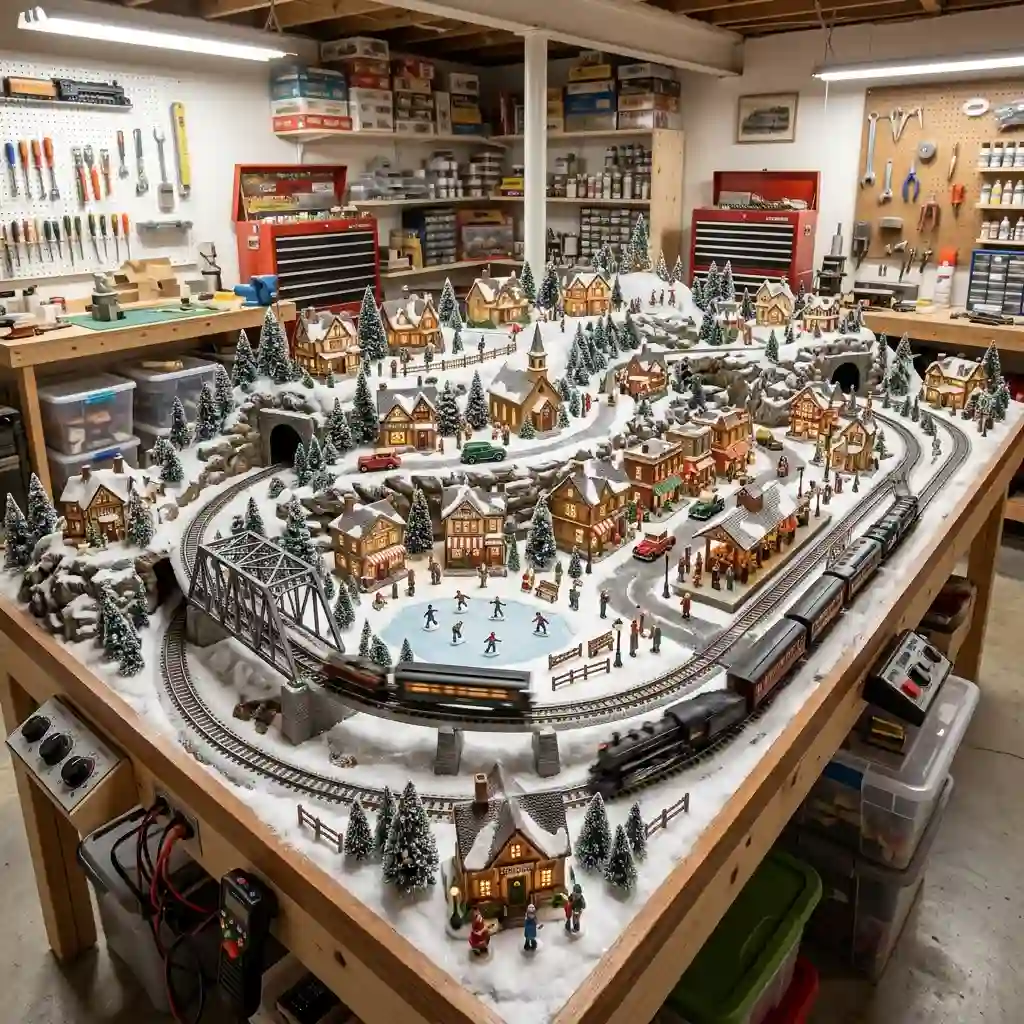
If you have a model train table, that is the ultimate village display. The train track gives the village a built-in road, and the table gives you plenty of space.
Use a mix of houses, trees, and small figures to create a scene. The train moving through the village adds a sense of life and activity that a static display cannot match.
30. The Floating Window Ledge
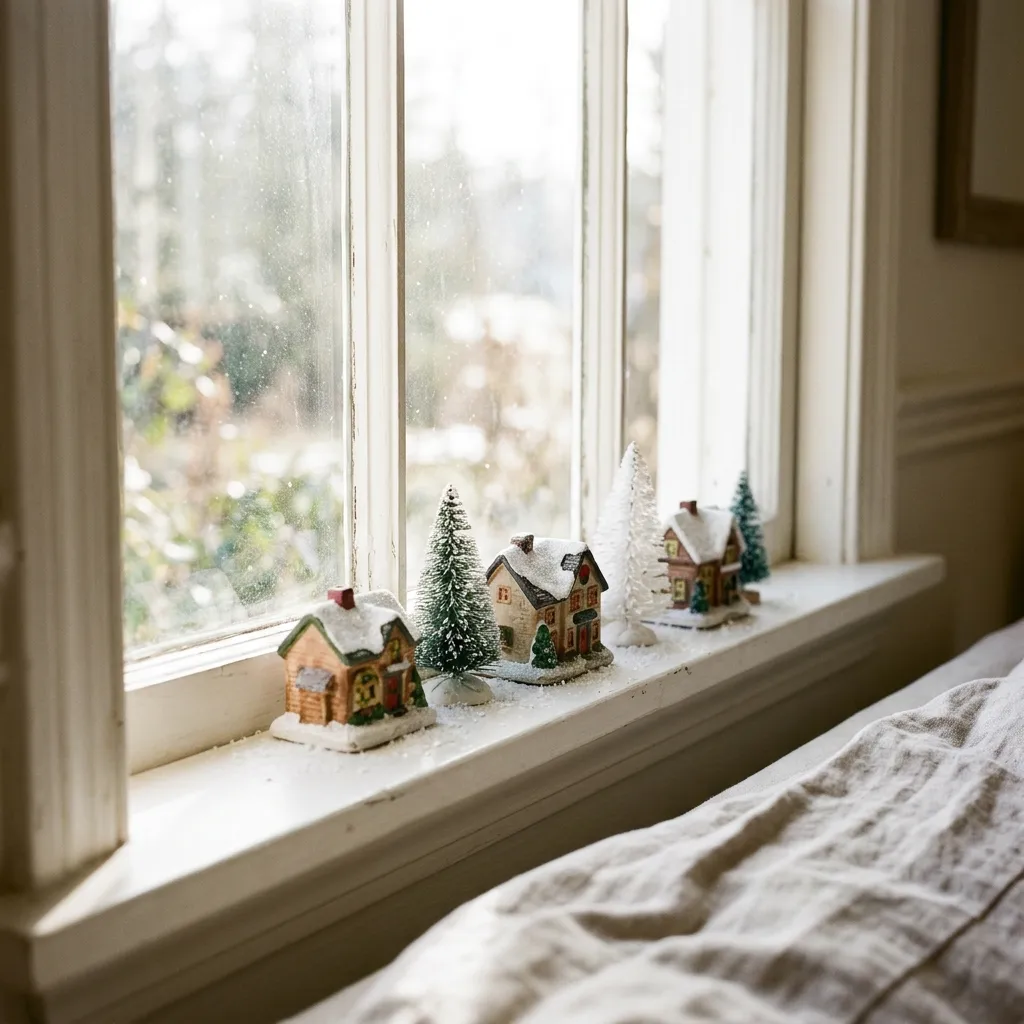
A window ledge is a classic spot for a village, but it can be hard to keep pieces from falling. Use a piece of double-sided tape or museum putty under each piece to hold it in place.
This is a great place for a small, simple display. A few houses and a tree are enough. The natural light from the window makes the village glow.
“A Christmas village is not a collection. It is a world you build with your own hands, every year.”
Frequently Asked Questions
How do I hide the cords on my Christmas village?
Use faux snow, small trees, or a layer of batting to cover the cords. Run the cords along the back of the display and use a power strip with a switch to turn all the lights on at once.
How do I keep pieces from falling over?
Use museum putty or double-sided tape under each piece. This is especially important on glass shelves or in high-traffic areas.
Can I use real snow in my village?
No. Real snow melts, and the moisture will damage the pieces and the lights. Use faux snow, batting, or a white fabric instead.
A Final Note
A village display is supposed to be joyful. It is not supposed to be stressful. Start with the pieces you already have, find a flat surface, and build from there.
Use a mirror or a stack of books to add height. Hide the cords with snow. Add a few trees to soften the edges.
And if it does not look perfect on the first try, that is fine. The best villages are the ones that get rearranged and added to over the years, one piece at a time.