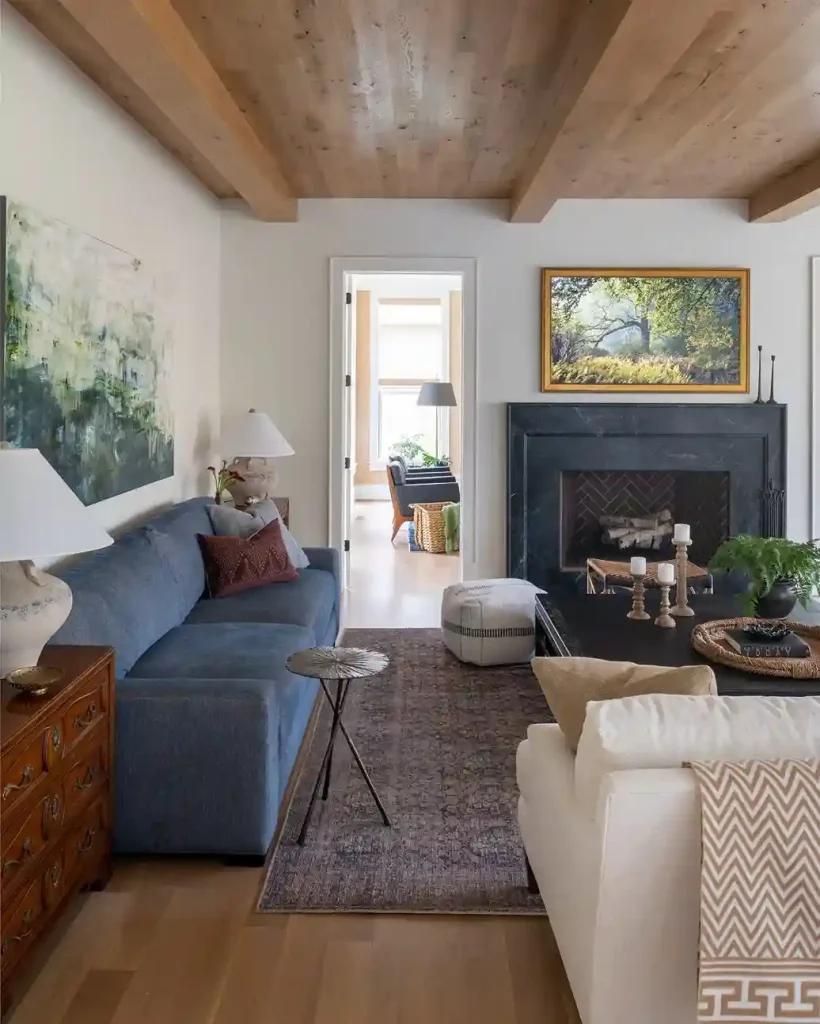
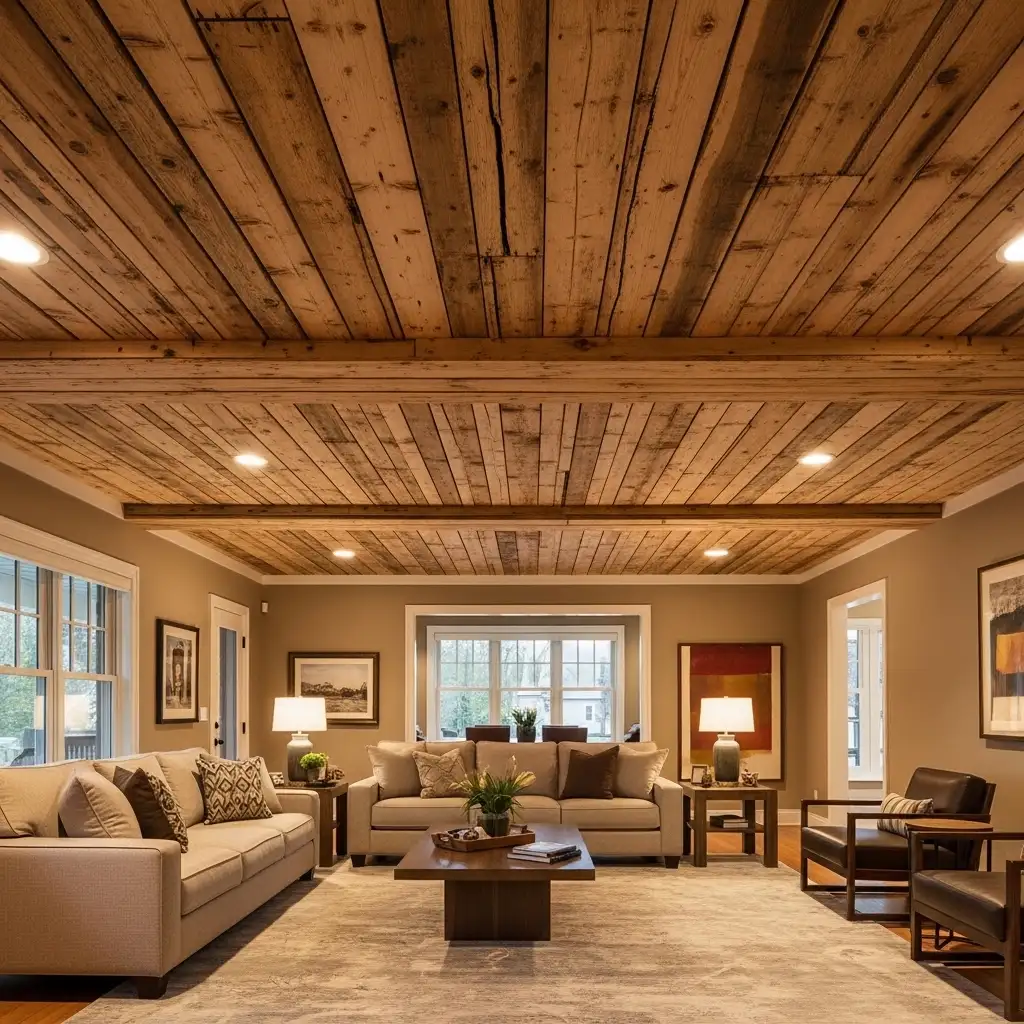
Wood ceilings add warmth and elegance to any room instantly. They create a cozy and inviting atmosphere that makes your house feel like a real home.
Low cost wood ceiling options make this upgrade possible for everyone on a tight budget today. Discover these simple and affordable ideas to transform your ceiling beautifully without breaking the bank completely.
Credits: @lizmearns
1. Cardboard Tube Faux Beams
Use large cardboard tubes to create fake wood beams easily. Wrap them with thin wood veneer or adhesive wood paper sheets. They look exactly like real solid wood beams from below. The weight is incredibly light making installation very simple for beginners. This technique works perfectly with home interior decor ideas for cohesive room styling and design coordination.
Credits: @motifspace
| Material | Cost Per Beam | Weight | Installation Difficulty |
|---|---|---|---|
| 6″ Tube | $10-15 | 3 lbs | Very Easy |
| 8″ Tube | $15-20 | 4 lbs | Very Easy |
| 10″ Tube | $20-30 | 6 lbs | Easy |
Install the tubes across ceiling joists at regular intervals carefully. Paint or stain the veneer before wrapping for convenience and efficiency. The hollow interior keeps costs down significantly while maintaining beautiful appearances. This method saves hundreds compared to real wood beam installations.
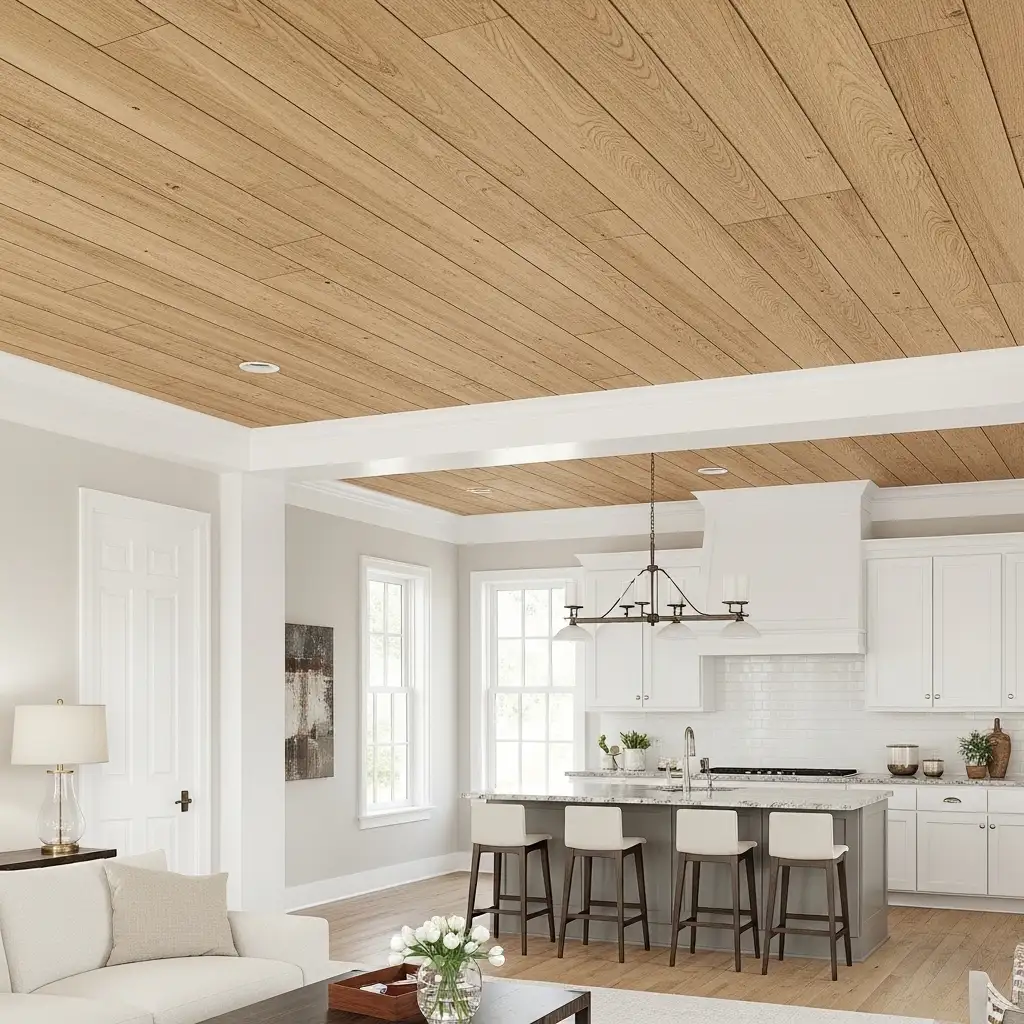
2. Peel and Stick Wood Planks
Peel and stick wood planks are the easiest DIY option. They have adhesive backing that sticks directly to existing ceilings firmly. No nails, screws, or special tools are needed at all. Each plank costs only $2-4 and installs in minutes quickly. Perfect for home interior design ideas that require quick transformations without mess or fuss.
Credits: @motifspace
| Size | Coverage | Cost Each | Total for 10×12 Room |
|---|---|---|---|
| 4″x36″ | 1 sqft | $2-3 | $240-360 |
| 6″x36″ | 1.5 sqft | $3-4 | $240-320 |
| 8″x48″ | 2.7 sqft | $5-7 | $222-315 |
These planks come in realistic wood grain patterns today. They’re moisture resistant and perfect for bathrooms and kitchens too. Removal is easy and won’t damage your original ceiling underneath. This temporary solution works great for rental properties and apartments.
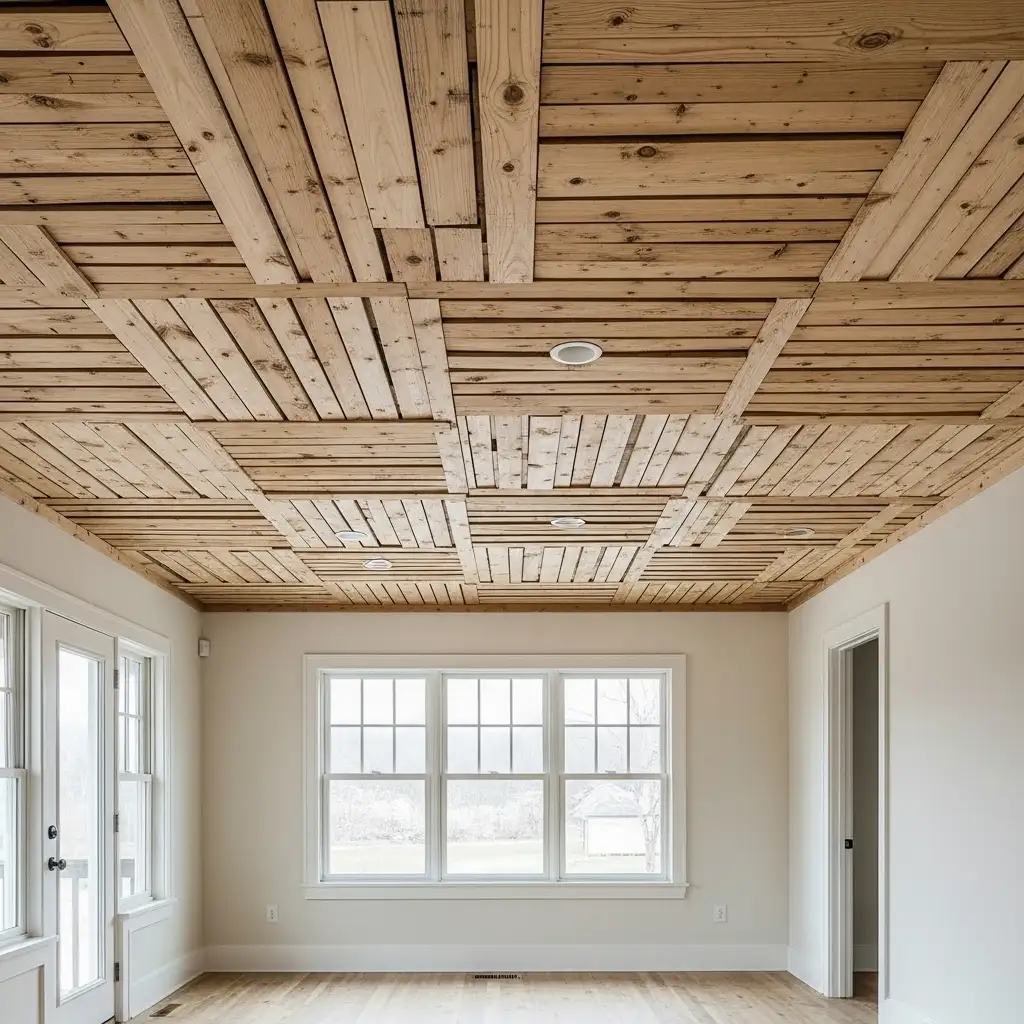
3. Scrap Lumber Mosaic
Collect free scrap lumber from construction sites and contractors nearby. Cut different pieces into various random sizes and shapes creatively. Create an artistic mosaic pattern on your ceiling surface beautifully. Sand and stain each piece for a cohesive look overall. Similar creativity found in living room category designs inspires unique personal touches throughout home spaces.
Credits: @motifspace
| Pattern Type | Skill Level | Time Required | Material Cost |
|---|---|---|---|
| Random | Easy | 3-4 days | Free-$50 |
| Geometric | Medium | 4-5 days | Free-$75 |
| Gradient | Hard | 5-7 days | Free-$100 |
Mix different wood types for interesting color variations naturally. Leave small gaps between pieces for rustic charm and character. This zero-waste approach is eco-friendly and incredibly budget-conscious always. Each ceiling becomes a unique work of art completely.
4. Corrugated Cardboard Panels
Heavy-duty corrugated cardboard creates surprising ceiling texture and dimension. Cut large panels and paint them to look like wood. Apply multiple coats of sealant for durability and protection always. The material costs almost nothing but looks quite impressive overall. Enhance with bedroom category styling for comfortable retreat spaces.
Credits: @motifspace
| Thickness | Durability | Cost/Sheet | Best Finish |
|---|---|---|---|
| Single Wall | Low | $2-4 | Painted |
| Double Wall | Medium | $4-7 | Painted/Sealed |
| Triple Wall | High | $7-12 | Stained/Sealed |
The three-dimensional corrugation adds shadow lines and visual interest beautifully. This temporary solution is perfect for events or staging purposes. Installation uses only industrial staples or strong adhesive spray. Remove easily when you’re ready for permanent upgrades later.
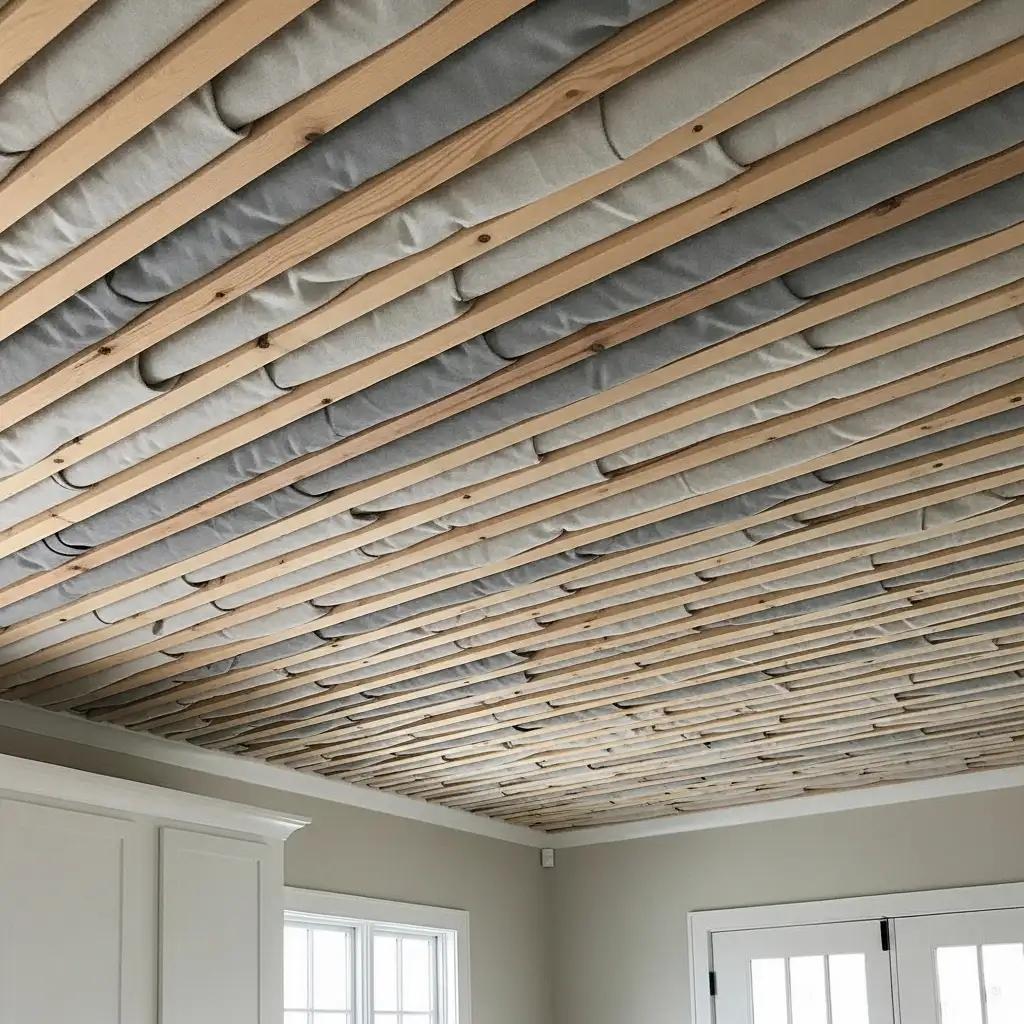
5. Fabric-Wrapped Wood Strips
Buy cheap thin wood strips from any hardware store nearby. Wrap them with affordable cotton or linen fabric pieces tightly. The fabric adds texture and softens the room acoustically too. This combination creates a unique custom designer look easily. Works wonderfully with home decor category themes for personalized living spaces today.
Credits: @motifspace
| Fabric Type | Cost Per Yard | Yards Needed | Total Material Cost |
|---|---|---|---|
| Cotton | $3-5 | 15-20 | $45-100 |
| Linen | $5-8 | 15-20 | $75-160 |
| Burlap | $2-4 | 15-20 | $30-80 |
Space the fabric-wrapped strips 6-12 inches apart for effect. Paint the ceiling behind them a contrasting color dramatically. The soft fabric absorbs sound creating a peaceful environment always. This technique uses less wood saving money on materials significantly.
6. Kraft Paper Wood Grain
Heavy kraft paper can mimic wood grain surprisingly well today. Crumple the paper then flatten it for natural texture lines. Apply wood-colored stain or paint over the wrinkled surface carefully. The result looks like distressed weathered wood from distance. Coordinate with teenage boys bedroom ideas for creative youth spaces on budgets.

Credits: @motifspace
| Paper Weight | Durability | Cost/Roll | Coverage |
|---|---|---|---|
| 30 lb | Low | $15-25 | 100 sqft |
| 50 lb | Medium | $25-40 | 100 sqft |
| 70 lb | High | $40-60 | 100 sqft |
Seal the finished paper with several polyurethane coats thoroughly. This protects against moisture and extends lifespan considerably today. The entire material cost is under $100 for average rooms. Installation takes only one weekend with basic supplies available everywhere.
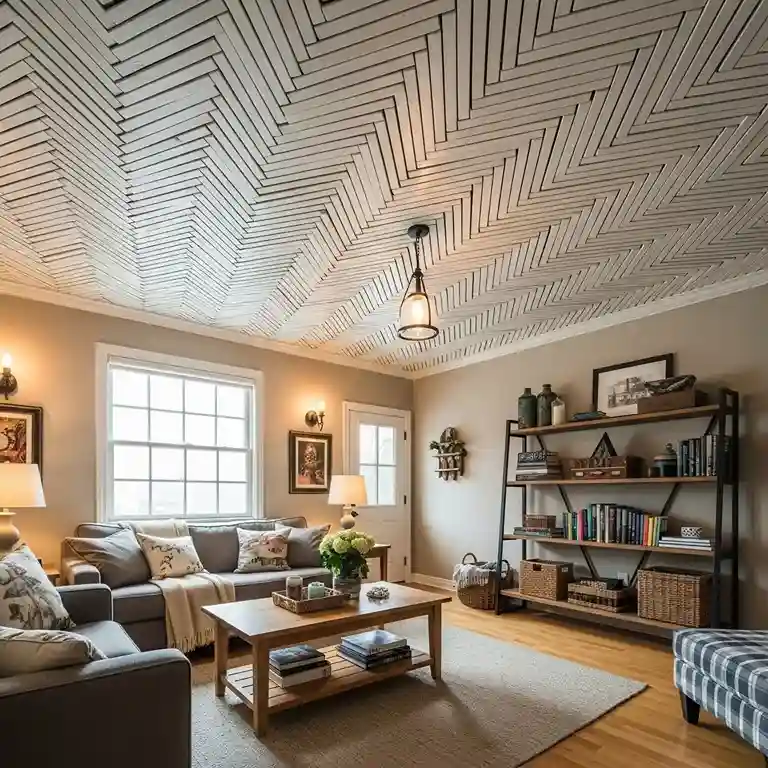
7. Wood Contact Paper Squares
Cut wood-look contact paper into uniform square tiles carefully. Arrange them in checkerboard or diamond patterns creatively overhead. This geometric approach looks modern and intentionally designed beautifully. Each roll costs only $10-20 at discount stores locally. Similar to master bath ideas these simple changes create big visual impact easily.
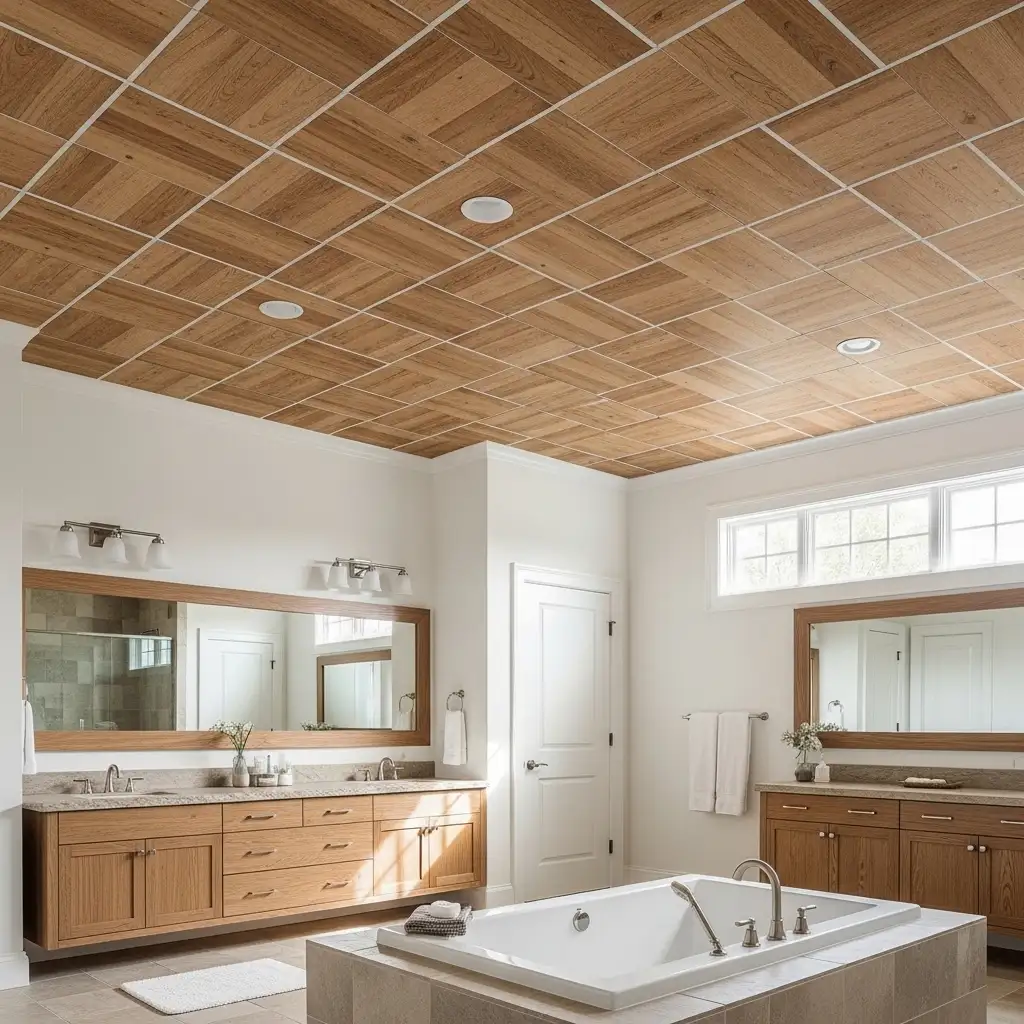
Credits: @motifspace
| Square Size | Tiles Needed | Material Cost | Installation Time |
|---|---|---|---|
| 6″x6″ | 480 | $60-120 | 2 days |
| 8″x8″ | 270 | $40-80 | 1.5 days |
| 12″x12″ | 120 | $30-60 | 1 day |
Mix light and dark wood patterns for contrast interest. The adhesive backing makes installation incredibly quick and simple always. No mess, no nails, no complicated tools required ever. This is perfect for renters who cannot make permanent changes.
8. Grocery Store Crates
Disassemble free wooden crates from grocery stores and markets nearby. Most stores give them away gladly when you ask nicely. The thin slats create rustic farmhouse charm instantly and authentically. Sand and clean them thoroughly before installation for safety always. Rustic appeal similar to home interior decoration ideas creates welcoming comfortable atmospheres.
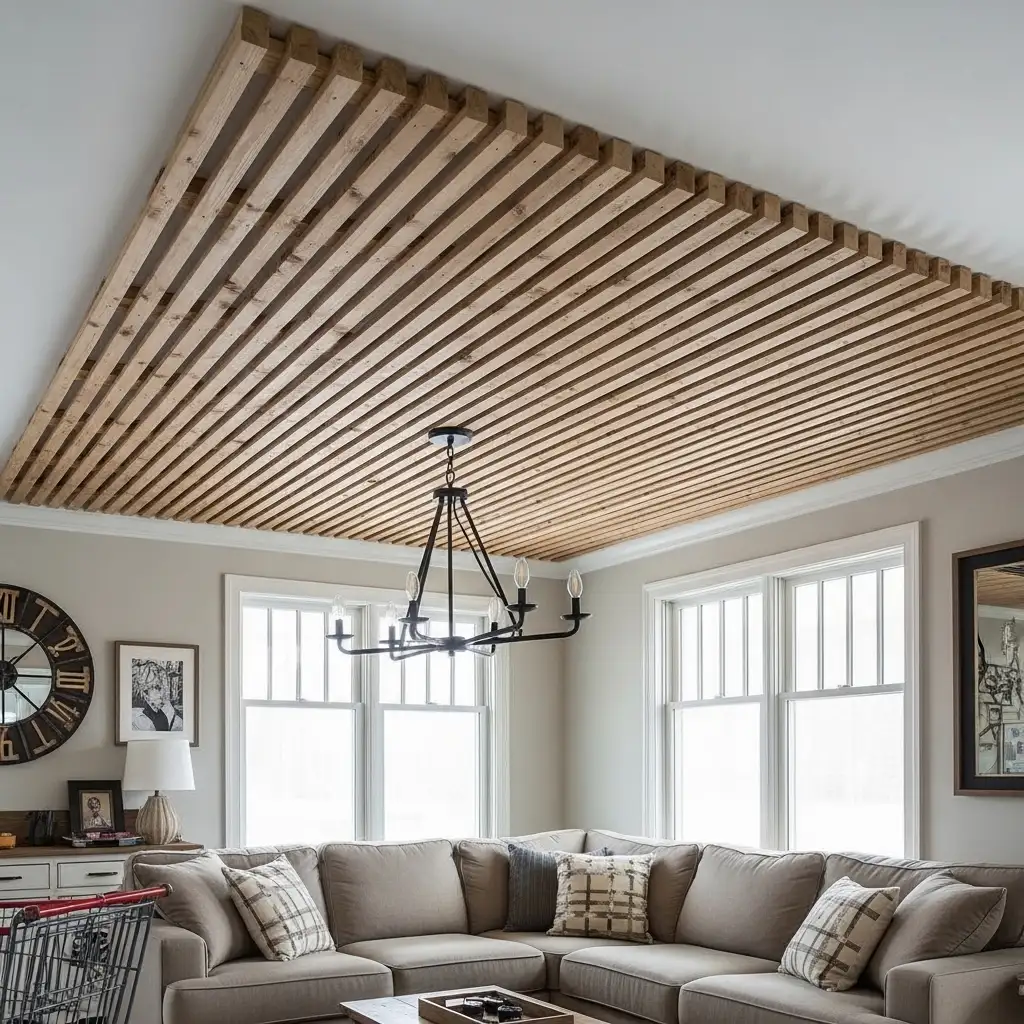
Credits: @motifspace
| Crate Source | Cost | Wood Quality | Preparation Time |
|---|---|---|---|
| Grocery | Free | Fair | 3 hours |
| Farm Stand | Free | Good | 2 hours |
| Warehouse | Free | Variable | 3-4 hours |
Arrange slats horizontally, vertically, or diagonally for different effects. The weathered appearance adds character without additional finishing work. Each crate yields substantial usable wood for your project. This truly zero-cost option just requires time and effort.
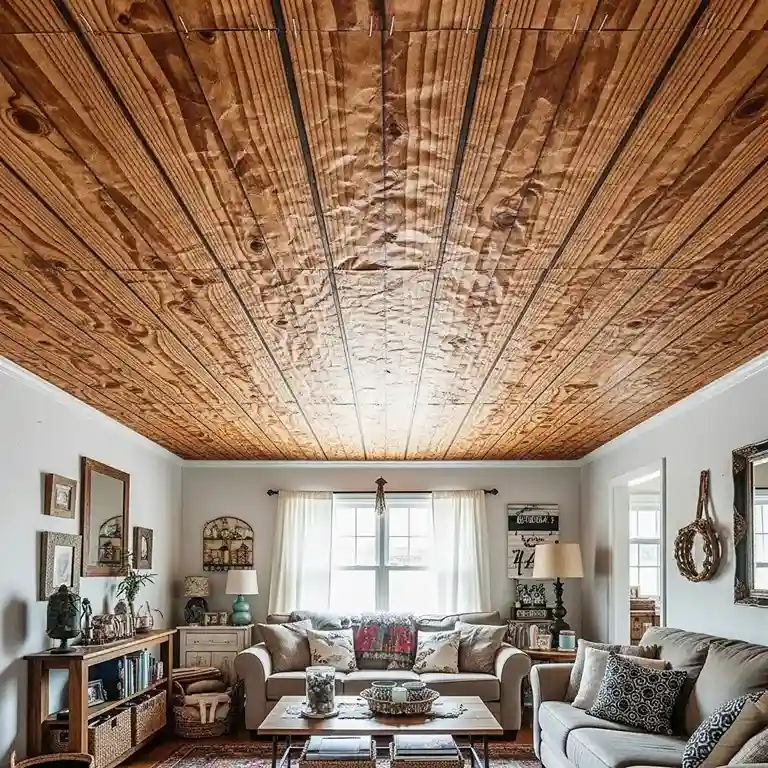
9. Pressed Board Planks
Pressed board is the cheapest engineered wood product available. Cut it into plank shapes with a circular saw easily. Prime and paint before installation for the best results always. The smooth surface creates a clean modern appearance overall. Integrate with multipurpose rooms ideas for flexible functional living spaces.
Credits: @motifspace
| Grade | Cost/Sheet | Coverage | Best Use |
|---|---|---|---|
| Standard | $8-12 | 32 sqft | Painted |
| Smooth | $12-18 | 32 sqft | Painted/Stained |
| Hardboard | $15-25 | 32 sqft | Any Finish |
The material is incredibly lightweight and easy to handle safely. Installation goes quickly with a helper for support overhead. Paint multiple colors for a custom artistic ceiling design. This option costs less than $1 per square foot total.
10. Wine Box Lids
Collect wooden wine box lids from liquor stores completely free. They have beautiful branded logos and text stamps already. Arrange them in an artistic collage pattern on your ceiling. The rustic industrial look is very trendy right now. Similar creativity in stunning tray ceiling ideas adds architectural interest to plain spaces.
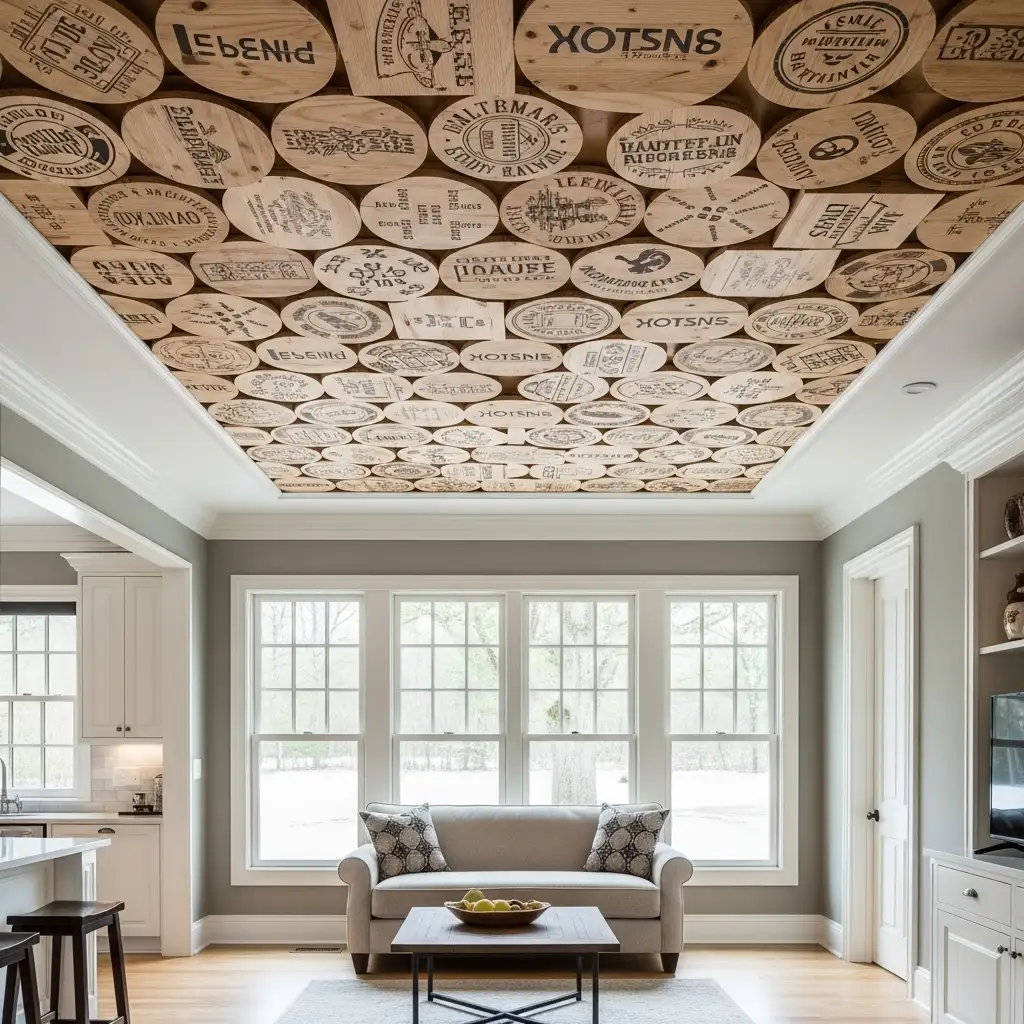
Credits: @motifspace
| Box Type | Availability | Character | Preparation |
|---|---|---|---|
| Standard | High | Medium | 1 hour |
| Vintage | Medium | High | 2 hours |
| Imported | Low | Very High | 1 hour |
Each lid tells a story with vineyard names and graphics. The varied sizes create an organic random pattern naturally. Seal the wood to preserve logos and prevent splintering always. This conversation-starter ceiling costs absolutely nothing except your time.
11. Newspaper Wood Technique
Roll newspaper tightly and glue it into wood-like cylinders. Stack these cylinders together and slice them into planks crosswise. The newspaper layers create beautiful grain-like patterns when cut. Seal with polyurethane for durability and water resistance completely. Eco-friendly like drop ceiling ideas this repurposes materials creatively and sustainably.

Credits: @motifspace
| Cylinder Diameter | Slices Per Roll | Material Cost | Time Investment |
|---|---|---|---|
| 2 inches | 18 | $5-10 | 8 hours |
| 3 inches | 12 | $10-15 | 6 hours |
| 4 inches | 9 | $15-20 | 5 hours |
The technique is time-consuming but virtually free materially speaking. The unique appearance is completely one-of-a-kind and custom made. Stain the slices different colors for artistic variation easily. This creative solution impresses everyone who sees it guaranteed.
12. Fence Picket Alternatives
Buy damaged or irregular fence pickets at deep discounts locally. Hardware stores sell “seconds” for 50-75% off regular prices. The imperfections add character and won’t show from below anyway. Cut them to size and install like regular planks. Affordable transformation similar to coffered ceiling ideas creates architectural depth and interest.
Credits: @motifspace
| Picket Type | Discount Price | Condition | Best For |
|---|---|---|---|
| Seconds | $0.50-1 | Minor Flaws | Rustic |
| Damaged | $0.25-0.75 | Visible Flaws | Painted |
| Irregular | $0.40-0.90 | Size Vary | Mixed |
Paint them all the same color to hide imperfections. Or embrace the flaws for authentic rustic farmhouse style. Installation is identical to standard wood plank ceilings always. This option saves 60-70% compared to premium fence boards.
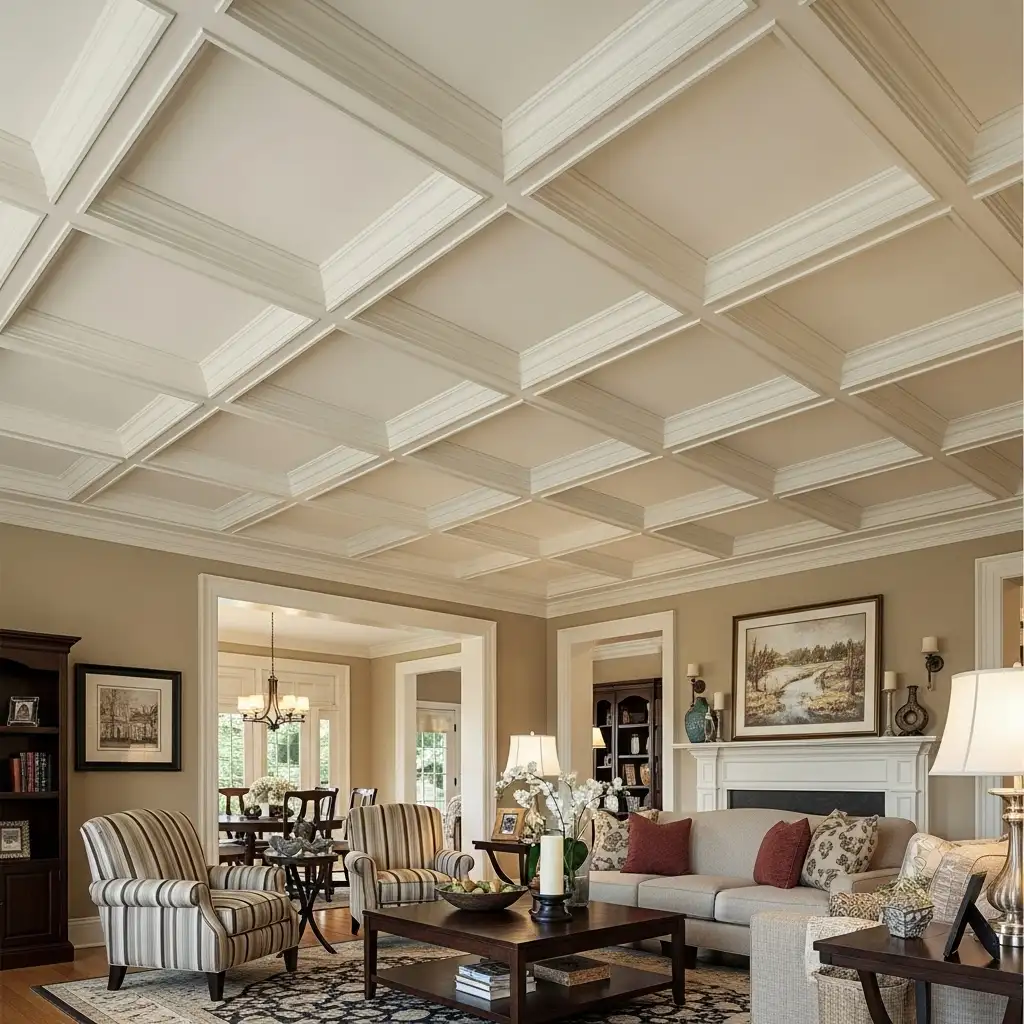
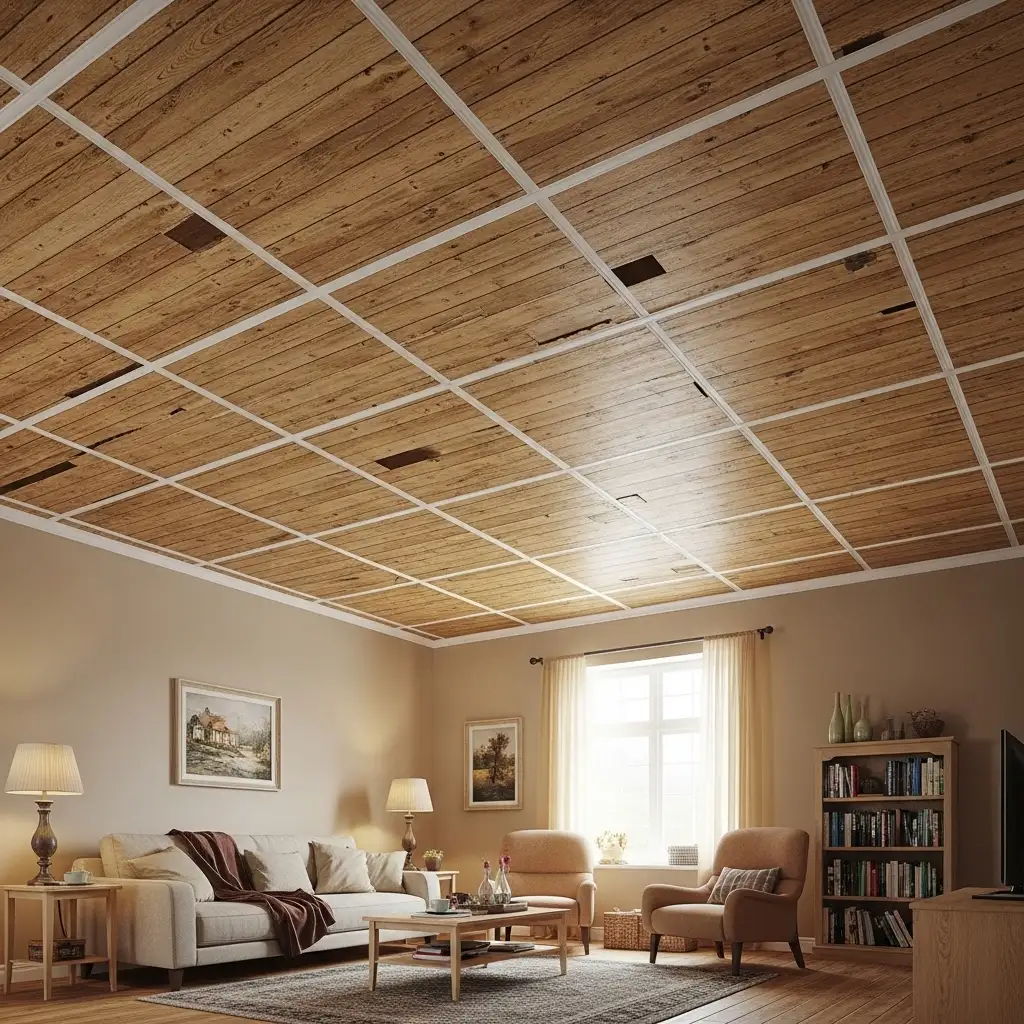
13. Particle Board Tiles
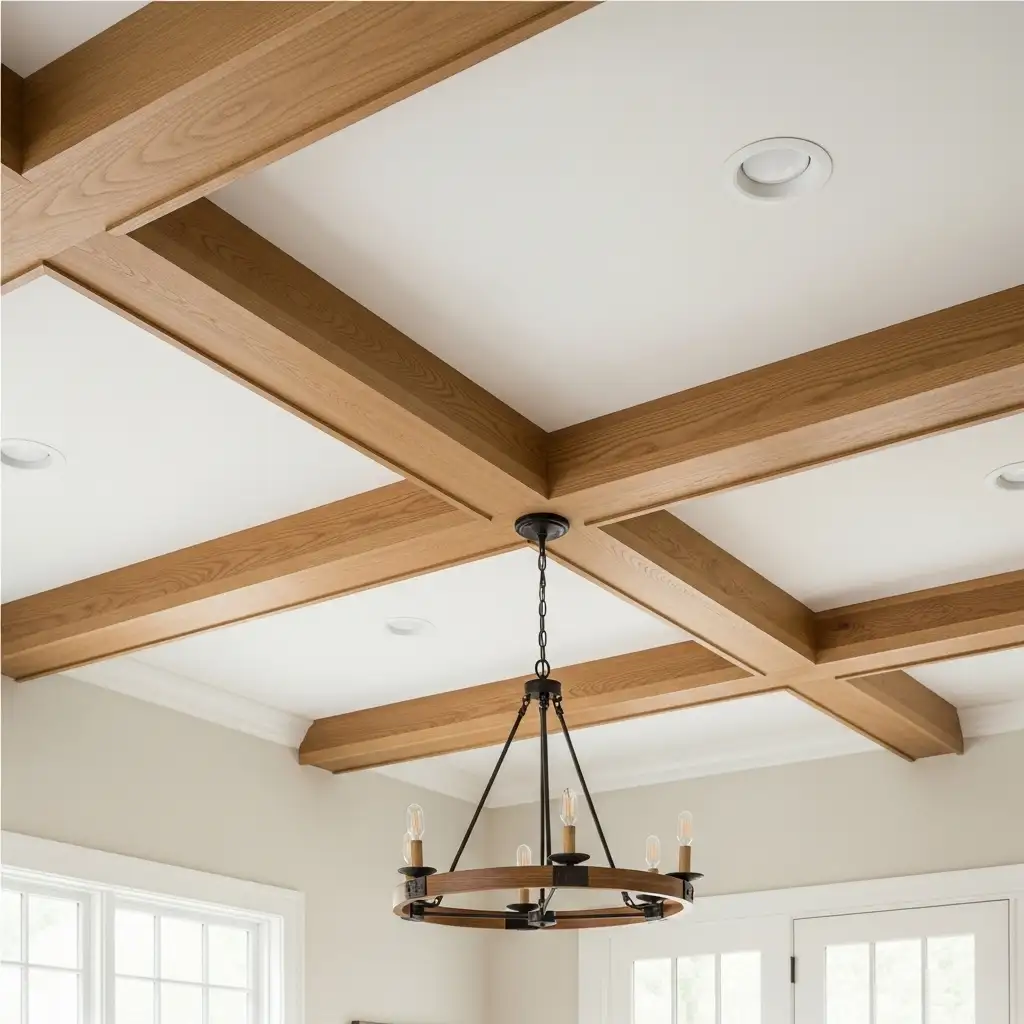
Cut particle board into large square or rectangle tiles. Score decorative lines into the surface before painting completely. This creates a faux coffered ceiling effect beautifully and affordably. The dimensional look appears much more expensive than reality. Sophisticated appearance like vaulted ceiling guide designs elevates room aesthetics dramatically.
Credits: @motifspace
| Tile Size | Tiles Needed | Material Cost | Visual Impact |
|---|---|---|---|
| 2’x2′ | 30 | $60-90 | High |
| 2’x4′ | 15 | $45-75 | Very High |
| 4’x4′ | 8 | $40-70 | Dramatic |
Paint tiles and trim in contrasting colors for emphasis. The geometric pattern adds sophisticated architectural interest to any space. Installation is faster than individual plank systems significantly today. Entire project costs under $150 for most average rooms.
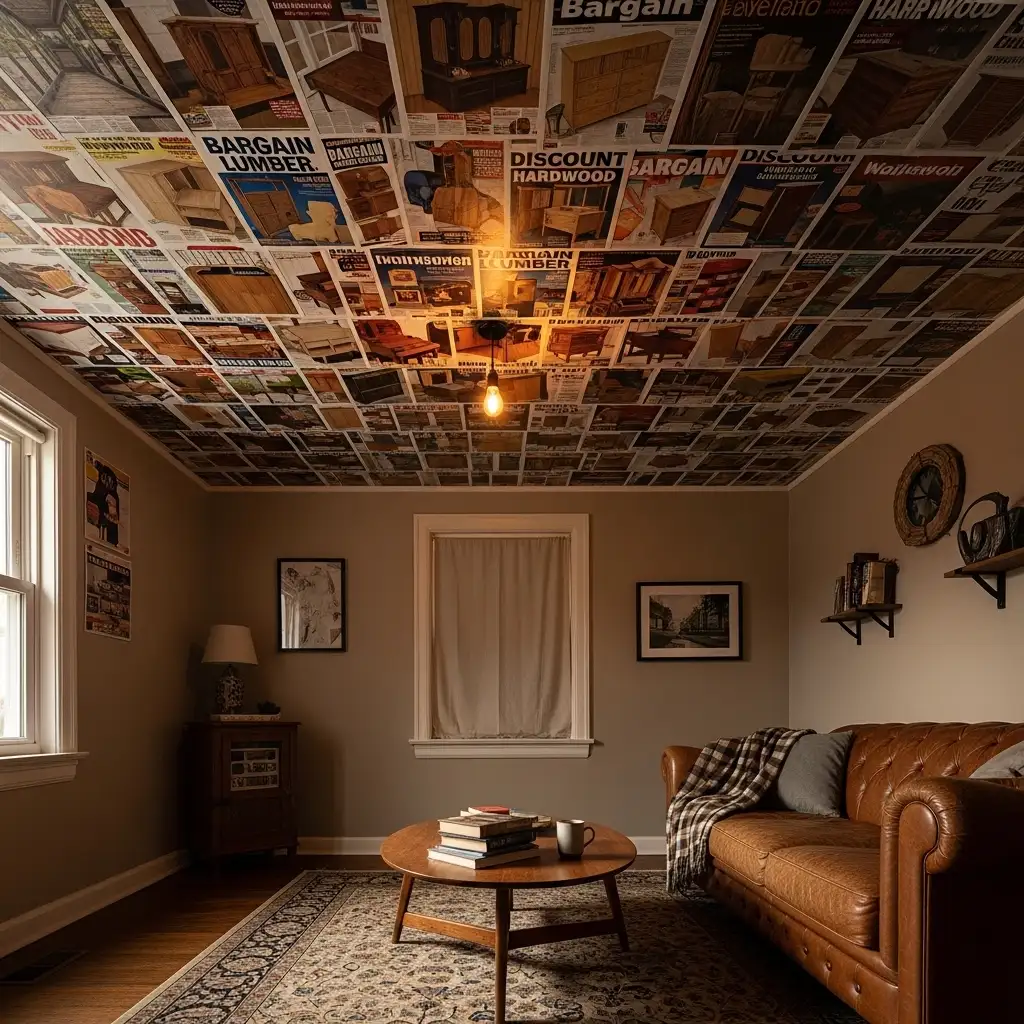
14. Magazine Page Decoupage
Decoupage magazine pages with wood images onto ceiling boards. Apply multiple layers of mod podge for durability always. The collaged effect creates unique artistic visual interest beautifully. This technique works best on smooth plywood or MDF. Creative like wood plank ceiling ideas this adds personality and character uniquely.
| Material | Cost | Pages Needed | Time Required |
|---|---|---|---|
| Magazines | Free-$20 | 200-300 | 8-10 hours |
| Mod Podge | $15-25 | 2-3 bottles | Included |
| Base Board | $60-100 | Full coverage | 2 hours |
Choose nature magazines with beautiful wood grain close-ups photographs. The realistic photos create convincing wood appearance from distance below. Seal with clear polyurethane for long-lasting protection and shine. This artsy approach costs under $150 for complete rooms.
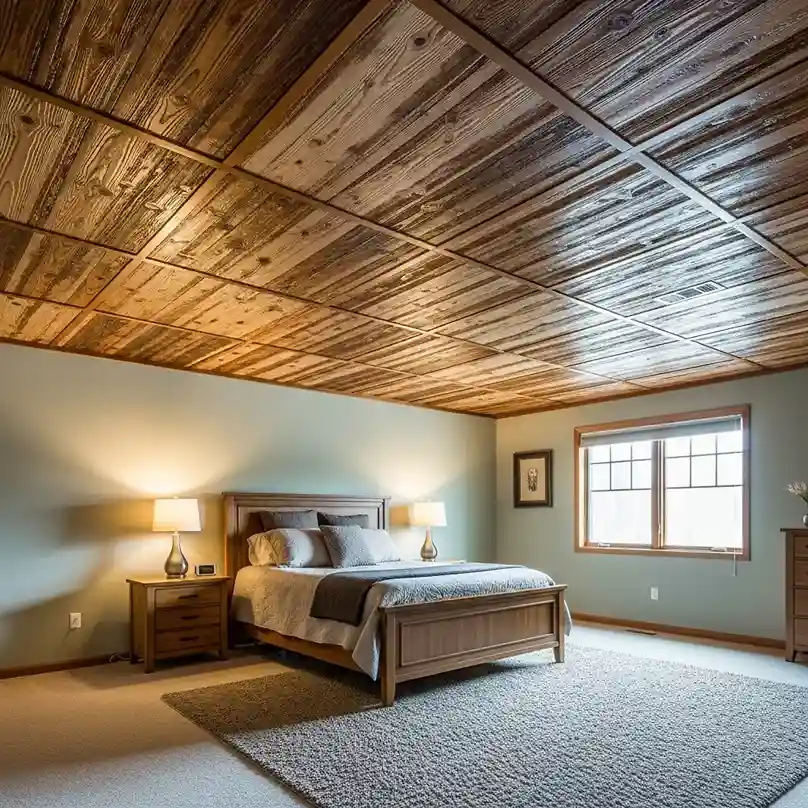
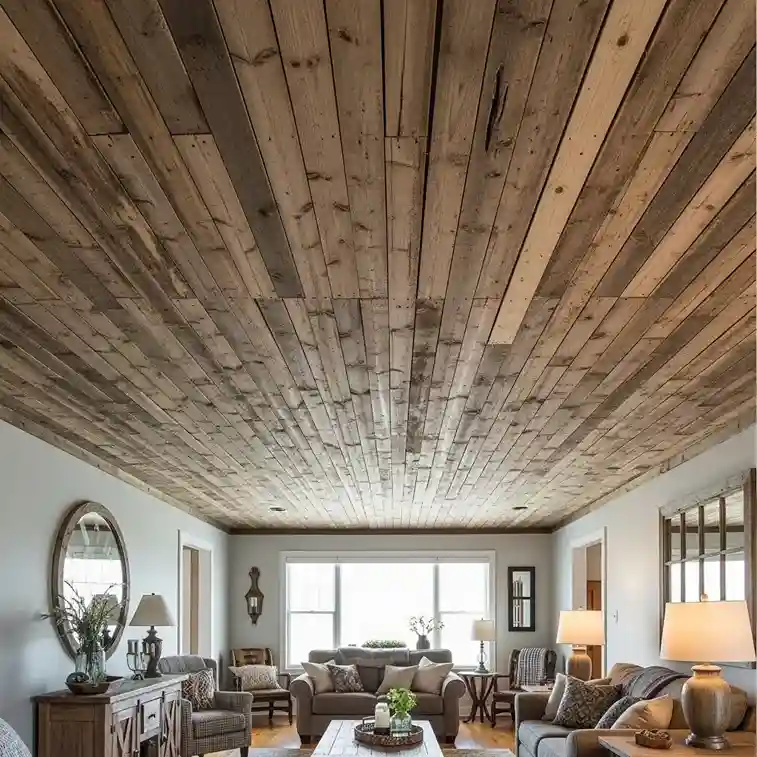
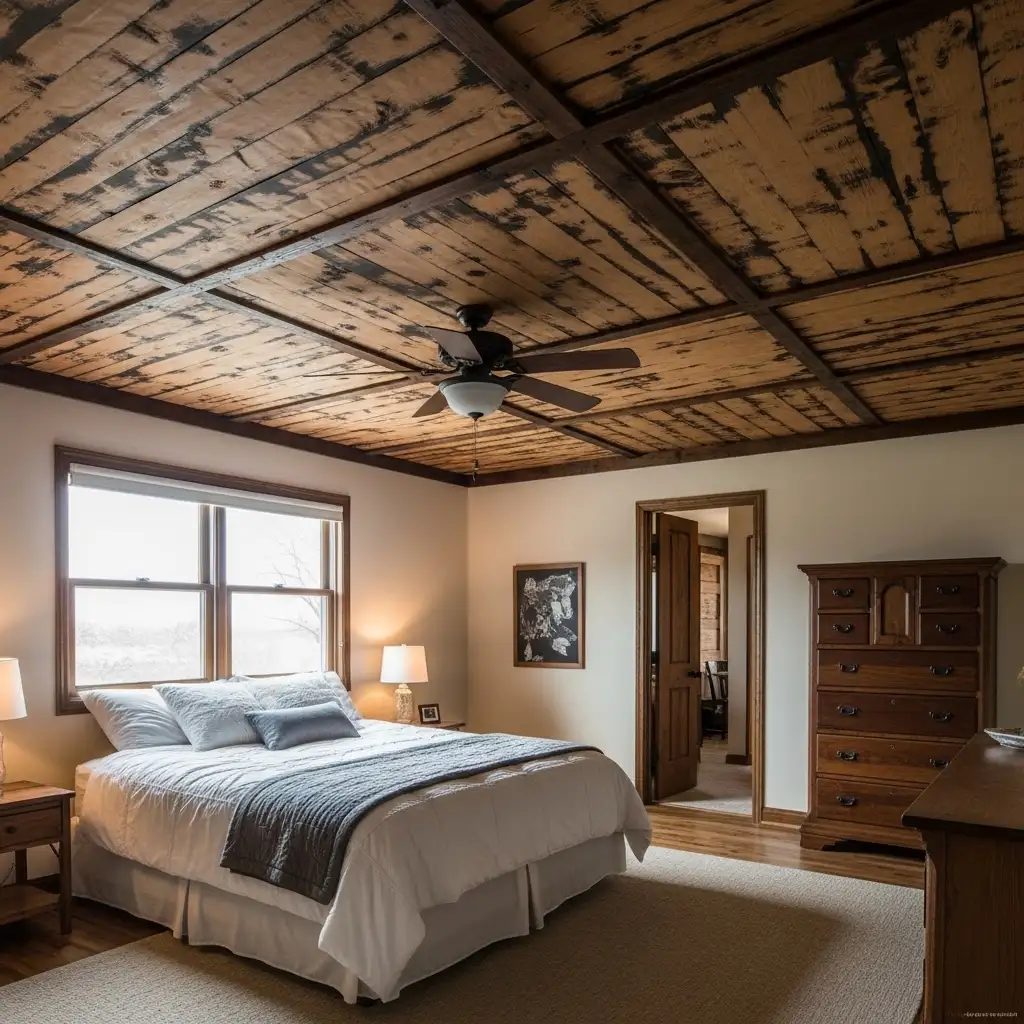
15. Shipping Pallet Slats
Disassemble free shipping pallets for usable wood slats easily. Each pallet yields 8-12 boards depending on size specifications. Sand them smooth and inspect for protruding nails carefully. The rustic weathered look is perfect for farmhouse style. Industrial charm similar to front porch ceiling guide creates authentic character naturally.
| Pallet Condition | Wood Quality | Usable Boards | Preparation Time |
|---|---|---|---|
| New | Excellent | 10-12 | 1 hour |
| Used | Good | 8-10 | 2 hours |
| Weathered | Fair | 6-8 | 3 hours |
Heat-treat pallets to eliminate potential pests and bacteria completely. Some pallets are already heat-treated marked with “HT” stamps. The wood is sturdy and holds up well overhead permanently. This zero-cost material just requires sweat equity and time.
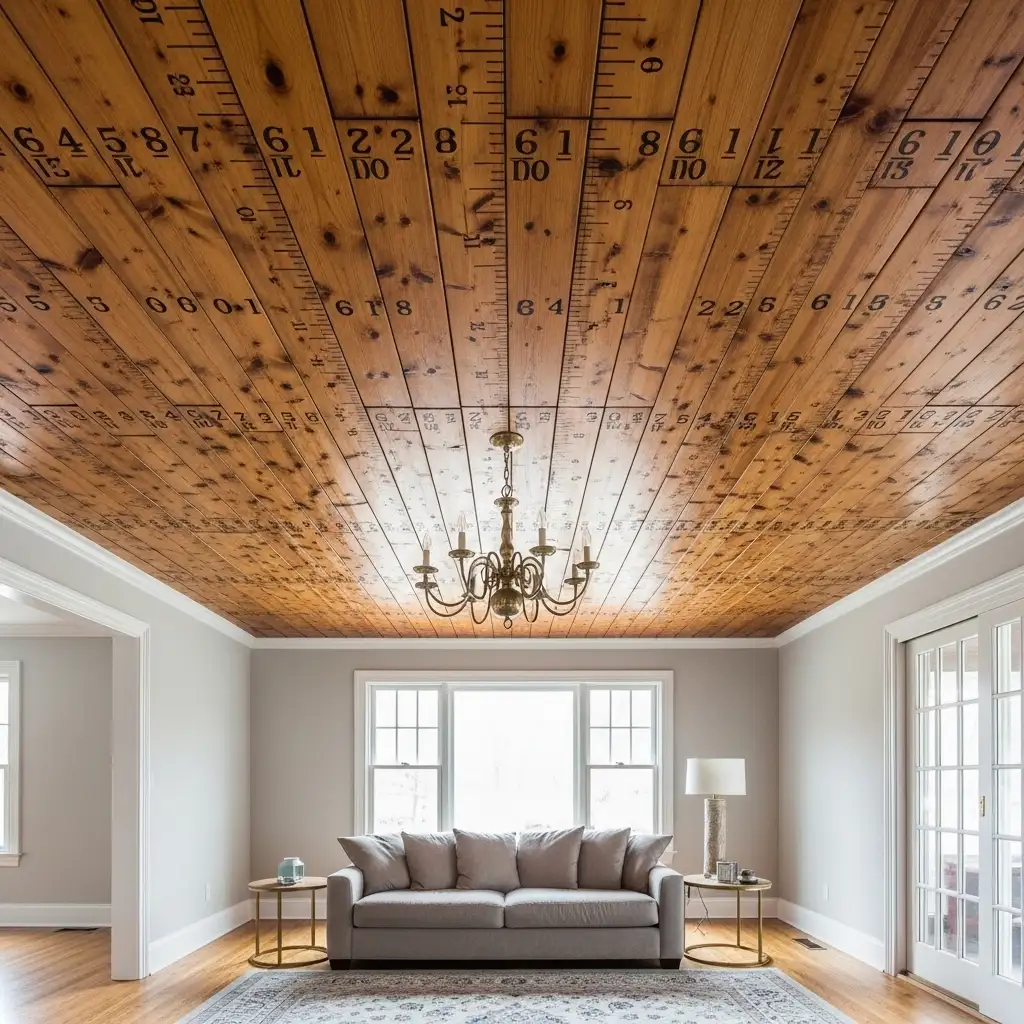
16. Dollar Store Yardsticks
Buy wooden yardsticks from dollar stores for $1 each. Arrange them side-by-side to create plank appearance easily. Paint or stain them all uniformly for cohesive look. The ruler markings add quirky unique character to space. Fun details like cheap DIY ceiling ideas make budget projects feel intentional and stylish.
| Room Size | Yardsticks Needed | Total Cost | Installation Time |
|---|---|---|---|
| 10×10 | 120-140 | $120-140 | 1 day |
| 10×12 | 140-170 | $140-170 | 1.5 days |
| 12×12 | 170-200 | $170-200 | 2 days |
Leave the numbers visible for a playful educational theme. Or sand them off completely for cleaner minimalist appearance. The wood is lightweight making installation very safe alone. This creative solution sparks conversation and smiles from visitors.
17. Bamboo Skewer Panels
Glue bamboo skewers together side-by-side creating panels tightly. Attach panels to ceiling in sections for coverage slowly. The natural bamboo color looks warm and tropical beautifully. Stain them darker for more dramatic exotic appearance overall. Natural materials like vaulted ceiling living room ideas bring organic warmth to interior spaces.
| Panel Size | Skewers Needed | Cost | Assembly Time |
|---|---|---|---|
| 2’x2′ | 150-200 | $15-20 | 3 hours |
| 2’x4′ | 300-400 | $30-40 | 5 hours |
| 4’x4′ | 600-800 | $60-80 | 8 hours |
The dimensional texture creates interesting shadows and depth effects. Bamboo is sustainable, eco-friendly, and incredibly affordable always today. Seal with polyurethane for durability and moisture resistance completely. This labor-intensive project costs less than $200 for rooms.
18. Butcher Paper Faux Wood
Heavy butcher paper accepts stain surprisingly well for effects. Crumple it heavily then smooth out for texture lines. Apply gel stain with a rag for wood grain. The lightweight material installs with basic staples or glue. Temporary solutions similar to bedroom paint colors change spaces without permanent commitment.
| Paper Type | Cost/Roll | Coverage | Durability |
|---|---|---|---|
| Light | $10-15 | 150 sqft | 1-2 years |
| Medium | $15-25 | 150 sqft | 2-3 years |
| Heavy | $25-40 | 150 sqft | 3-5 years |
Seal with multiple coats of polyurethane for longevity always. The faux wood grain looks convincing from normal viewing distance. This technique works great for temporary or rental situations. Entire ceiling costs under $100 including all supplies needed.
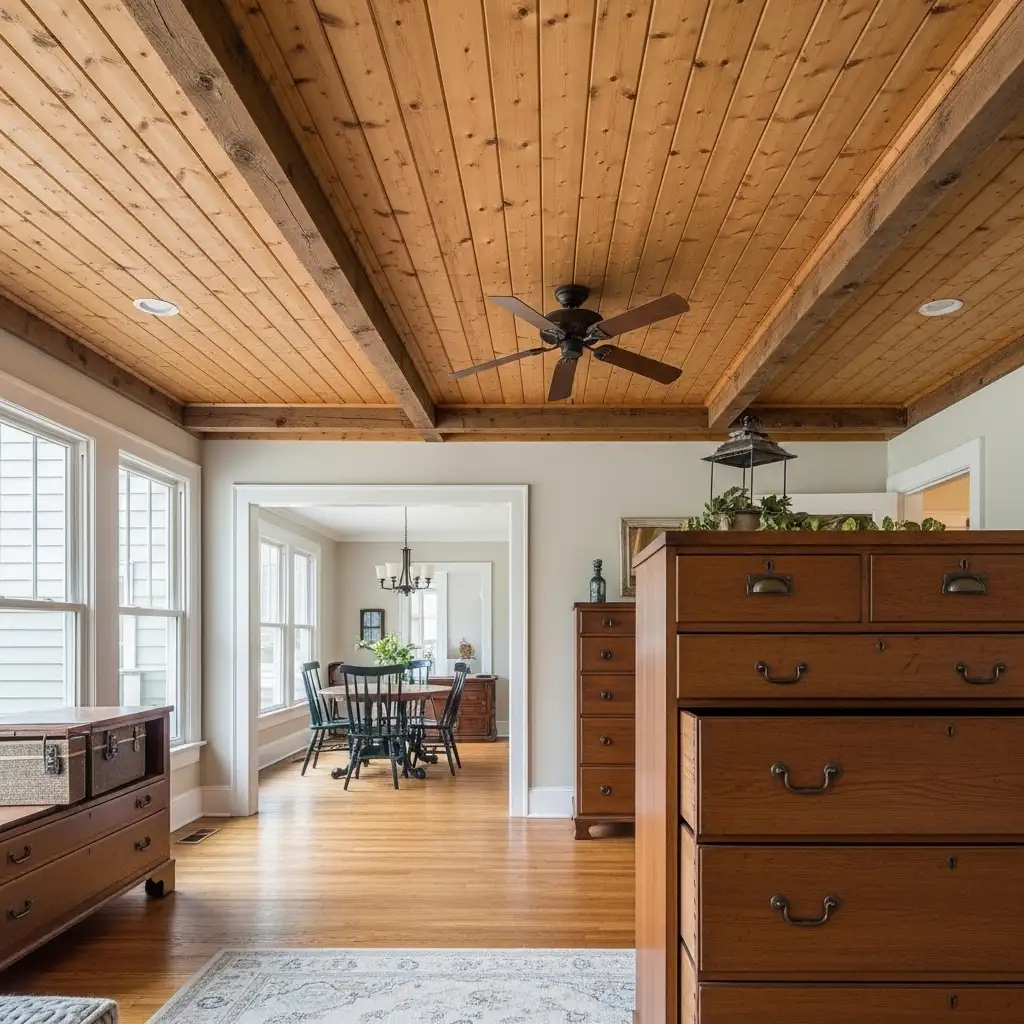
19. Reclaimed Drawer Bottoms
Remove bottoms from old discarded dresser drawers for wood. Thrift stores and curb alerts provide free drawer sources regularly. The thin wood is perfect ceiling weight and thickness. Each drawer bottom covers 2-4 square feet of area. Salvaged materials like home interior design ideas add history and character to modern homes.
| Drawer Size | Coverage Each | Cost | Preparation |
|---|---|---|---|
| Small | 2 sqft | Free | 15 min |
| Medium | 3 sqft | Free | 15 min |
| Large | 4 sqft | Free | 15 min |
Mix different wood types for interesting varied pattern naturally. The thin material is easy to cut and install. Sand and refinish for uniform appearance if desired overall. This recycling approach is eco-friendly and completely budget-friendly always.
20. Paint Stick Ceiling
Collect free paint sticks from hardware stores over time. They give them away with paint purchases or freely. Arrange hundreds of sticks in geometric patterns creatively above. Paint them before installation for convenience and less mess. Simple materials like living room category designs prove beauty doesn’t require expensive materials always.
| Pattern | Sticks Needed | Collection Time | Installation |
|---|---|---|---|
| Horizontal | 400-500 | 2-3 months | 2 days |
| Herringbone | 500-600 | 3-4 months | 3 days |
| Basketweave | 600-700 | 4-5 months | 4 days |
The uniform width creates clean lines and modern aesthetics. Leave small gaps between sticks for shadow line effects. This zero-cost project requires patience collecting enough sticks beforehand. The final result looks intentionally designed and sophisticated completely.
21. Foam Board Wood Print
Print high-resolution wood grain images on adhesive vinyl sheets. Apply vinyl to lightweight foam board for rigid backing. Cut foam boards into plank shapes with sharp knives. Install with construction adhesive or double-sided tape securely today. Modern techniques found in home decor category blend technology with traditional aesthetics successfully.
| Foam Thickness | Cost/Sheet | Weight | Appearance Quality |
|---|---|---|---|
| 1/4 inch | $3-5 | Very Light | Good |
| 1/2 inch | $5-8 | Light | Very Good |
| 3/4 inch | $8-12 | Medium | Excellent |
The photo-realistic prints look exactly like real wood grains. Choose from hundreds of wood species and finishes digitally. Installation is incredibly quick and easy for beginners completely. This high-tech solution costs $150-300 for average ceilings today.
22. Tissue Paper Layering
Layer brown tissue paper with wood grain painted patterns. Apply with wallpaper paste in overlapping sections carefully today. The translucent layers create depth and dimension beautifully when sealed. This delicate technique requires patience but costs almost nothing. Artistic approaches like bedroom category designs transform ordinary rooms into personal retreats.
| Layer Count | Coverage | Material Cost | Time Required |
|---|---|---|---|
| 3 layers | 120 sqft | $20-30 | 6 hours |
| 5 layers | 120 sqft | $30-50 | 10 hours |
| 7 layers | 120 sqft | $40-70 | 14 hours |
Paint wood grain lines between each tissue paper layer. The built-up texture creates a unique handmade appearance. Seal with acrylic medium for strength and water resistance. This artistic ceiling becomes a true conversation starter always guaranteed.
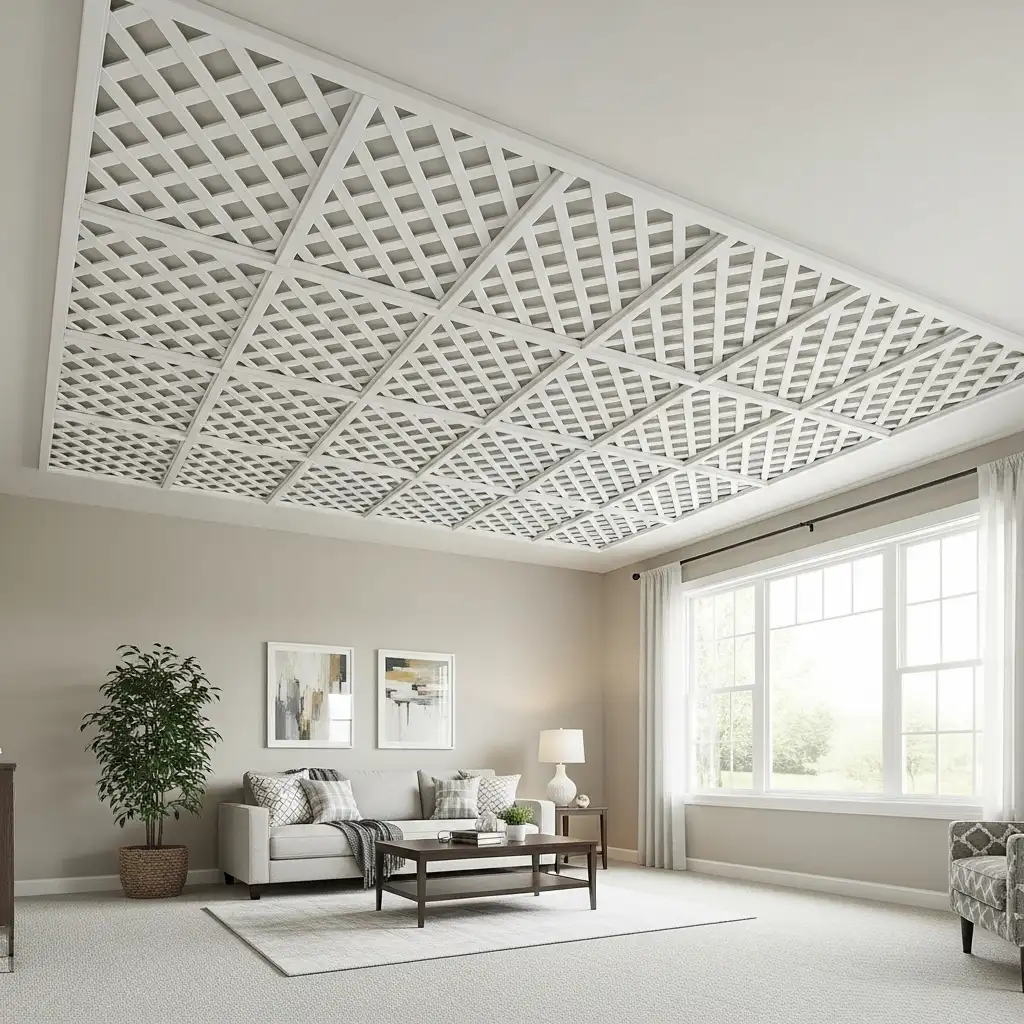
23. Garden Trellis Panels
Use inexpensive lattice garden trellis as ceiling panels today. The geometric pattern creates instant architectural interest beautifully and affordably. Paint panels before installation for easier complete coverage always. Each 4×8 panel costs only $15-25 at stores. Simple solutions similar to multipurpose rooms ideas maximize function and beauty simultaneously.
| Lattice Style | Cost/Panel | Coverage | Visual Effect |
|---|---|---|---|
| Diagonal | $15-20 | 32 sqft | Traditional |
| Square | $18-25 | 32 sqft | Modern |
| Privacy | $25-35 | 32 sqft | Dramatic |
The open weave allows some ceiling color to show. Paint behind panels in contrasting colors for emphasis dramatically. Installation uses construction adhesive or small finishing nails today. This quick project transforms ceilings in one weekend easily.
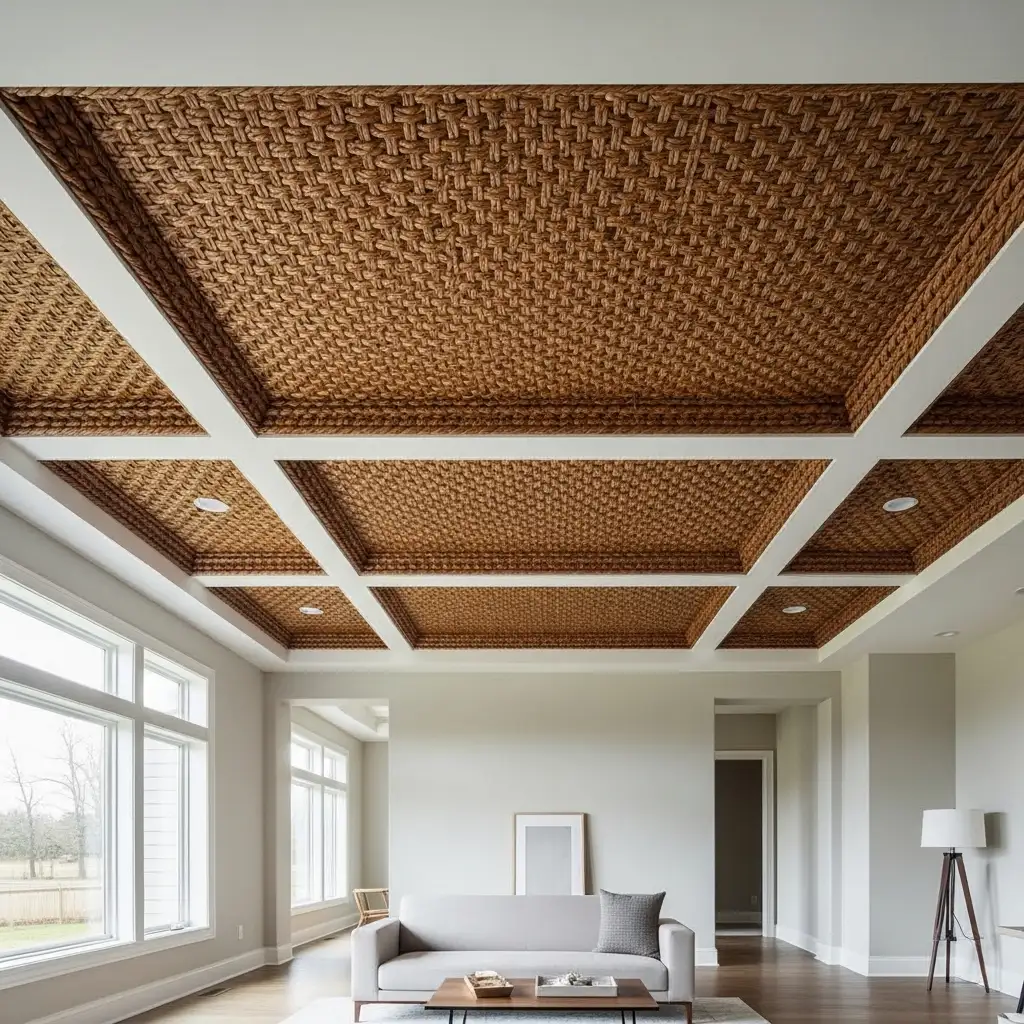
24. Woven Paper Rope
Weave brown paper rope into large flat panels tightly. The basket-weave texture mimics natural wood materials beautifully and convincingly. Seal the finished panels with polyurethane coats for durability. This labor-intensive technique creates truly unique one-of-a-kind ceilings. Handcrafted details like coffered ceiling ideas add custom luxury on budgets.
| Panel Size | Rope Needed | Material Cost | Weaving Time |
|---|---|---|---|
| 2’x2′ | 200 feet | $20-30 | 4 hours |
| 2’x4′ | 400 feet | $40-60 | 8 hours |
| 4’x4′ | 800 feet | $80-120 | 16 hours |
The woven texture provides excellent sound absorption naturally today. Choose different rope colors for varied pattern effects easily. This craft project doubles as functional acoustic treatment too. The natural material is eco-friendly and completely sustainable always.
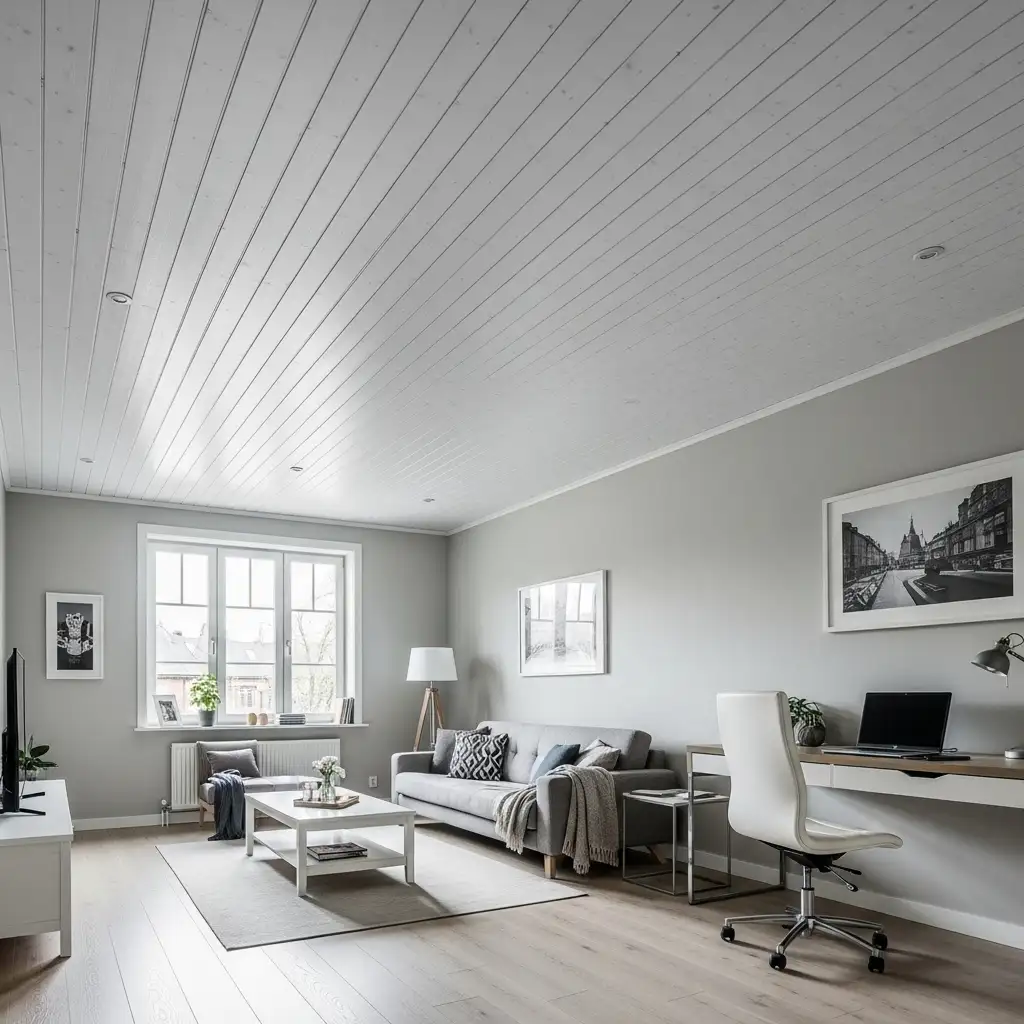
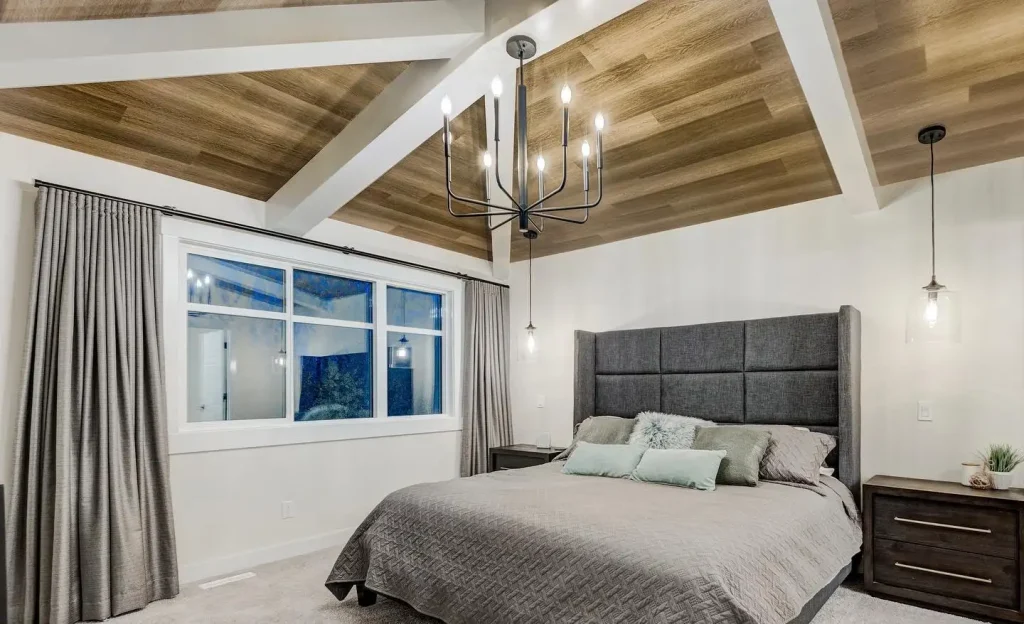
25. Vinyl Plank Flooring
Use leftover luxury vinyl plank flooring on ceilings today. The click-lock system makes installation incredibly simple and quick. No glue or nails are required for installation ever. Vinyl is moisture-proof perfect for bathrooms and kitchens too. Versatile materials like wood plank ceiling ideas work in multiple applications throughout homes.
Credits: @cityhomesedmonton
| Plank Type | Cost/Sqft | Thickness | Installation Speed |
|---|---|---|---|
| Standard | $1-2 | 4mm | Very Fast |
| Premium | $2-4 | 6mm | Very Fast |
| Luxury | $3-5 | 8mm | Fast |
The wood-look finish is incredibly realistic and convincing always. Vinyl is lighter than real wood making overhead work. Leftover flooring from other projects makes this virtually free. Installation takes only one day for average-sized rooms today.
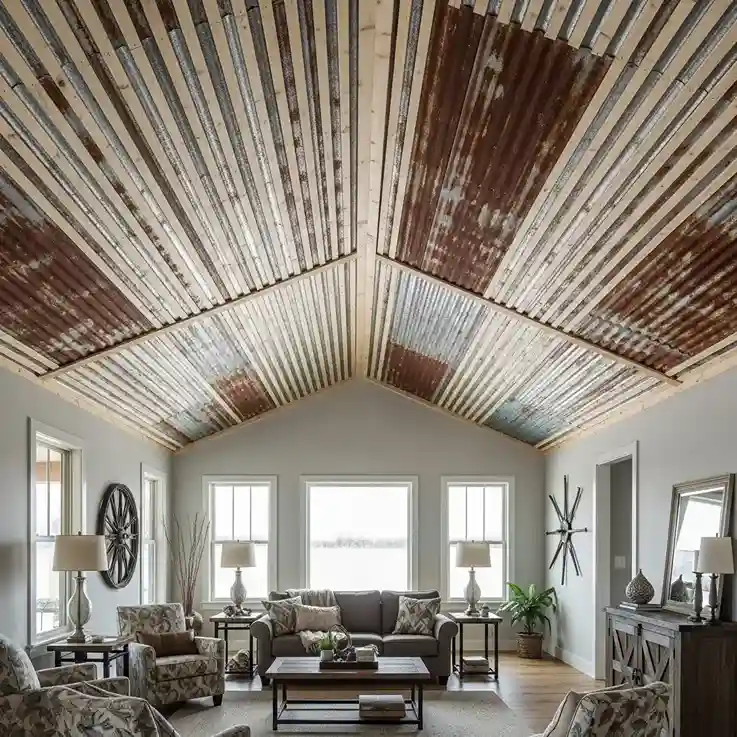
26. Corrugated Metal Accents
Alternate cheap wood strips with corrugated metal sections today. Metal costs less per square foot than wood coverage. The industrial farmhouse look is extremely trendy right now. Buy galvanized or rusted finish for authentic character easily. Mixed materials like vaulted ceiling guide add texture and visual interest dramatically.
| Metal/Wood Ratio | Material Savings | Style | Best Room |
|---|---|---|---|
| 25/75 | 15% | Subtle | Bedrooms |
| 50/50 | 30% | Balanced | Living rooms |
| 75/25 | 45% | Bold | Kitchens |
The metal reflects light brightening the entire room naturally. Corrugated texture adds three-dimensional shadow lines beautifully throughout space. Installation alternates between wood and metal strips evenly today. This hybrid approach saves money while looking intentionally designed.
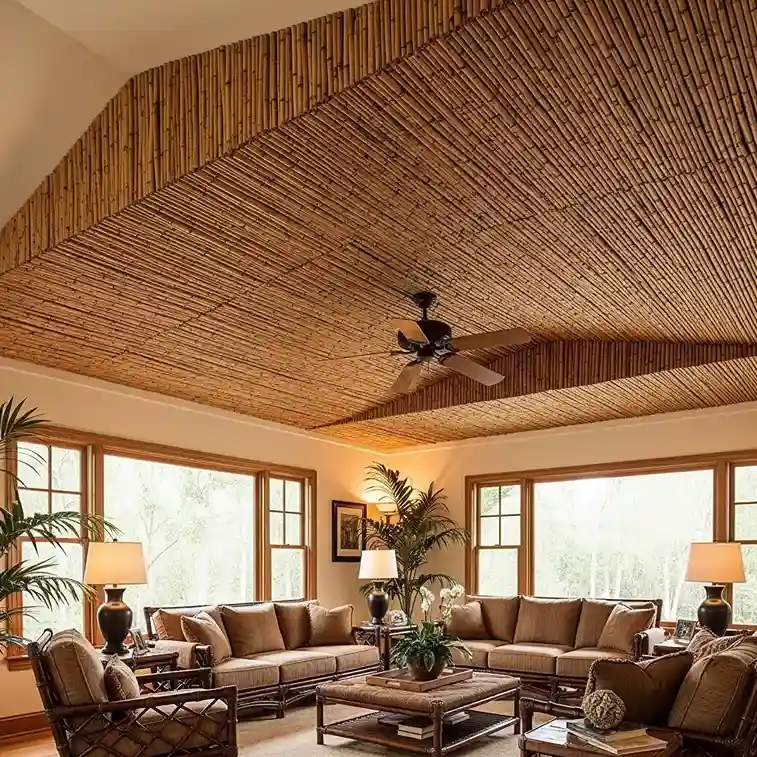
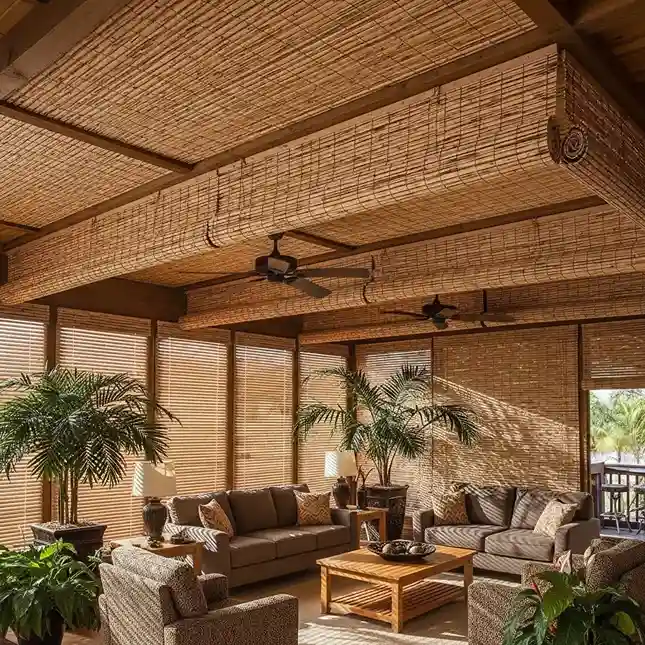
27. Matchstick Blinds Mounted
Mount inexpensive bamboo matchstick blinds onto ceiling frames carefully. The natural wood slats create instant tropical vacation vibes. Each blind costs only $20-40 depending on sizes needed. Install multiple blinds side-by-side for complete room coverage. Natural textures similar to front porch ceiling guide create relaxed casual atmospheres.
| Blind Width | Cost Each | Coverage | Number Needed |
|---|---|---|---|
| 36 inches | $20-30 | 9 sqft | 14-16 |
| 48 inches | $25-35 | 12 sqft | 10-12 |
| 72 inches | $35-50 | 18 sqft | 7-8 |
The natural bamboo color is warm and inviting always. Stain them darker for richer more dramatic appearance overall. The rolled format makes transport and handling very easy. This quick installation method takes only hours not days.
28. Plywood Edge Grain
Stand plywood sheets on edge showing the layered grain. Cut into strips and install vertically for effect dramatically. The striped pattern creates bold modern linear design beautifully. This technique uses less material than flat installation methods. Contemporary looks like stunning tray ceiling ideas make architectural statements affordably.
Credits: @kodikodigram
| Plywood Grade | Strip Width | Visual Effect | Cost/Sqft |
|---|---|---|---|
| BC | 2 inches | Subtle | $0.75-1 |
| AC | 3 inches | Moderate | $1-1.50 |
| AA | 4 inches | Bold | $1.50-2 |
The exposed plywood layers show beautiful natural grain patterns. Space strips apart with gaps for interesting shadow effects. Paint backing ceiling black for dramatic high-contrast look today. This architectural technique costs 40% less than traditional methods.
Installation Tips for Success
Always prepare your ceiling surface before starting any project. Remove loose paint, patch holes, and ensure everything is clean. Measure twice and cut once to minimize waste materials. Work with a helper for safety when installing overhead. Use proper safety equipment including goggles and dust masks always.
Start from one corner and work systematically across room. Keep all cuts consistent for professional-looking uniform results throughout. Take breaks frequently to prevent fatigue and maintain quality. Apply finish coats after installation rather than before when possible.
Cost Breakdown Comparison
Free pallet wood costs only time and effort overall. Paint sticks cost nothing but require patience collecting enough. Cardboard options cost $50-100 for complete room coverage. Vinyl planks cost $120-600 depending on quality grades chosen. All options cost significantly less than traditional wood ceilings.
Professional installation adds $500-1500 to any ceiling project typically. DIY saves money but requires time commitment and effort. Budget 15-20% extra for unexpected issues or material waste. Most low-cost ceilings pay for themselves through increased enjoyment.
Maintenance and Longevity
Dust low-cost wood ceilings regularly with soft microfiber cloths. Sealed surfaces can be gently wiped with damp cloths. Check for loose pieces twice yearly and reattach promptly. Touch up paint or stain every 2-3 years as needed.
Most budget ceiling options last 10-15 years with proper care. Temporary solutions like paper may need replacement sooner obviously. Permanent installations using real wood components last longest overall. Regular maintenance extends any ceiling’s lifespan significantly and economically.
Frequently Asked Questions
Can I install wood ceiling in a bathroom?
Yes, but seal wood properly against moisture and humidity damage. Use marine-grade polyurethane or epoxy sealant for best protection results. Vinyl plank options work better in very humid bathrooms naturally. Ensure adequate ventilation to prevent mold growth and wood deterioration. Many budget options like vinyl are naturally moisture-resistant already today.
How much weight can a ceiling support?
Standard ceiling joists support 10-15 pounds per square foot safely. Lightweight materials like cardboard and paper are perfectly safe always. Real wood planks may require additional ceiling reinforcement for safety. Consult a structural engineer for heavy material installations every time. Most low-cost options are lightweight eliminating any structural concerns completely.
Do I need special tools for installation?
Most low-cost ceiling projects need only basic hand tools. A drill, saw, level, and tape measure cover everything. Adhesive options require even fewer tools for installation success. Rent specialty tools like nail guns for faster professional results. Many techniques use only glue eliminating power tools entirely today.
Conclusion
Low cost wood ceilings transform any space beautifully and affordably. Creative solutions make this upgrade accessible to everyone today. From free materials to discount supplies options abound everywhere. DIY installation saves hundreds or thousands in labor costs.
These 28 ideas prove expensive doesn’t mean better always guaranteed. Budget constraints actually inspire creativity and unique personal solutions. Your ceiling can become a stunning focal point feature. Start planning your affordable wood ceiling transformation project today immediately.