Organized kitchen counters completely transform how cooking feels and how your kitchen functions.
A clear, organized counter reduces stress, speeds up meal preparation, and makes your kitchen genuinely enjoyable to be in.
These 32 practical ways to organize your kitchen counters will help you create the calm, functional workspace you deserve.
1. Start With a Complete Counter Purge
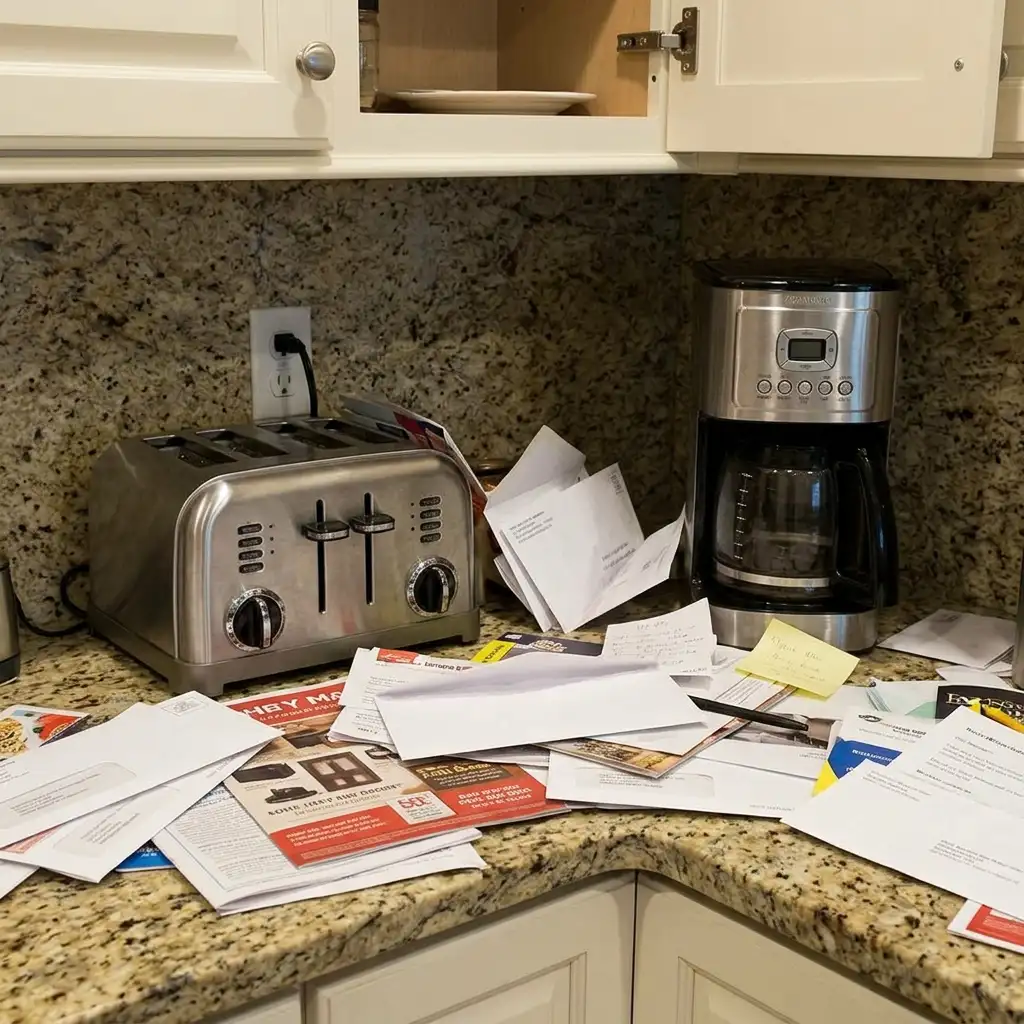
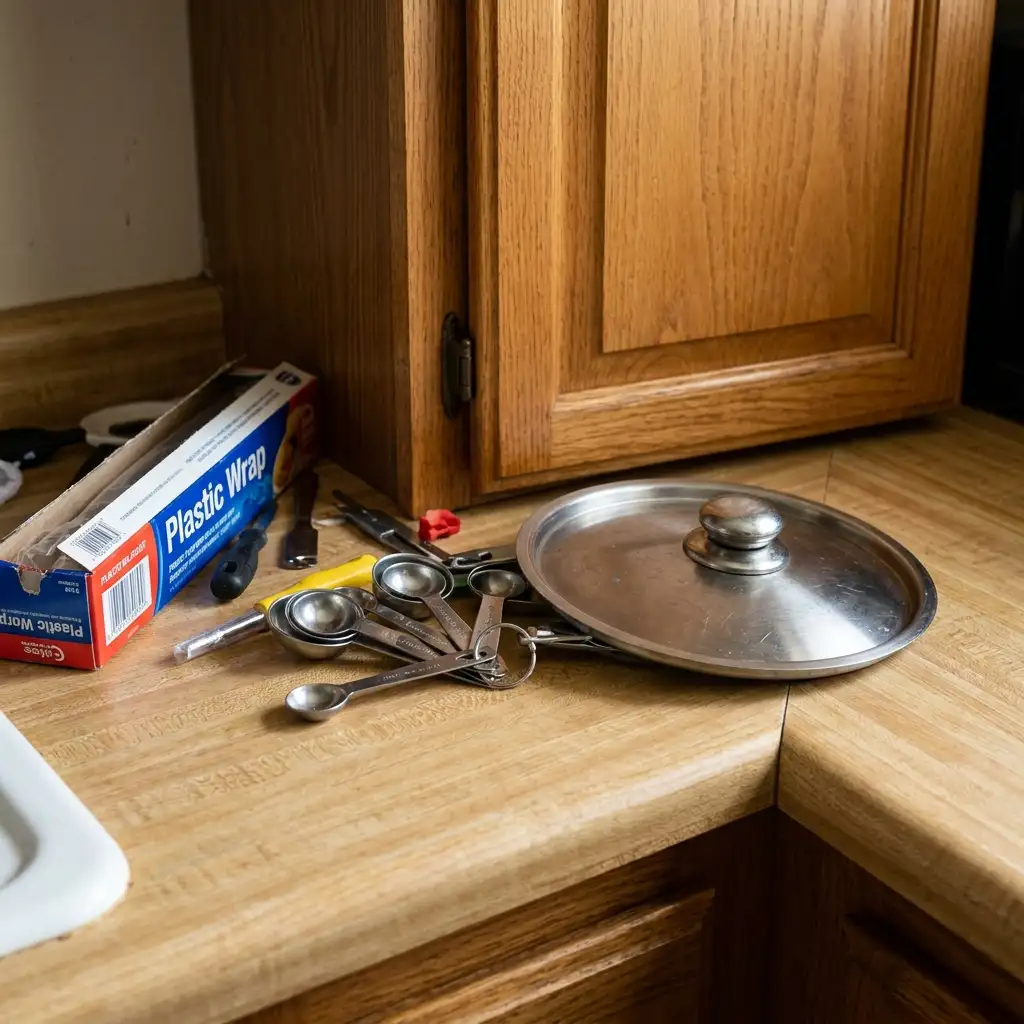
Every successful kitchen counter organization project begins with removing absolutely everything from every surface. You cannot make smart decisions about what belongs on your counters while everything is still in place. A complete purge reveals what you actually use, what belongs elsewhere, and what simply needs to leave the kitchen permanently.
Pull every single item off every counter surface and place it temporarily on the kitchen table or floor. Be honest as you review each item about how frequently it is actually used on the counter rather than stored there out of habit. Anything used less than once per week deserves serious consideration for cabinet, drawer, or pantry storage instead.
| Counter Purge Category | Decision to Make |
|---|---|
| Daily use items | Keep on counter, assign a home |
| Weekly use items | Cabinet storage, easy access |
| Monthly use items | Back of cabinet or pantry |
| Rarely used items | Deep storage or donation |
2. Apply the Only-Daily-Use Rule for Counter Items
The most transformative rule for permanently organized kitchen counters is brutally simple. Only items used every single day earn the right to live on the counter. Everything else, regardless of how convenient it seems, belongs in a kitchen cabinet, drawer, or pantry where it stays until actually needed.

This rule feels restrictive until you experience the clarity and functionality of properly cleared counters. A coffee maker used every morning earns its counter spot immediately. A bread machine used once a month does not. Applying this standard consistently is the single most impactful kitchen counter organization decision you will make.
| Daily Use Test | Counter Status |
|---|---|
| Used every single morning | Earns counter space |
| Used 3–4 times per week | Borderline, assess by size |
| Used once per week | Move to accessible cabinet |
| Used less than weekly | Back of cabinet or pantry |
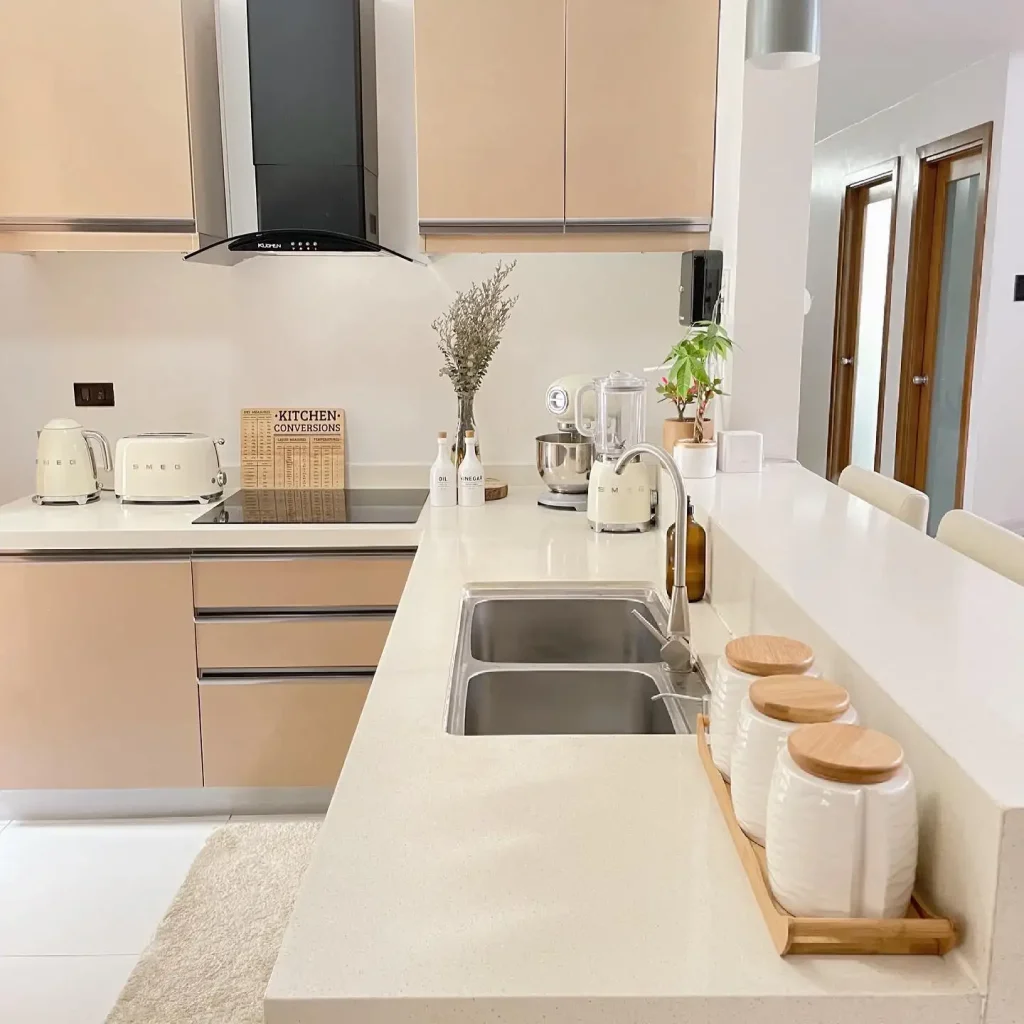
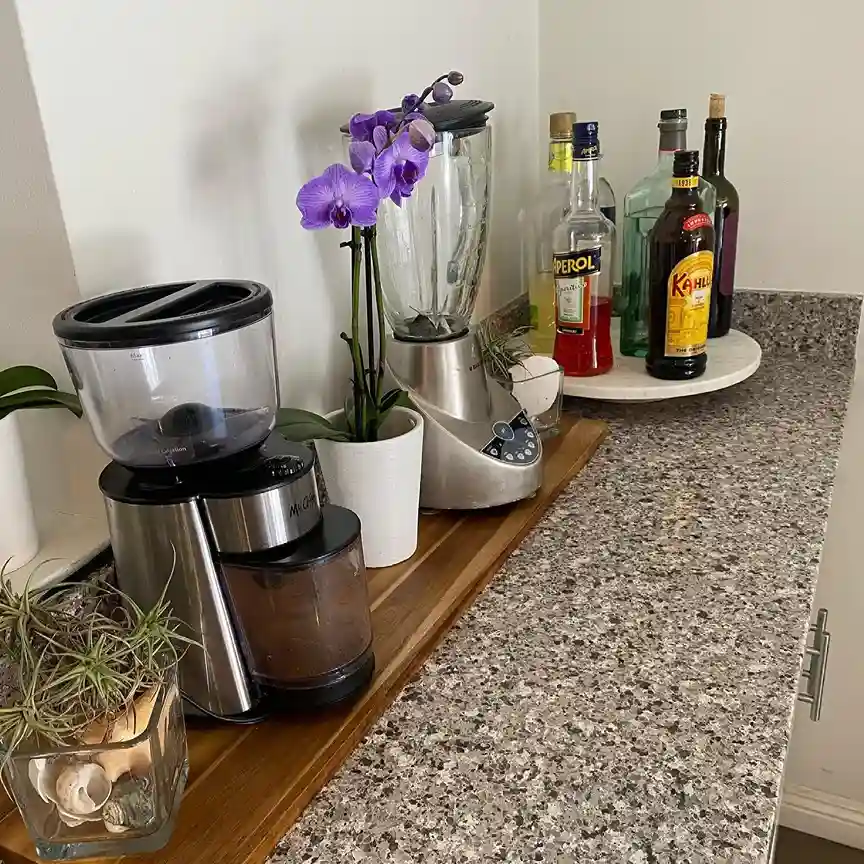
3. Create Dedicated Zones for Different Counter Functions
A zoned counter system assigns specific functions to specific sections of counter space. Just like a professional kitchen has a prep zone, a cooking zone, and a plating zone, your home kitchen benefits enormously from the same clear thinking. Zones prevent different functional items from mixing and creating visual chaos.

Designate one clear section of counter as the primary prep zone and keep it completely clear of everything that is not directly related to food preparation. Assign your coffee maker and morning essentials to one dedicated corner. Give the area beside the stove to cooking-related items only. This zone thinking makes your counter space feel dramatically larger than it physically is.
| Kitchen Counter Zone | Items That Belong There |
|---|---|
| Prep zone | Knife block, cutting board, bowl |
| Coffee station zone | Coffee maker, mugs, beans |
| Cooking zone | Oil, salt, spoon rest |
| Baking zone | Stand mixer, measuring tools |
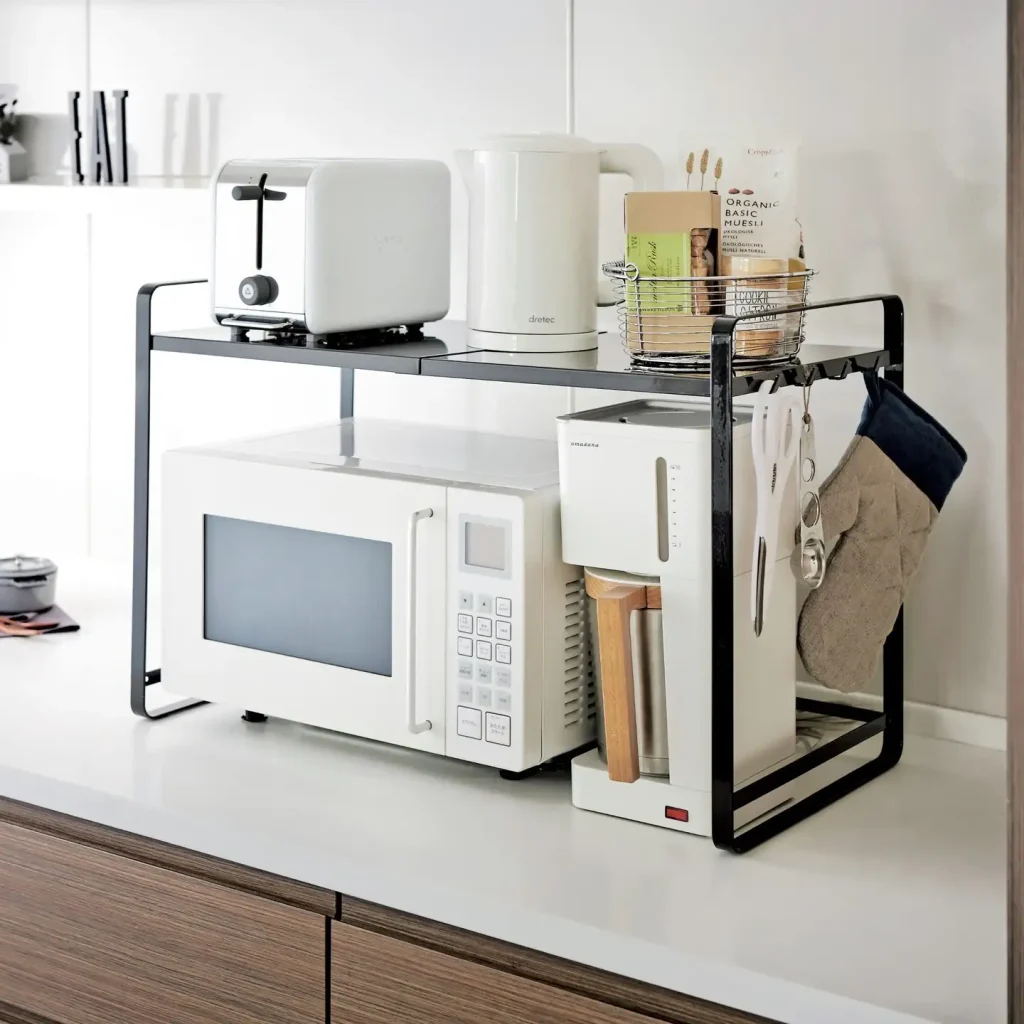
4. Use Vertical Space With Tiered Organizers
Most kitchen counter organization focuses exclusively on the horizontal surface while completely ignoring the valuable vertical space directly above it. Tiered organizers, risers, and small shelf systems use vertical space to effectively double or triple the organizational capacity of any counter area. This approach creates more usable space without increasing the counter footprint.

A two-tier counter shelf beside the stove can hold spices on the upper level and oils and vinegars below, keeping both organized and accessible without spreading across the entire counter surface. Tiered fruit bowls store more produce in a smaller footprint than a flat bowl. A vertical file-style organizer holds cutting boards and baking sheets upright in minimal counter space.
| Vertical Counter Organizer | Space Multiplication |
|---|---|
| Two-tier shelf organizer | Doubles usable surface area |
| Tiered fruit bowl | 3x produce storage in same footprint |
| Vertical cutting board holder | 4 boards in width of one |
| Stacked can or jar organizer | Multiple rows in one footprint |
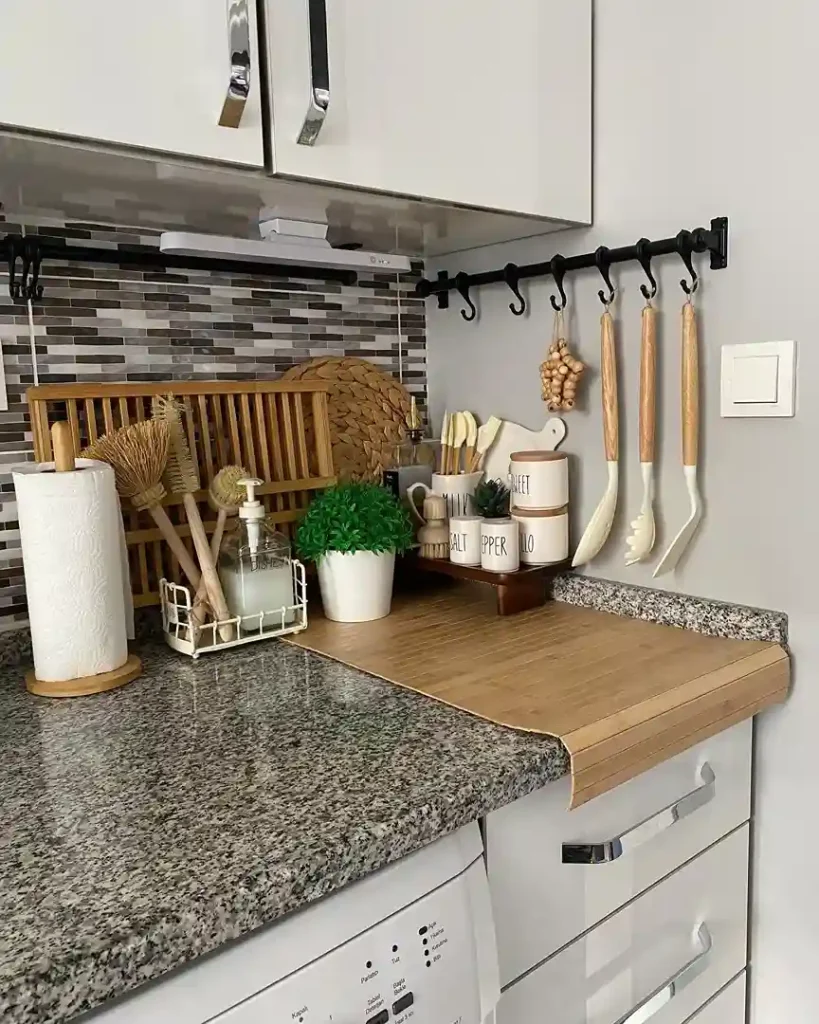
5. Install a Magnetic Knife Strip to Free Counter Space
A knife block sitting on the counter is one of the single largest consumers of valuable counter real estate in most kitchens remodel. A wall-mounted magnetic knife strip removes the knife block from the counter entirely and displays knives safely and accessibly on the wall. This one change can reclaim 80 to 120 square inches of counter space immediately.
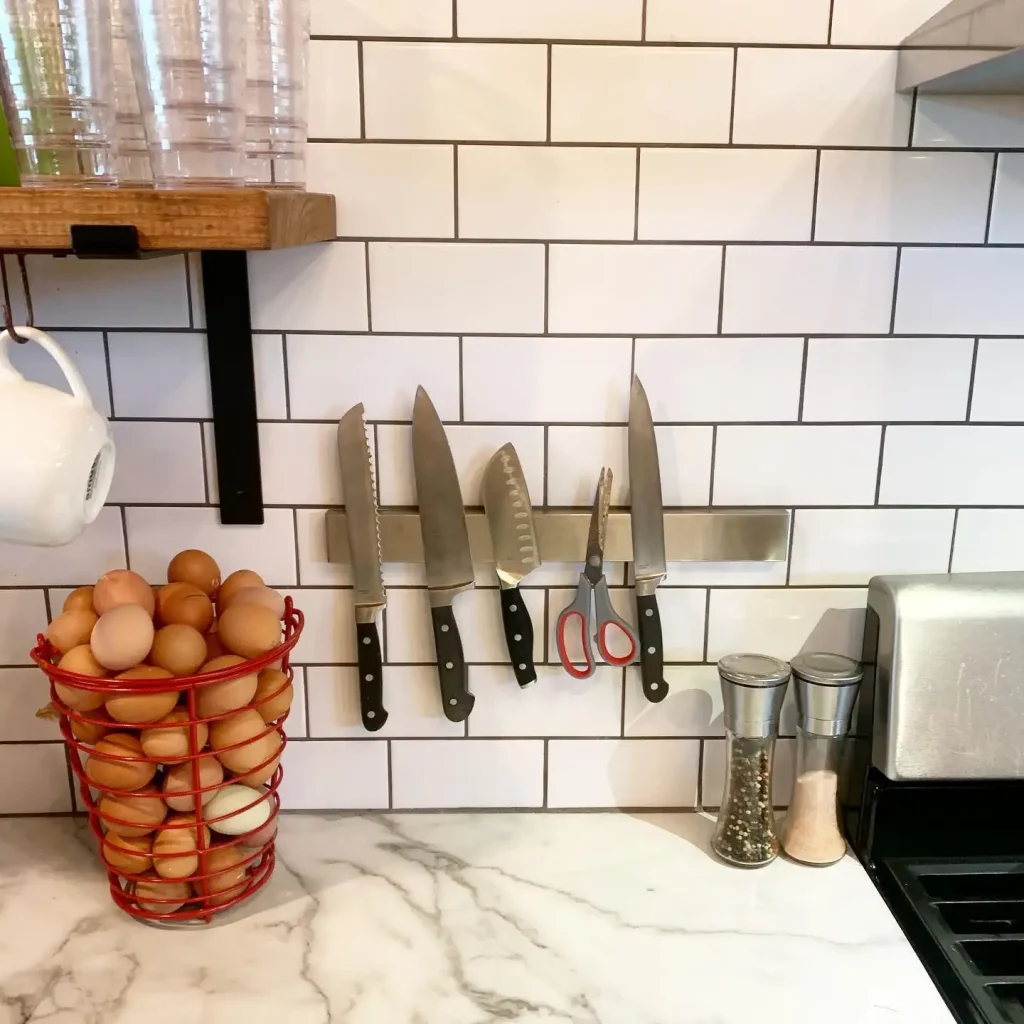
Mount the magnetic knife strip on the wall directly beside or above the primary prep area for the most convenient daily access. Choose a strip length appropriate for your knife collection and the available wall space. Magnetic knife strips also display knives more safely than a drawer and keep blades sharper than block storage over time.
| Magnetic Knife Strip Length | Knives Accommodated |
|---|---|
| 10-inch strip | 4–5 standard knives |
| 16-inch strip | 6–8 standard knives |
| 24-inch strip | 10–12 knives plus tools |
| Double strip system | Complete large knife collection |
6. Add a Wall-Mounted Spice Rack to Clear Counter Space
Spice storage on the counter is one of the most common and most solvable kitchen counter organization problems. A wall-mounted spice rack moves the entire spice collection off the counter and onto an unused wall surface. This frees significant counter space while simultaneously making every spice visible and accessible during cooking.
Choose a wall-mounted spice rack style that complements your kitchen aesthetic — a sleek stainless steel rail with magnetic spice tins suits modern kitchens while a wooden wall rack suits farmhouse and traditional styles. Mount the rack close enough to the stove to reach spices easily during cooking without taking up any counter surface at all.
| Wall Spice Rack Style | Kitchen Style Match |
|---|---|
| Magnetic wall panel with tins | Modern, contemporary |
| Wooden wall-mounted rack | Farmhouse, traditional |
| Stainless steel rail system | Industrial, modern farmhouse |
| Over-cabinet door rack | Any style, hidden storage |
7. Use a Pegboard Backsplash for Tool Organization
A kitchen pegboard installed on the backsplash area between the counter and the upper cabinets creates an enormous amount of organized storage without using any counter space. Hooks, bins, and small shelves mounted on the pegboard hold utensils, small tools, measuring spoons, and frequently used accessories. This functional approach transforms unused wall space into a highly organized kitchen tool center.
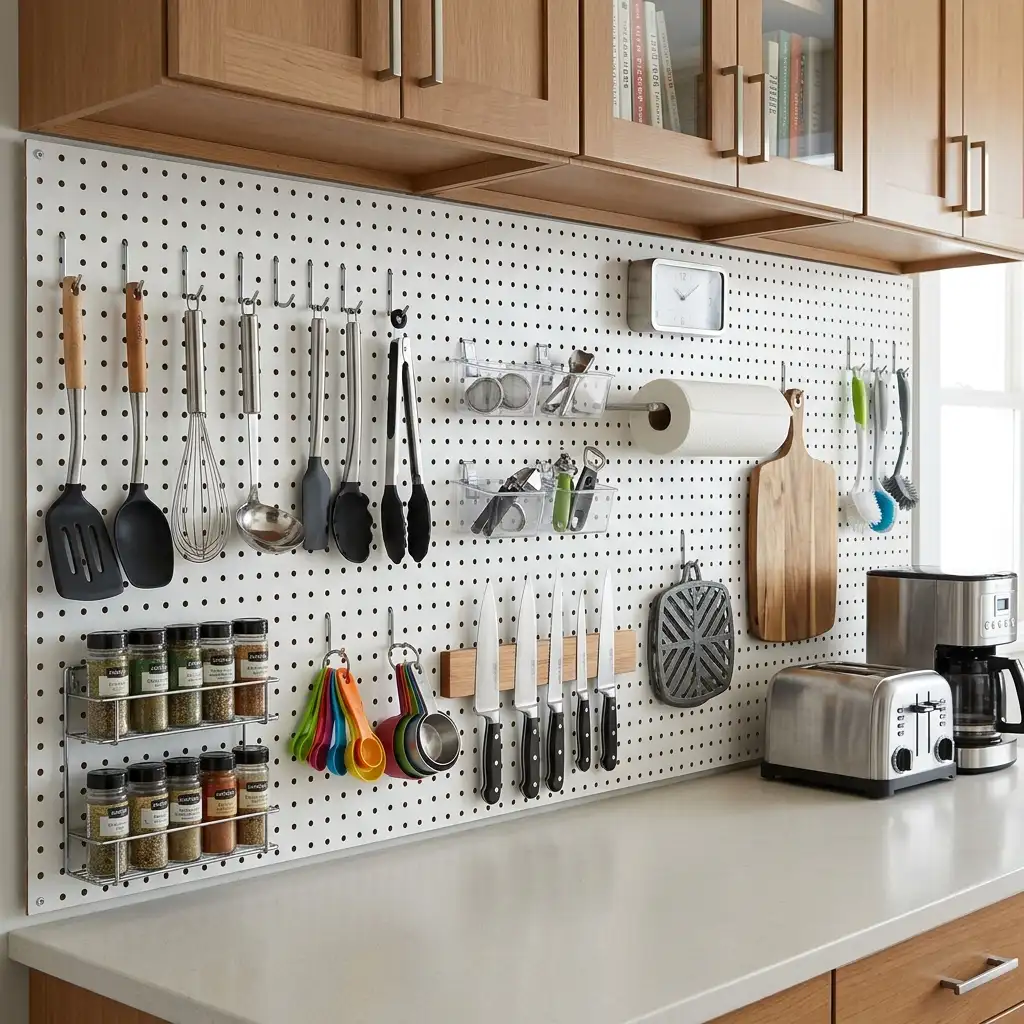
Paint the pegboard to match your kitchen walls or cabinets for a seamlessly integrated look. Use a mix of different hook sizes and bin types to accommodate the full range of kitchen tools and accessories you want to store. A kitchen pegboard organization system can hold 30 to 50 items that would otherwise crowd your counter or get lost in a drawer.
| Pegboard Kitchen Accessory | Items to Organize |
|---|---|
| Small hooks | Measuring spoons, ladles |
| Large hooks | Pots, pans, colanders |
| Small bins | Spatulas, wooden spoons |
| Small shelves | Spice jars, small containers |
8. Invest in an Appliance Garage for Countertop Appliances
An appliance garage is a dedicated cabinet with a roll-up or lift-up door that sits on the counter and conceals small appliances behind a closed door when they are not in use. This clever storage solution keeps frequently used appliances accessible without permanently cluttering the visual space of your counter. An appliance garage transforms a messy appliance collection into a clean, organized counter feature.
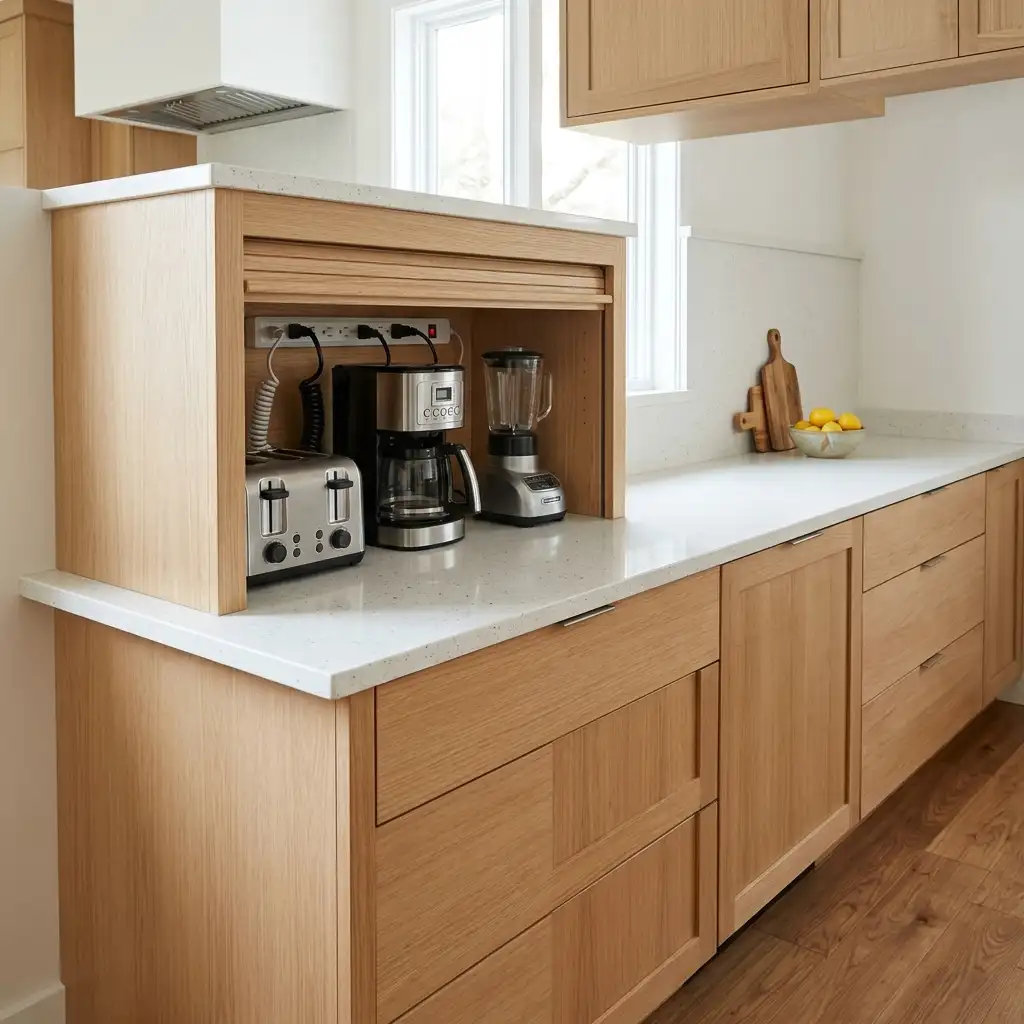
Appliance garages work particularly well in corners where counter space meets wall cabinetry. A roll-up door style appliance garage can be installed as part of a kitchen renovation or added as a freestanding unit purchased separately. The toaster, blender, coffee grinder, and food processor all disappear behind the closed door and emerge easily when needed.
| Appliance Garage Size | Appliances It Accommodates |
|---|---|
| Small corner unit | Toaster, coffee grinder |
| Medium standard unit | Blender, food processor, toaster |
| Large corner unit | Stand mixer, multiple appliances |
| Full cabinet conversion | Complete appliance collection |
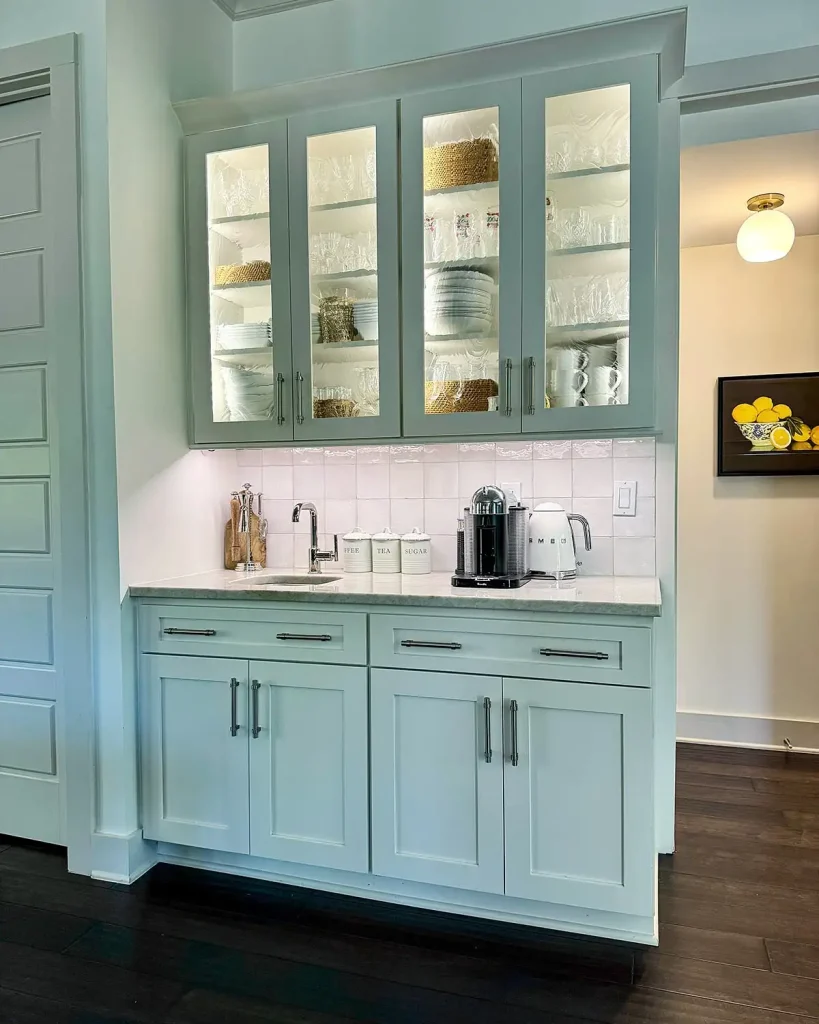
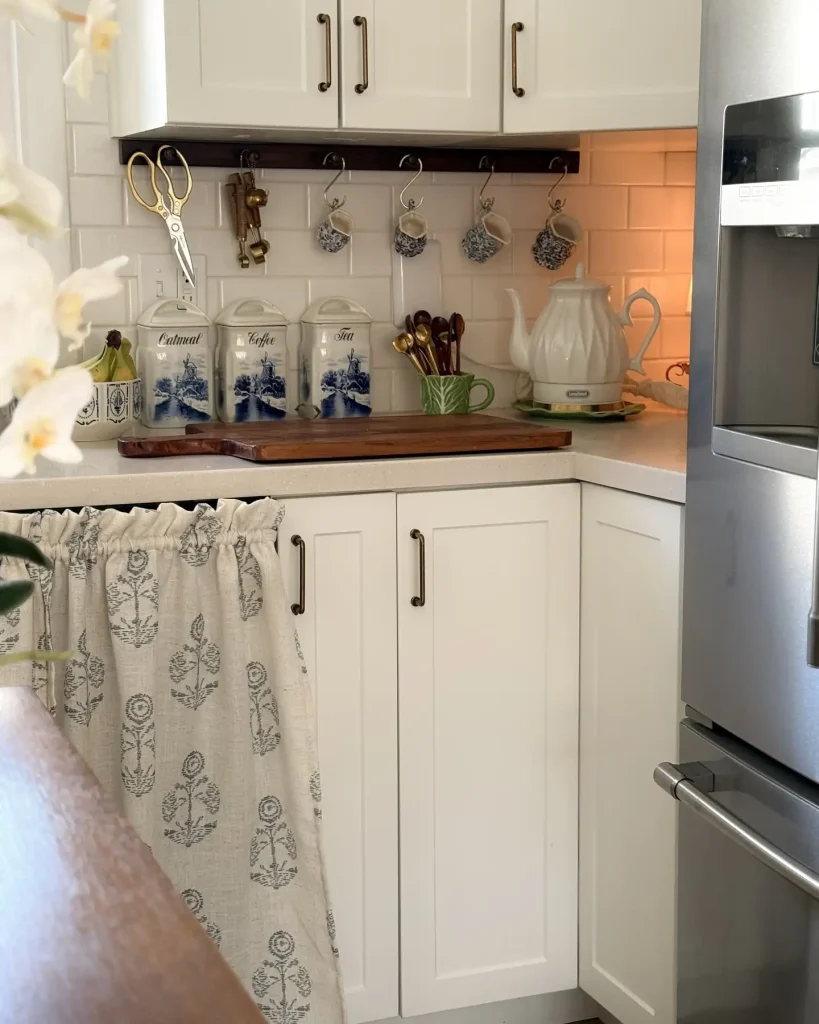
9. Create a Dedicated Coffee Station With Proper Organization
A properly organized coffee station contains all coffee-related items in one clearly defined counter zone. Without a dedicated station, coffee supplies spread across multiple areas creating clutter that makes the entire kitchen feel disorganized. A beautiful, organized coffee station becomes a functional focal point rather than a source of visual chaos.
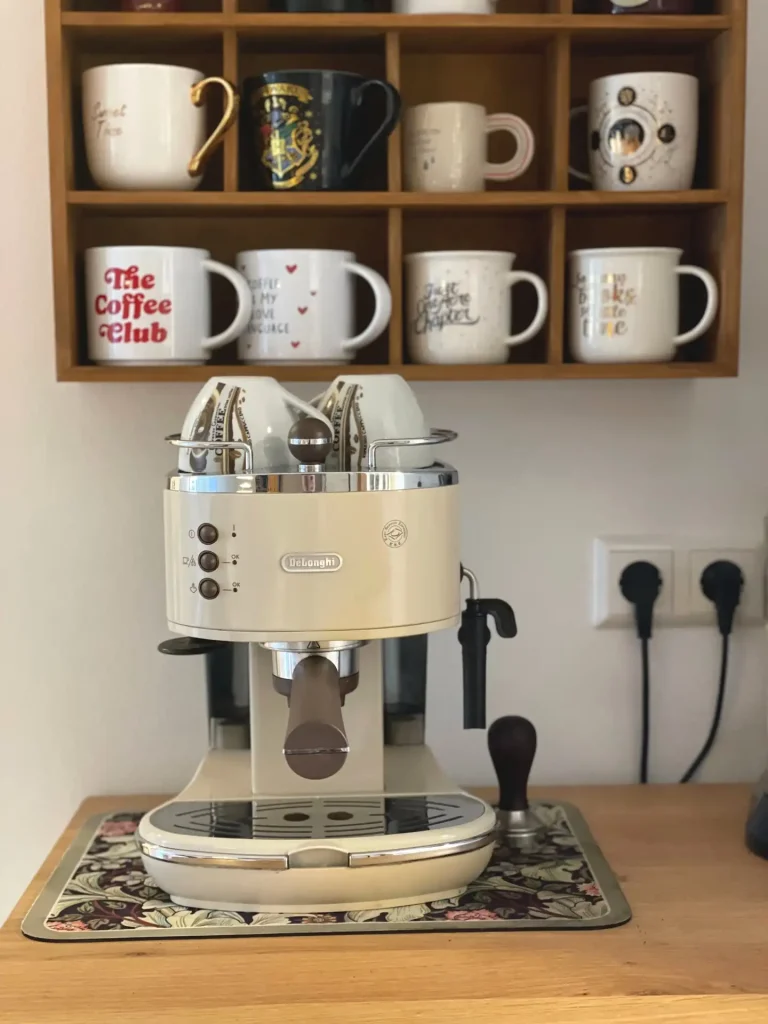
Use a wooden tray or a defined mat to clearly delineate the coffee station boundary on the counter. Store only coffee maker, mugs, coffee beans or pods, and sugar within this defined zone. Everything else that tends to accumulate around the coffee maker — mail, keys, random items — gets deliberately excluded from this carefully defined area.
| Coffee Station Organization | Container Choice |
|---|---|
| Coffee beans or grounds | Labeled airtight canister |
| Pods or capsules | Rotating pod holder |
| Sugar and sweeteners | Small labeled jar |
| Mugs | Hanging mug hooks under cabinet |
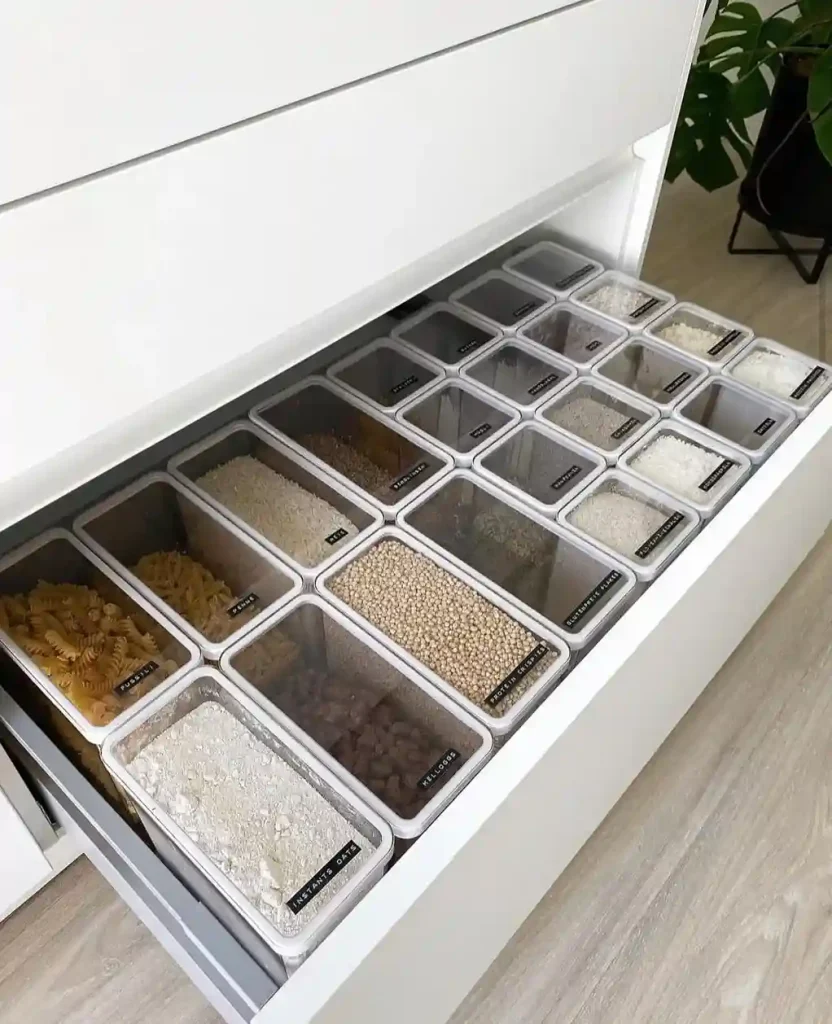
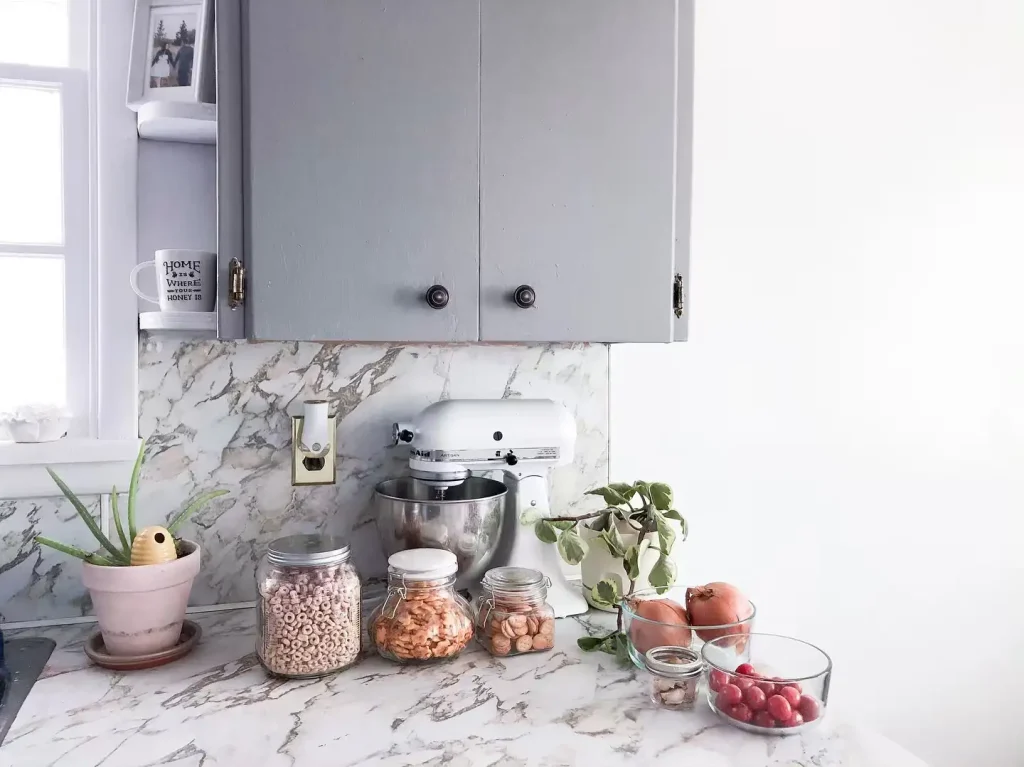
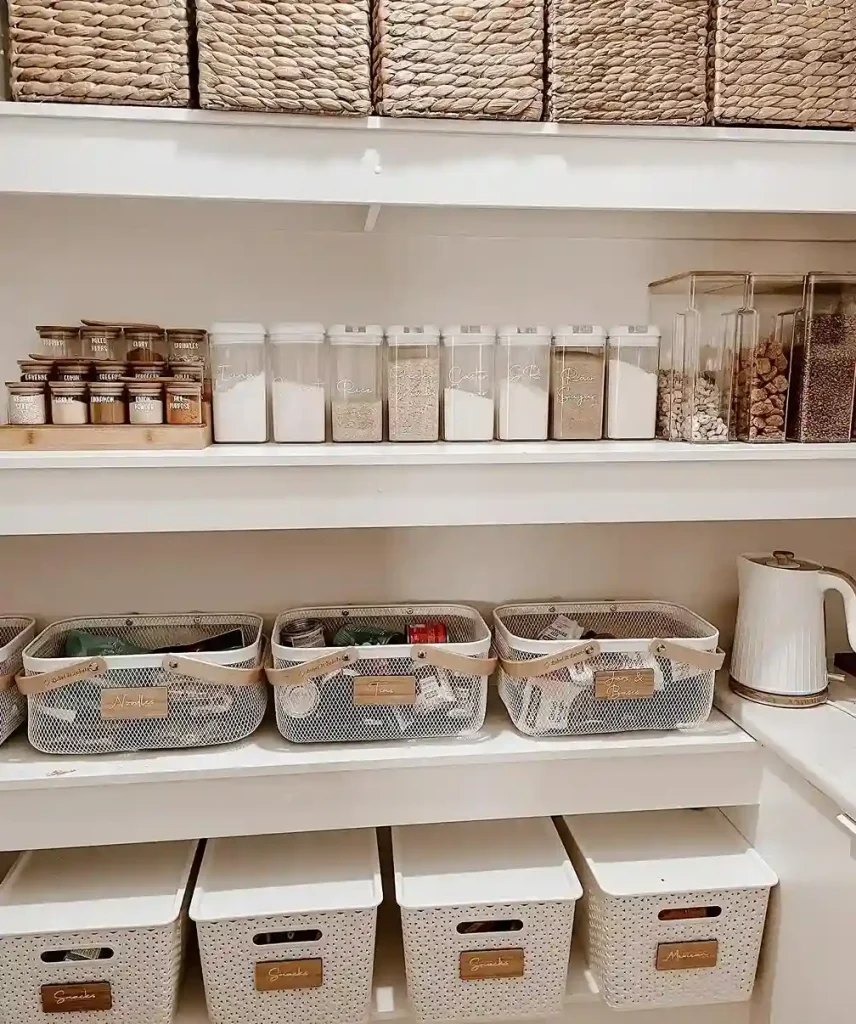
10. Use Clear Canisters for Counter-Top Pantry Items
Clear matching canisters for frequently used pantry items like flour, sugar, pasta, and coffee transform a cluttered collection of bags and boxes into a cohesive, beautiful counter display. The uniformity of matching containers creates visual order even when multiple items are grouped together on the counter. Clear glass or acrylic containers allow you to see contents and quantities at a glance without opening anything.
Choose canisters in one consistent style and material for maximum visual cohesion across your counter. Square canisters store more efficiently than round ones in the same counter footprint. Label every canister clearly even when contents seem obvious — consistency in labeling prevents the inevitable uncertainty that arises when the whole household uses the same storage system.
| Clear Canister Size | Best Counter Contents |
|---|---|
| Small (16–32 oz) | Coffee, tea, small snacks |
| Medium (1–2 qt) | Pasta, rice, granola |
| Large (1 gal) | Flour, sugar, oats |
| Extra large (2 gal) | Bulk dry goods |
11. Install Under-Cabinet Lighting to Enhance Function
Under-cabinet lighting dramatically improves kitchen counter functionality by illuminating the work surface directly and eliminating the shadows created by overhead cabinet overhang. Better lighting makes counter organization easier to maintain because you can actually see everything clearly. This practical upgrade also makes the kitchen counter area feel significantly more inviting and easier to use.
LED strip lights installed along the underside of upper cabinets provide efficient, long-lasting task lighting for the counter surface below. Choose warm white LED strips (2700K to 3000K) for the most flattering, kitchen-appropriate illumination. Motion-activated under-cabinet lights turn on automatically when you approach the counter, adding a premium, convenient touch.
| Under-Cabinet Light Type | Installation Method |
|---|---|
| LED strip lights | Adhesive or clip mounting |
| Puck lights | Plug-in or hardwired |
| Linear LED bar | Screw mounted underneath |
| Motion-sensor LED | Battery or plug-in |
12. Use a Countertop Compost Bin to Contain Waste
A countertop compost bin that sits on or beside the counter collects food scraps during cooking without requiring constant trips to an outdoor bin. A dedicated, attractive compost container on the counter is far preferable to scraps accumulating in a pile or being pushed to the edge of the prep space. This single addition makes the cooking process cleaner and more organized in real time.
Choose a compost bin with a tight-fitting lid to contain odors and a charcoal filter for the freshest counter experience. Empty the countertop compost bin every one to two days to prevent odor development. A stainless steel or ceramic compost bin in a size appropriate for your counter adds organization without visual clutter.
| Countertop Compost Bin Size | Best Household Size |
|---|---|
| 0.5 gallon | Single or couple, small kitchen |
| 1 gallon | Small family, average kitchen |
| 1.3 gallon | Medium family, busy kitchen |
| 2 gallon | Large family, heavy cooking |
13. Hang Utensils From a Rail System to Clear Drawers and Counters
A rail-mounted utensil system installed on the backsplash or wall beside the stove keeps frequently used cooking utensils organized and within reach without occupying any counter space. S-hooks, baskets, and cups attach to the rail and hold spatulas, ladles, whisks, tongs, and other cooking tools. This European-inspired kitchen organization approach is extremely practical and visually appealing.
Install a stainless steel rail or a wooden dowel rail at a height between the counter and the bottom of upper cabinets. Add a variety of hooks and accessories to accommodate different utensil sizes and types. The rail system keeps cooking tools visible and accessible, which actually encourages more organized cooking habits by making every tool findable in seconds.
| Rail System Accessory | Utensils It Holds |
|---|---|
| S-hooks (small) | Ladles, spoons, whisks |
| S-hooks (large) | Colanders, pots, strainers |
| Rail baskets | Spatulas, tongs, loose tools |
| Rail cups | Pens, scissors, small tools |
14. Implement a Paper and Mail Management System
One of the biggest non-food contributors to kitchen counter clutter is paper — mail, school notes, bills, coupons, and receipts. Without a system, paper accumulates relentlessly on any flat kitchen surface. A dedicated, contained paper management system eliminates this category of counter clutter permanently.
Install a small wall-mounted file organizer or a countertop file folder system specifically for incoming paper. Establish a clear rule that paper lives in the system immediately upon entering the kitchen rather than being set down temporarily on the counter. Process the paper file weekly so it never overflows its designated container.
| Paper Management System | Paper Category |
|---|---|
| Inbox slot | New, unprocessed mail |
| Action slot | Items requiring response |
| File slot | To be filed away |
| Recycle zone | Immediate junk mail disposal |
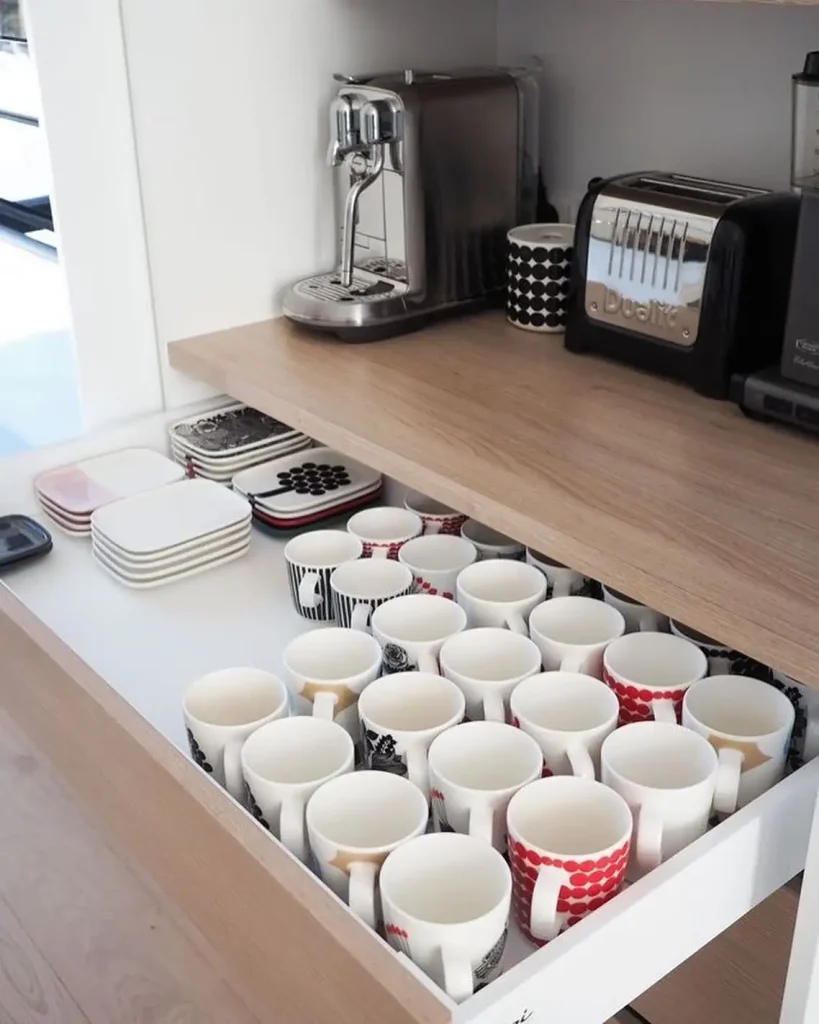
15. Use Drawer Organizers to Move Items Off the Counter
Many items currently living on kitchen counters belong in properly organized drawers. Spatulas in a cup beside the stove, measuring spoons scattered on the counter, and spice packets piled near the prep area all belong in well-organized drawers within easy reach. Proper drawer organization directly reduces counter clutter by creating accessible alternatives to counter storage.
Install bamboo or plastic adjustable drawer dividers in every kitchen drawer to create dedicated sections for specific item categories. A properly organized utensil drawer eliminates the need for counter-top utensil storage completely. An organized spice drawer replaces the counter spice rack for those who prefer a completely clear counter aesthetic.
| Drawer Organizer Type | Best Contents |
|---|---|
| Adjustable bamboo divider | Utensils, sorted by type |
| Cutlery tray organizer | Forks, knives, spoons |
| Spice drawer insert | Labeled spice jars, flat |
| Junk drawer organizer | Batteries, tools, miscellaneous |
16. Add a Fruit Bowl as an Organized Display Element
A beautiful fruit bowl on the kitchen counter serves a double purpose — it provides proper room-temperature storage for produce while adding a natural, organic decorative element. An intentionally chosen, properly scaled fruit bowl belongs on the counter as a functional display piece. A bowl that is too small creates clutter while one that is too large dominates the counter inappropriately.
Choose a bowl that is proportionate to your counter space — a large kitchen can accommodate a generous wooden bowl while a small kitchen is better served by a compact bowl or a tiered fruit stand. Keep only room-temperature appropriate produce in the counter bowl — apples, oranges, bananas, and avocados — while refrigerating everything else.
| Fruit Bowl Style | Counter Size Best Suited |
|---|---|
| Small ceramic bowl (8 inch) | Compact or small kitchen |
| Medium wood bowl (12 inch) | Standard kitchen counter |
| Large tiered fruit stand | Generous counter space |
| Wire hanging fruit basket | Space-saving, off-counter option |
17. Create a Charging Station Away From the Kitchen Counter
Phones, tablets, and chargers accumulate on kitchen counters because the kitchen is the household gathering point. Creating a dedicated charging station in another location — a hallway, a living room, or a dedicated household command center — removes this category of clutter from the kitchen counter permanently. The kitchen counter is genuinely not the right place for device charging.
Establish a household rule that devices charge in the designated charging station rather than on the kitchen counter. A small charging hub with individual device slots, housed in a basket or cabinet drawer in another room, serves the device charging function without creating kitchen counter clutter. This change can immediately reclaim several square feet of counter space.
18. Install Hooks on the Inside of Cabinet Doors
The inside of kitchen cabinet doors is one of the most underutilized storage surfaces in any kitchen. Small hooks, pocket organizers, and mounted racks on the inside of cabinet doors move items off the counter and into contained, hidden storage. This approach adds storage without changing anything visible in the kitchen.
Install over-door hooks or adhesive hooks on the inside of the cabinet directly above or beside where an item is currently sitting on the counter. Measuring spoons, pot lids, plastic wrap boxes, and small tools all store effectively on the inside of cabinet doors. This simple hack alone can move dozens of small items off kitchen counters.
| Cabinet Door Inside Storage | Items to Store |
|---|---|
| Over-door hooks | Measuring spoons, small tools |
| Wire door rack | Spice jars, small containers |
| Mounted wrap holder | Foil, plastic wrap, parchment |
| Adhesive pocket organizer | Small packets, clips, bags |
19. Declutter the Kitchen Counter Weekly
Kitchen counter organization is not a one-time project but an ongoing maintenance habit. Without a regular reset, counters accumulate clutter progressively until the organizational system is overwhelmed and the problem returns to its original state. A brief weekly counter reset prevents this gradual re-cluttering from ever reaching a critical level.
Schedule five minutes every week specifically for returning everything on the counter to its designated home. This maintenance session addresses the small drift in organization that occurs naturally during a busy week of cooking, grocery shopping, and daily household activity. Five consistent weekly minutes preserves the results of hours of initial counter organization effort.
| Weekly Counter Reset Task | Time Required |
|---|---|
| Return misplaced items to homes | 2–3 minutes |
| Wipe down all counter surfaces | 1–2 minutes |
| Check and empty countertop compost | 30 seconds |
| Review what accumulated that week | 1 minute |
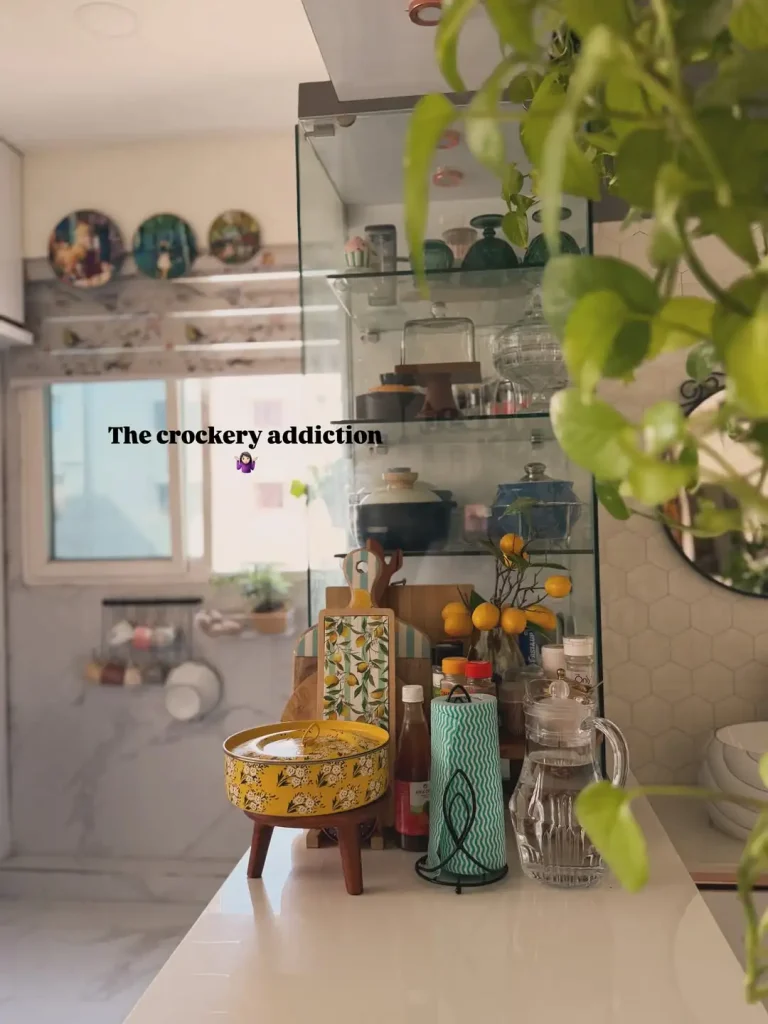
20. Use a Tray to Corral Groups of Related Items
A tray is one of the simplest, most effective, and most visually powerful kitchen counter organization tools. Placing a tray on the counter and grouping related items within it immediately creates visual order from what previously looked like scattered clutter. The tray creates a defined boundary that prevents items from spreading across the counter surface.
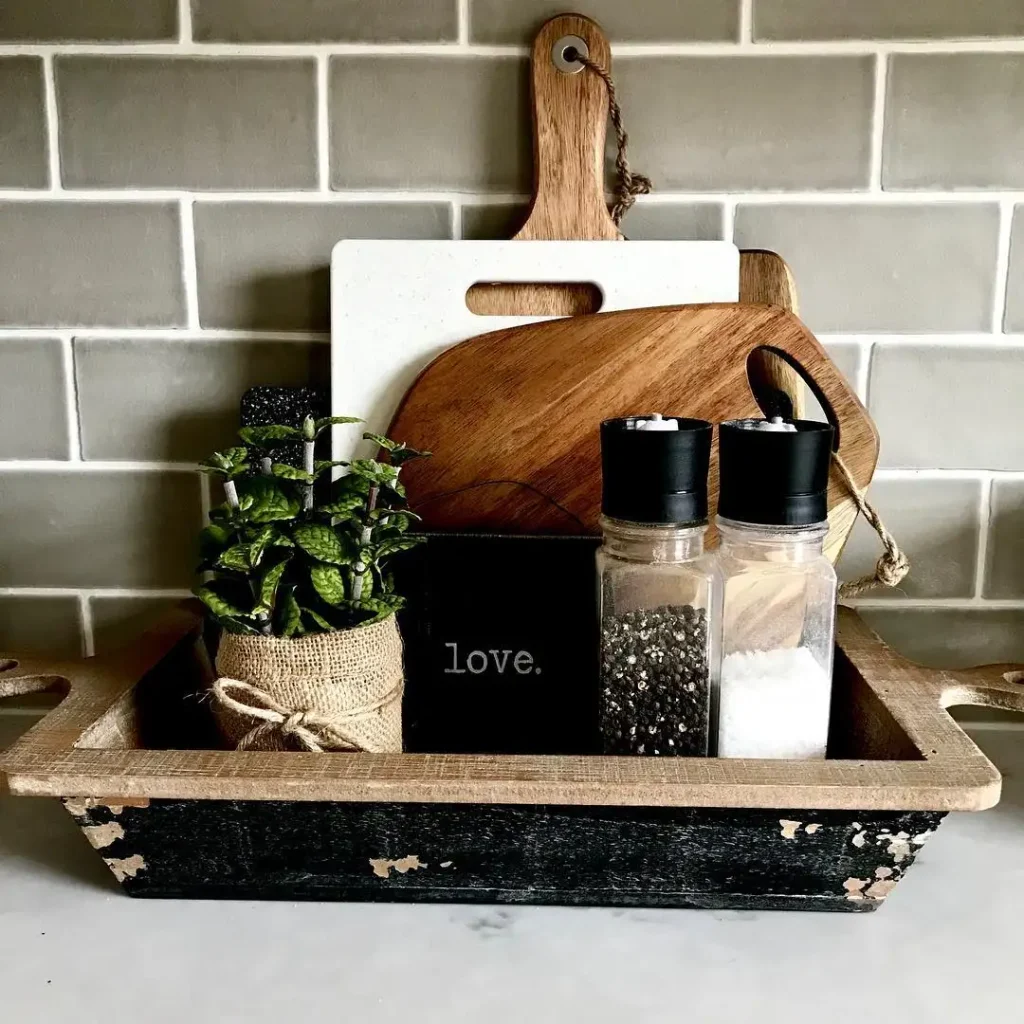
Use a wooden tray, a marble tray, or a woven tray beside the stove to corral oils, vinegar, and frequently used condiments. A tray at the coffee station keeps coffee supplies organized and contained. A small tray beside the sink holds dish soap, hand soap, and a sponge holder as a neat, contained unit rather than scattered individual items.
| Tray Counter Application | Items to Corral Inside |
|---|---|
| Cooking tray beside stove | Oils, vinegar, salt, pepper |
| Coffee station tray | Coffee maker, beans, sugar |
| Sink area tray | Dish soap, hand soap, sponge |
| Breakfast zone tray | Toaster, jam, butter dish |
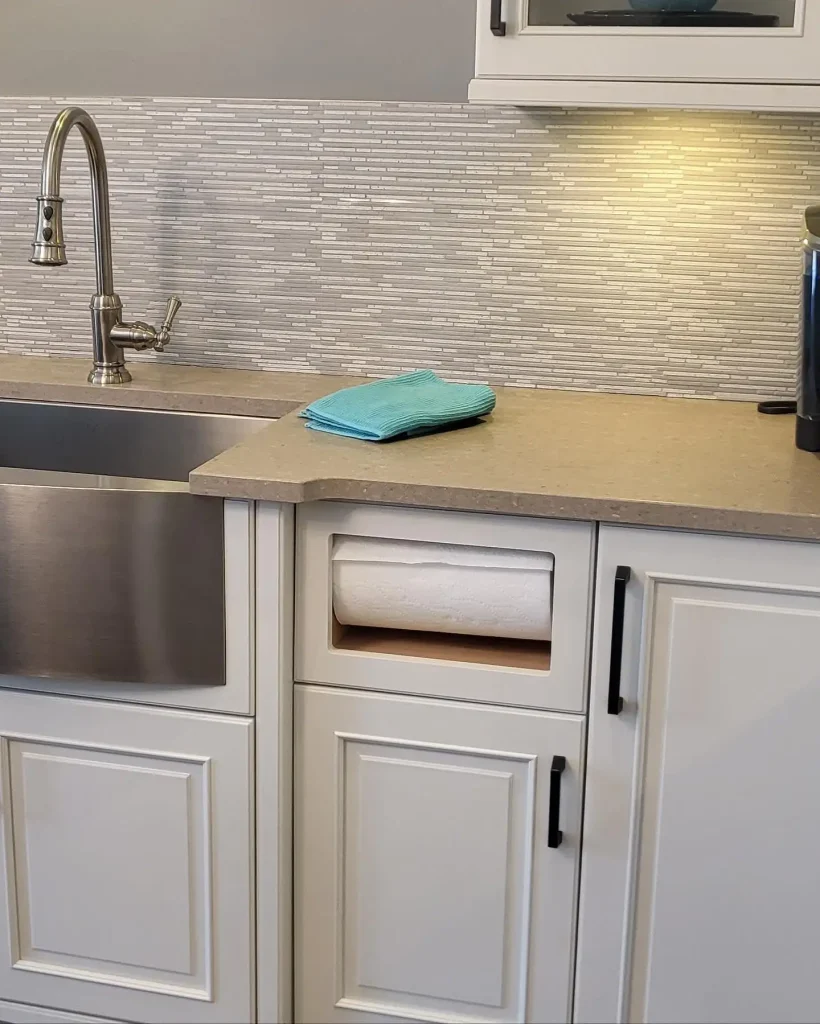
21. Mount a Paper Towel Holder Under the Cabinet
A paper towel roll sitting on the counter occupies a surprisingly large amount of valuable counter real estate. An under-cabinet paper towel holder mounts to the underside of upper cabinets and keeps the roll accessible at exactly the right height for daily use without consuming any counter space. This simple hardware addition is one of the fastest counter space recovery hacks available.
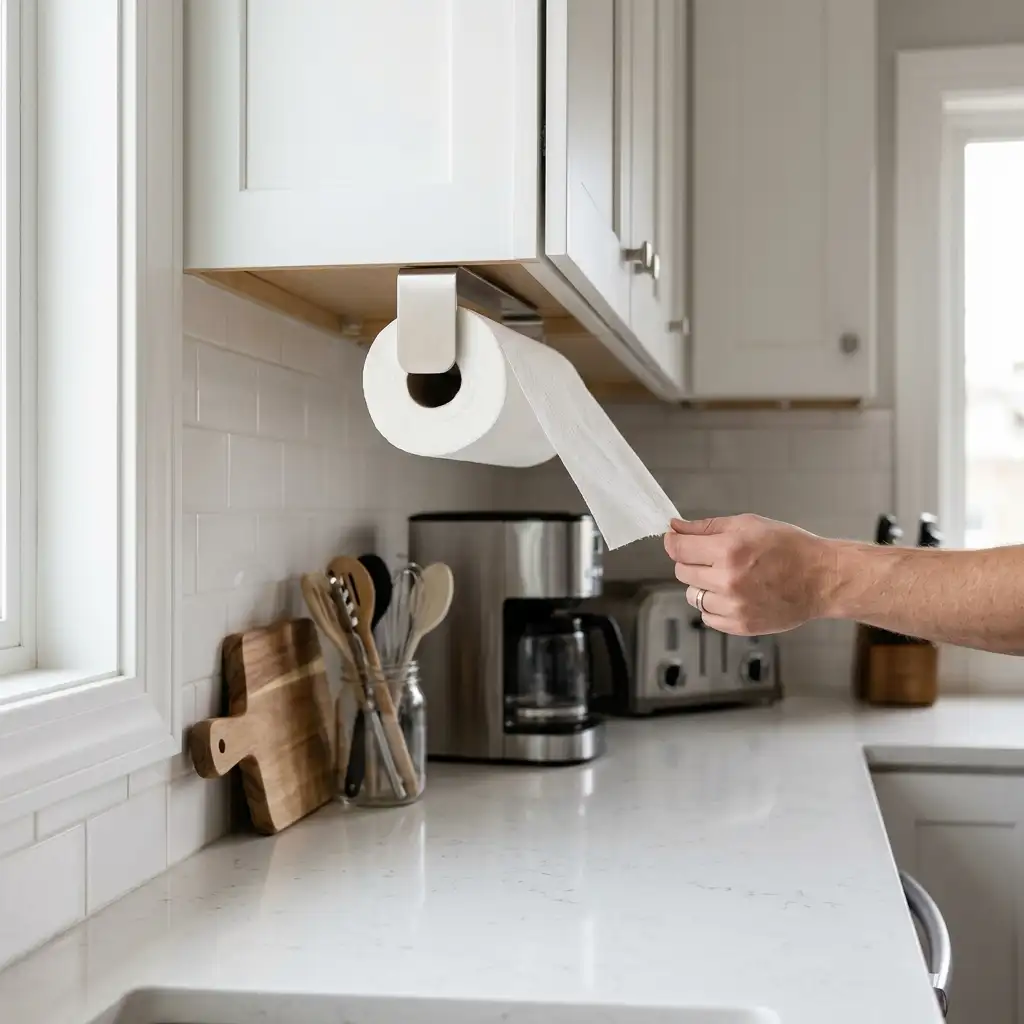
Choose an under-cabinet paper towel holder with a spring-loaded arm that prevents the roll from unraveling when bumped during cooking. Position it beside or slightly in front of the sink area where paper towels are most frequently needed. A quality under-cabinet mount also keeps the paper towel cleaner than a counter-mounted roll that sits near cooking splatter.
22. Invest in Proper Small Appliance Storage
The most common kitchen counter organization challenge in most households is small appliance accumulation. Toasters, coffee makers, blenders, air fryers, and instant pots collectively consume enormous amounts of counter space. Smart small appliance storage solutions directly address the single biggest contributor to kitchen counter clutter.
Store appliances used less than daily in deep cabinets, on pantry shelves, or in dedicated appliance storage areas. Install a pull-out shelf in a deep base cabinet for heavy appliances like stand mixers that are difficult to lift repeatedly. A dedicated appliance cabinet with easy access doors keeps the counter clear while maintaining reasonable accessibility for weekly-use appliances.
| Appliance Storage Solution | Best For |
|---|---|
| Pull-out cabinet shelf | Heavy stand mixer, blender |
| Deep base cabinet | Air fryer, instant pot |
| Pantry shelf | Bread maker, waffle iron |
| Appliance garage | Daily use toaster, coffee grinder |
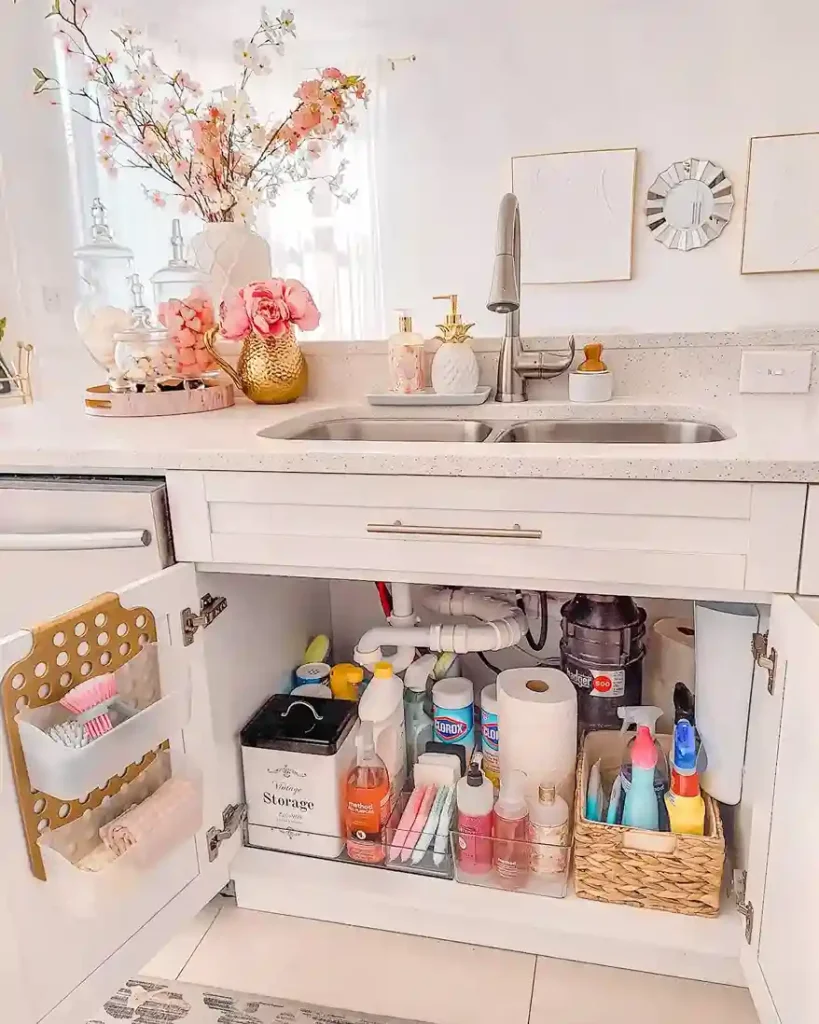
23. Organize the Area Around the Kitchen Sink Specifically
The kitchen sink area is one of the most cluttered zones on any counter and also the most visible from most vantage points in the kitchen. A dedicated organization approach for the sink area creates an immediate improvement in the overall appearance and functionality of the entire kitchen counter space. This zone deserves specific attention rather than being treated as overflow space.
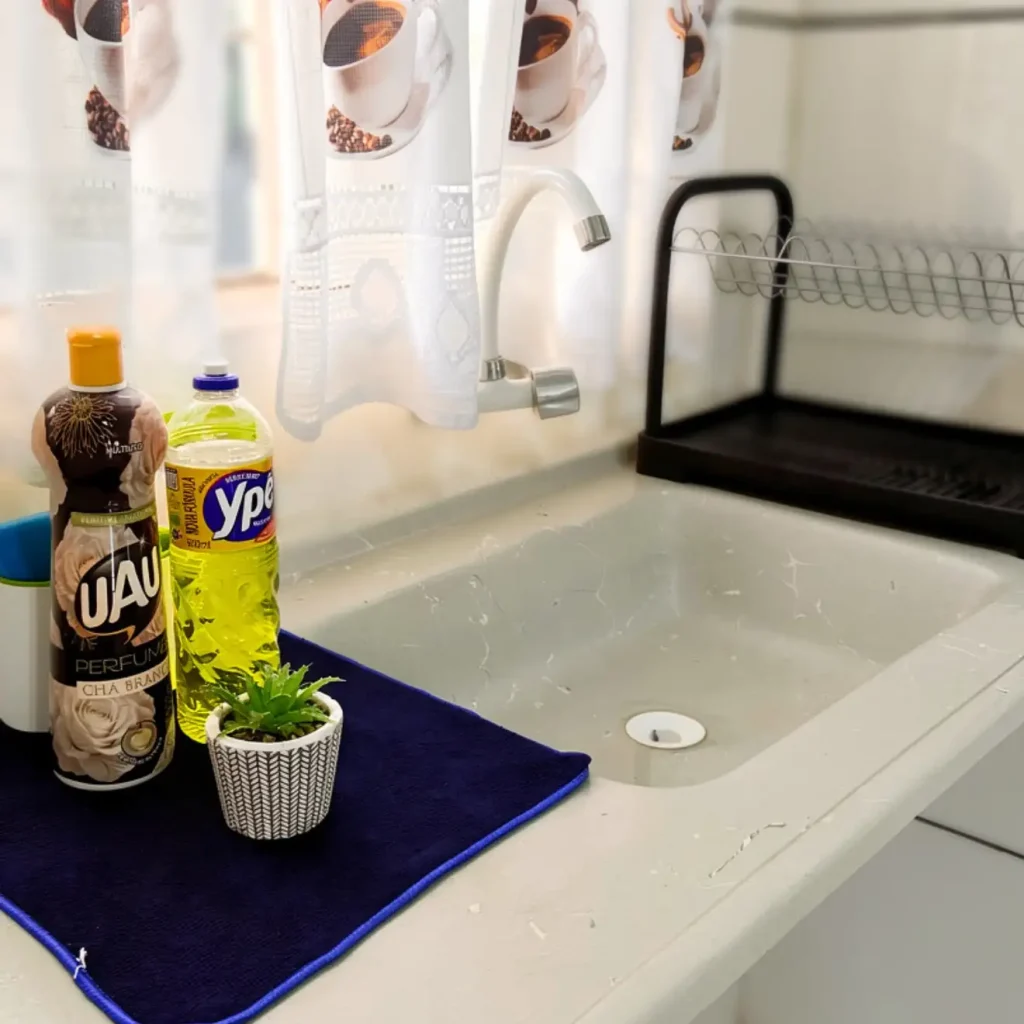
Mount a caddy or small organizer on the inside of the cabinet door below the sink for sponges, brushes, and cleaning supplies that would otherwise live on the counter. Install a proper soap dispenser pump in place of multiple soap bottles. Use a small, attractive dish beside the sink for rings and jewelry rather than a pile beside the faucet.
| Sink Area Organization | Solution |
|---|---|
| Sponge storage | Wall-mounted or hanging holder |
| Dish soap | Built-in pump or single dispenser |
| Cleaning brushes | Small caddy inside cabinet door |
| Ring and jewelry holder | Small ceramic dish, defined spot |
24. Add a Cookbook Stand or Digital Recipe Holder
A cookbook stand or dedicated tablet holder on the counter provides a proper place for recipes that prevents them from being propped awkwardly against the backsplash, laid flat on the cutting board, or abandoned on the counter creating paper clutter. A proper recipe holder is a small addition that significantly improves cooking organization and workflow.
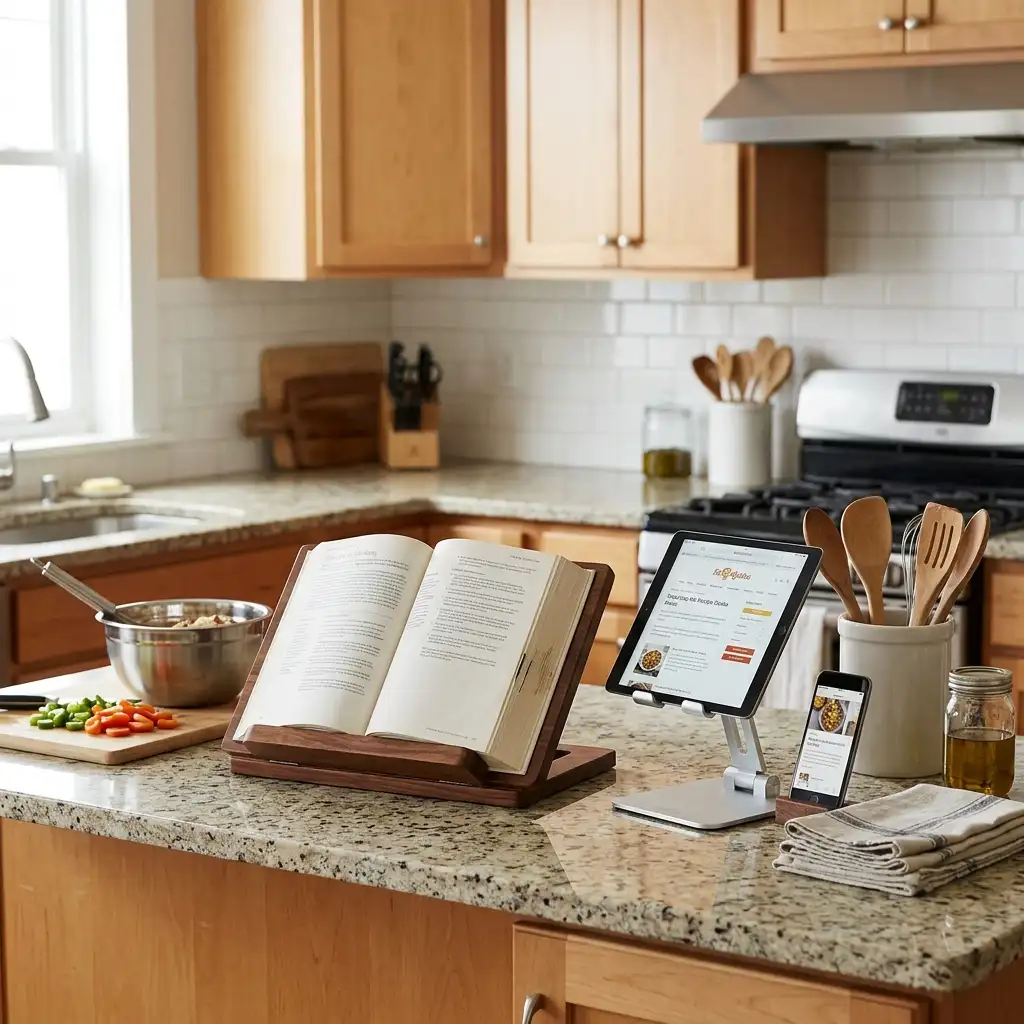
Choose a cookbook stand with a lip deep enough to hold a large cookbook securely during active cooking. A tablet holder that keeps a phone or tablet screen visible while hands are busy cooking serves the same function for digital recipe users. Position the recipe holder in a fixed location within the cooking zone so it has a permanent, defined home on the counter.
25. Use Command Strips and Hooks for Counter-Adjacent Wall Storage
The wall space immediately above kitchen counters and adjacent to them is prime real estate for storage solutions that reduce counter clutter. Command strips and adhesive hooks allow tool-free installation of organizers, hooks, and storage accessories without permanent wall damage. This approach is especially valuable for renters or those who do not want to commit to permanent modifications.
Install adhesive hooks for hanging oven mitts, pot holders, and small tools on the wall beside the stove. Mount a small adhesive wire basket on the backsplash for frequently accessed small items. A command strip-mounted key hook beside the kitchen entrance prevents keys from ending up on the counter rather than having a proper home.
| Command Strip Wall Storage | Items to Organize |
|---|---|
| Adhesive hooks | Oven mitts, pot holders |
| Wire baskets | Small tools, brushes |
| Key hooks | Keys kept off counter |
| Small shelf | Frequently used small items |
26. Organize Your Counter-Top Knife and Tool Storage
The way you store knives and cooking tools has a direct impact on how much counter space they consume. A large wooden knife block is one of the most space-inefficient kitchen counter storage methods. Replacing it with a more space-efficient alternative immediately frees significant counter area for cooking and food preparation.
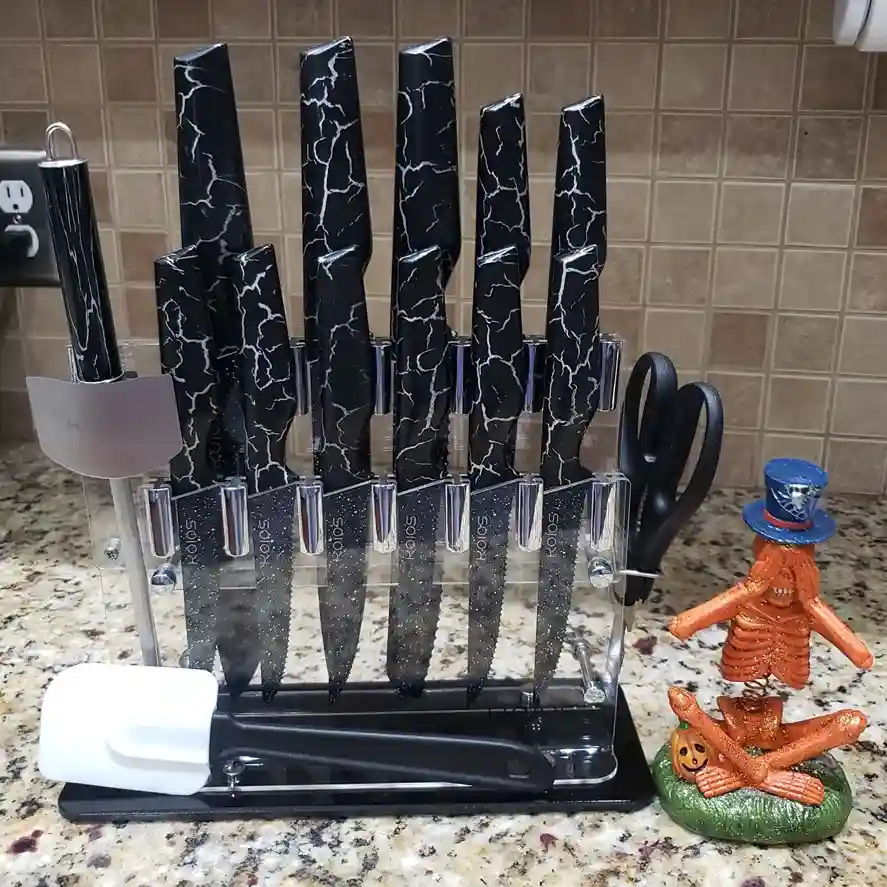
A compact in-drawer knife organizer, a wall-mounted magnetic strip, or a small slim edge-mounted knife block all store the same number of knives in dramatically less counter space than a traditional freestanding knife block. Similarly, a utensil crock that holds tools vertically takes less counter space than tools sprawled flat beside the stove.
| Knife Storage Alternative | Counter Space Comparison |
|---|---|
| Traditional knife block | 6×9 inches footprint |
| Compact slim knife block | 2×8 inches footprint |
| Magnetic wall strip | Zero counter footprint |
| In-drawer knife organizer | Zero counter footprint |
27. Create a Breakfast Station to Contain Morning Chaos
Morning rush is one of the primary times kitchen counter clutter is created and accumulated. A dedicated breakfast station that contains everything needed for morning meals in one defined counter zone prevents the daily scatter of cereal boxes, toasters, and breakfast supplies across the entire counter. This zone thinking applied to the most hectic part of the day creates significant organizational improvement.
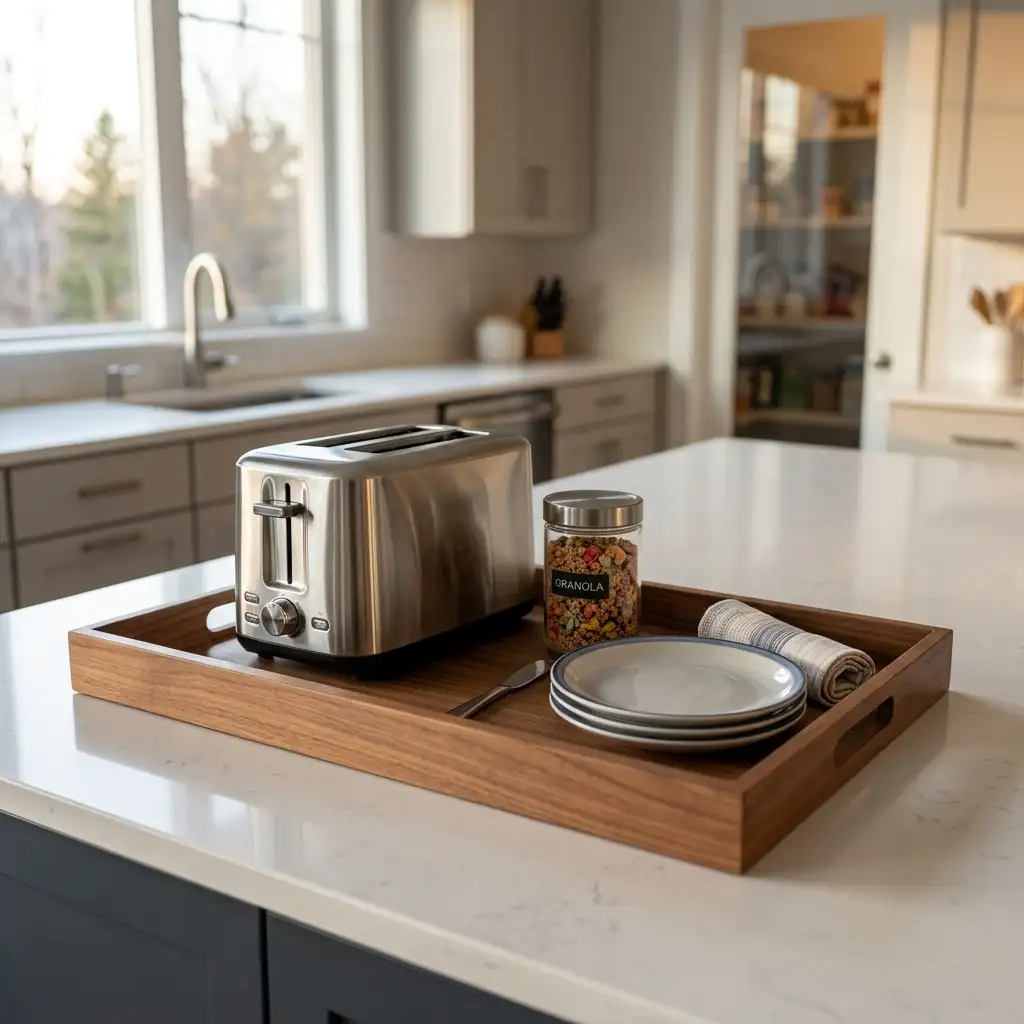
Define the breakfast station clearly with a tray or a designated counter section. Keep only the toaster, a small canister of breakfast items, and one or two plates within this zone. Everything else, including cereal boxes and bread bags, lives in the pantry and comes out for use before returning immediately after breakfast.
| Breakfast Station Element | Organization Approach |
|---|---|
| Toaster | Permanent station item |
| Bread | Bread box within station or pantry |
| Cereal | Pantry, not permanent counter |
| Mugs | Hanging hooks above station |
28. Keep Cleaning Supplies Off the Counter and Properly Stored
Cleaning sprays, sponges, and dish soap scattered across the counter create both clutter and a hygiene concern in the food preparation area. A proper system for cleaning supply storage keeps these items accessible but contained and separated from the food preparation environment. This is both an organizational and a food safety improvement.
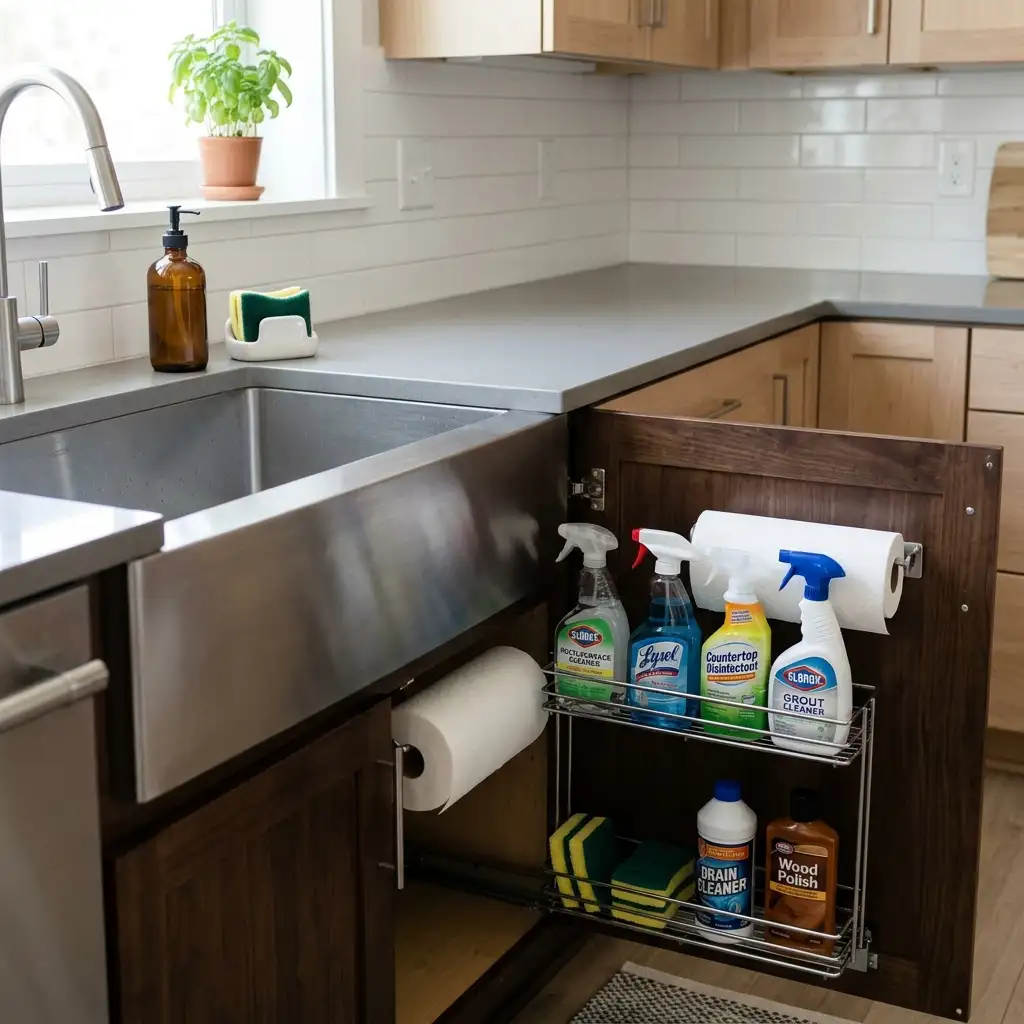
Store all cleaning sprays and supplies under the sink rather than on the counter. Install an under-sink organizer to make these items easily accessible without cluttering the cabinet floor. Keep only the absolute minimum — one dish soap dispenser and one small sponge holder — visible on the counter beside the sink.
29. Use a Vertical File Organizer for Flat Kitchen Items
Baking sheets, cutting boards, and pot lids are awkward, space-inefficient items to store on kitchen counters. A vertical file-style organizer stores these flat items standing upright in minimal counter space. This approach is far more efficient than stacking them flat and dramatically easier to use since each item is individually accessible without moving the others.
Place a vertical file organizer in a corner of the counter or on a lower shelf for cutting boards, baking sheets, and cooling racks. Items stored vertically take up a fraction of the counter footprint compared to the same items stacked horizontally. Label or organize the vertical file by frequency of use with most-used items at the front for easiest access.
| Vertical File Organizer Contents | Space Compared to Flat Storage |
|---|---|
| Three cutting boards | 70% less counter space used |
| Four baking sheets | 80% less counter space used |
| Pot lids in a row | 75% less counter space used |
| Cooling racks | 80% less counter space used |
30. Style the Counter With Intention After Organizing
Organized kitchen counters are not just about removing clutter. They are also about deliberately styling what remains so that the functional items on the counter look intentional and beautiful rather than merely present. Thoughtful styling of the organized counter makes the discipline of maintaining organization feel worthwhile and genuinely rewarding.
Group counter items into cohesive visual vignettes rather than leaving them scattered individually across the surface. Use consistent materials and finishes for items that remain on the counter — matching canisters, coordinated small appliances, and unified accessory finishes create visual harmony. Add one genuinely decorative element like a small plant or a beautiful bowl to soften the functional character of the organized counter.
| Counter Styling Principle | Application |
|---|---|
| Group related items together | Coffee station, prep zone |
| Consistent materials and finishes | Matching canisters, coordinated |
| Vary heights for visual interest | Tall canister, low bowl, medium plant |
| One decorative element | Small plant or beautiful bowl |
31. Reassess Your Counter Organization Seasonally
Kitchen needs change with the seasons, with life events, and with evolving cooking habits. A counter organization system that worked perfectly in winter may feel wrong in summer when fresh produce is abundant and cold drinks are constant. Seasonal reassessment keeps your counter organization genuinely aligned with how your kitchen is actually being used.
Every three to four months, spend fifteen to twenty minutes reassessing whether your current counter organization is working. Add summer-specific items like a lemonade pitcher or a fruit bowl during warmer months. Make space for holiday baking equipment during festive seasons. Remove items that have naturally migrated to the counter without genuine justification since the last assessment.
| Seasonal Counter Adjustment | Season |
|---|---|
| Add: Fruit bowl, cold drink station | Summer |
| Add: Baking station, spice display | Fall and holiday |
| Add: Hot beverage station, hearty prep | Winter |
| Add: Fresh herb pots, lighter prep | Spring |
32. Maintain Counter Organization With One Golden Rule
After investing time and effort into organizing your kitchen counters, maintaining that organization comes down to one powerful daily habit. Every item that lands on the counter must be either put away immediately after use or given a permanent, defined home on the counter. There is no temporary middle ground — items either have a defined counter home or they do not belong there at all.
This one rule, consistently applied by every member of the household, preserves the organized counter environment indefinitely without requiring repeated major organization sessions. Teaching this habit to children and household members early makes it automatic over time. An organized kitchen counter is not a one-time achievement but a daily practice that becomes effortless with consistent repetition.
| One Golden Rule Behavior | Habit Result |
|---|---|
| Return item immediately after use | Counter stays clear always |
| Give every item a defined home | Nothing gets abandoned on counter |
| No temporary counter placements | Clutter never accumulates |
| Household-wide consistency | System works for everyone |
Frequently Asked Questions
What should I keep on my kitchen counter?
Only items used every single day earn counter space. This typically includes a coffee maker, a knife block or magnetic strip, a dish soap dispenser, a fruit bowl, and one or two appliances used daily. Everything else — regardless of how convenient it seems — belongs in a cabinet, drawer, or pantry until it is actively needed.
How do I keep my kitchen counter clean and organized long-term?
The most effective long-term strategy is the daily habit of returning every item to its designated home immediately after use rather than setting it down temporarily. A five-minute weekly reset catches any organizational drift before it becomes overwhelming. Apply the one-in one-out rule for any new kitchen items to prevent gradual accumulation over time.
How do I organize a small kitchen counter with limited space?
Maximize vertical space with tiered organizers, wall-mounted magnetic knife strips, and under-cabinet storage. Apply the daily-use-only rule even more strictly in a small kitchen. Use every available wall surface — pegboards, rail systems, hooks — to move items off the counter completely. Choose compact, multi-function appliances over multiple single-purpose ones.
What is the best way to organize kitchen counter appliances?
Store all appliances used less than daily in cabinets or pantry storage. Use an appliance garage for frequently used small appliances that you want accessible but hidden. Apply the rule that only the coffee maker and possibly a toaster belong on most kitchen counters permanently — every other appliance earns its counter spot only if used every single day.
How do I organize my kitchen counter without spending a lot of money?
Start with the free organization methods — the purge, the zone assignment, and the daily-use rule — before spending anything. Use what you already have, including trays, bowls, and jars, as organizers. Adhesive hooks, a tension rod under the sink, and a pegboard are extremely affordable upgrades. The most impactful changes to kitchen counter organization are behavioral habits rather than purchased products.
Conclusion
Organized kitchen counters are genuinely transformative for daily life in your home. They reduce cooking stress, speed up meal preparation, and make the kitchen a room you actually enjoy spending time in rather than one you tolerate. The 32 strategies in this guide give you everything you need to create the clear, functional, beautiful kitchen counter you have been imagining.
Start with the purge and the daily-use rule before investing in any organizational products. These foundational behavioral changes deliver the biggest improvements and cost absolutely nothing. Build the physical organization systems around these habits and maintain them with a brief weekly reset. Your kitchen counter will become the organized, functional workspace it was always meant to be.