So, you’re finishing your basement. You’ve picked the perfect wall color, debated flooring options, and planned the layout. But what about the ceiling? It’s often an afterthought, yet how you handle your basement ceiling can make or break the entire room.
Basements present unique challenges: low clearance, exposed pipes, ductwork, and electrical wires. But with a little creativity, these challenges can become opportunities for stunning design. The right ceiling can add height, enhance your style, and provide crucial access to utilities. For a broader look at overhead design, you can explore our Guide to Ceiling Lights, which is crucial for any basement plan.
Let’s explore twelve of the most popular and effective basement ceiling ideas to help you create a space that’s both beautiful and functional.
1. The Classic: Drywall Ceiling
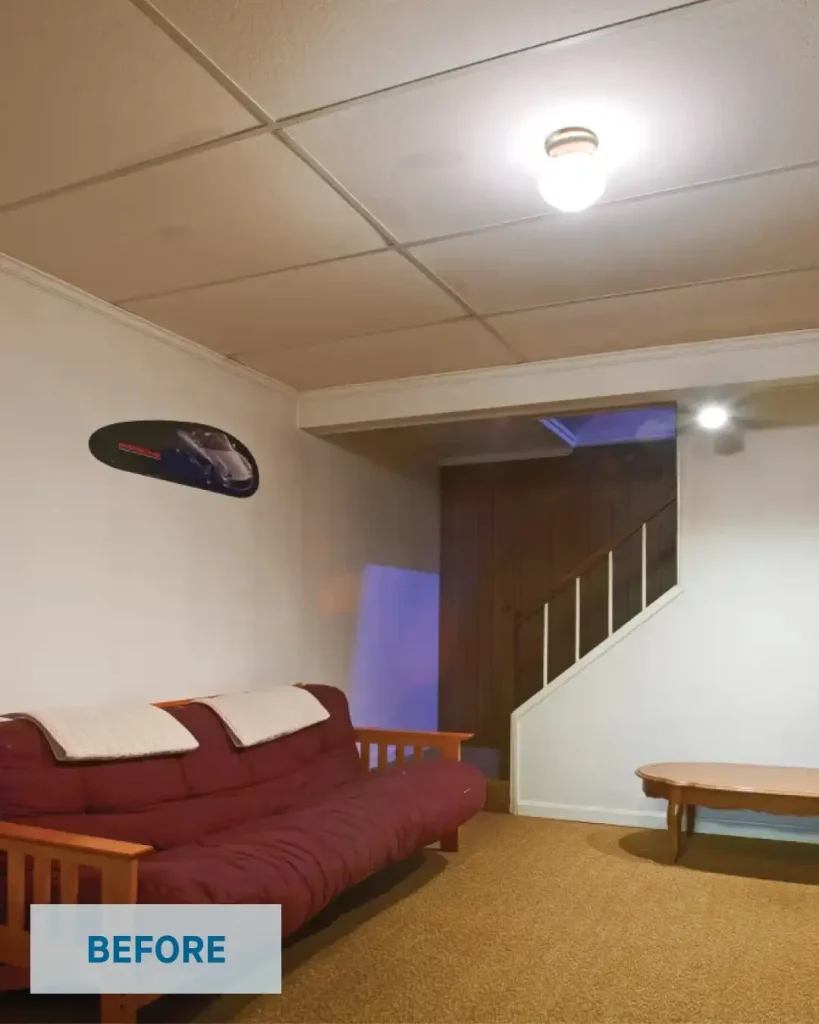
Best for: A clean, polished look that matches the rest of your home.
A drywall ceiling gives your basement a seamless, finished-room feel. It creates a smooth canvas for your lighting and makes the space feel like a natural extension of your house.
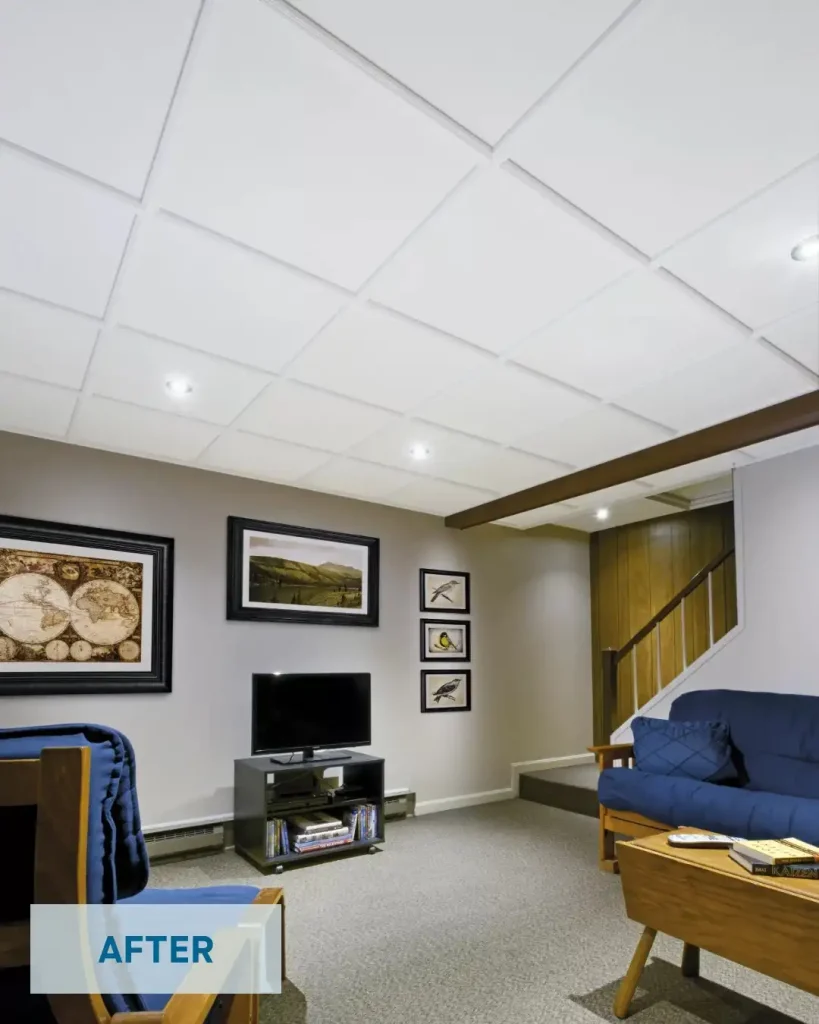
Credits: @armstrongceilings
- Pros: Clean and professional appearance; excellent for recessed lighting; provides a fire barrier.
- Cons: Expensive and time-consuming to install; difficult to access utilities for repairs or leaks.
- Pro Tip: Install an access panel near key shut-off valves or plumbing junctions to avoid having to cut into the drywall in an emergency. For lighting that sits flush and saves space, consider these Flush Mount Ceiling Light Ideas.
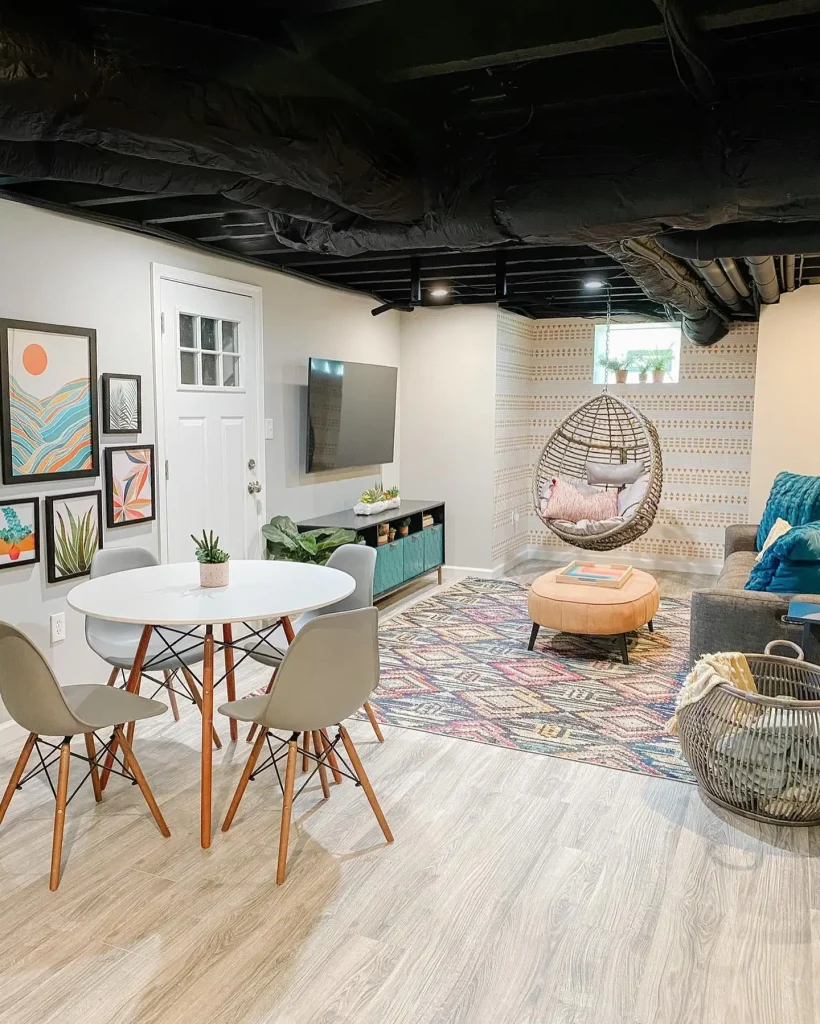
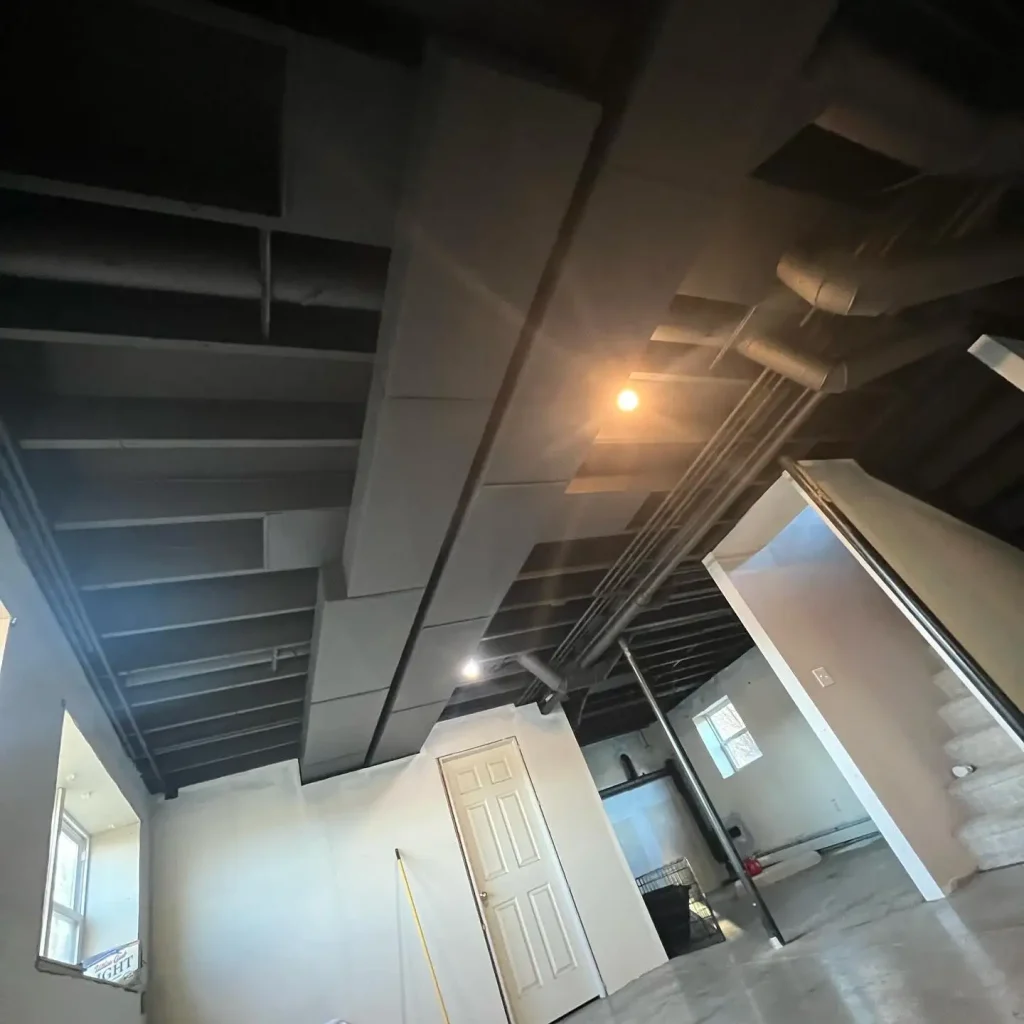
2. The Industrial Favorite: Exposed Ceiling
Best for: Modern, loft-style spaces and maximizing headroom.
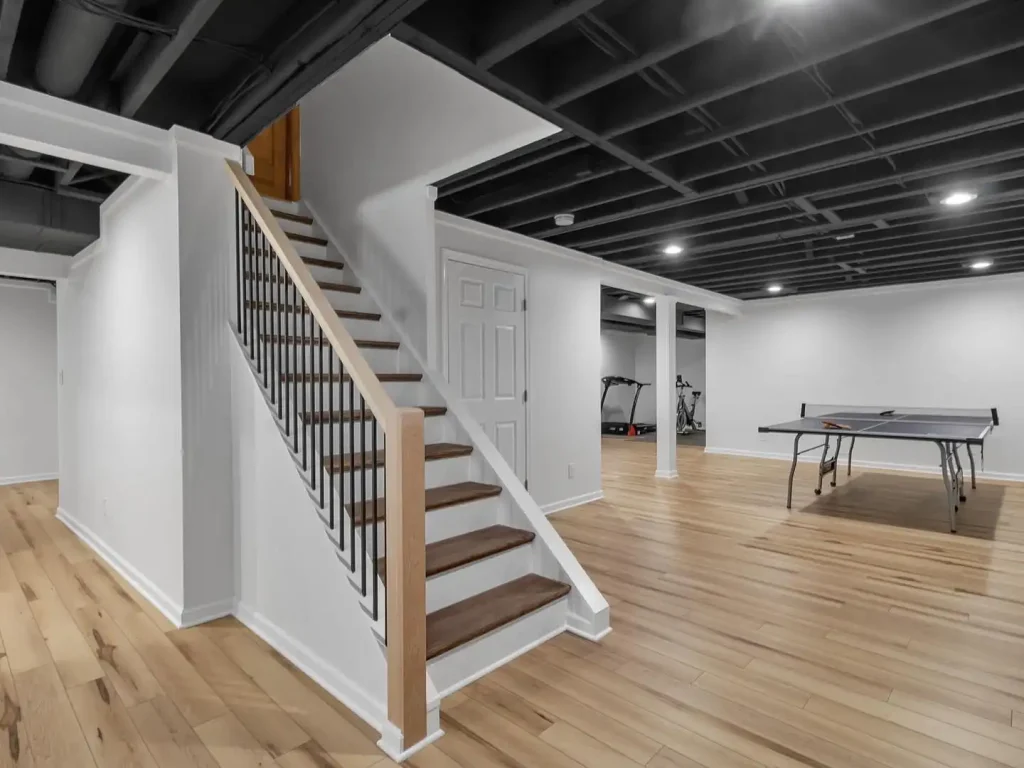
Credits: @buffalorenovators
Turn necessity into a style statement. By painting everything above your head—joists, ductwork, pipes, and wires—a uniform dark color (like matte black, charcoal, or navy), you create an intentional, industrial look that draws the eye upward, making the space feel larger. View more ideas on exposed basement ceiling.
- Pros: Saves the most headroom; easy access to all utilities; relatively low cost.
- Cons: Can be noisy (sound travels easily); requires meticulous cleaning and painting for a polished look.
- Pro Tip: Use a flat, dark paint to help the “clutter” recede. Then, use strategic track lighting or pendant lights to highlight specific areas below.
3. The Go-To Solution: Drop Ceiling (Acoustic Tiles)
Best for: Home theaters, playrooms, and anyone who needs easy utility access.
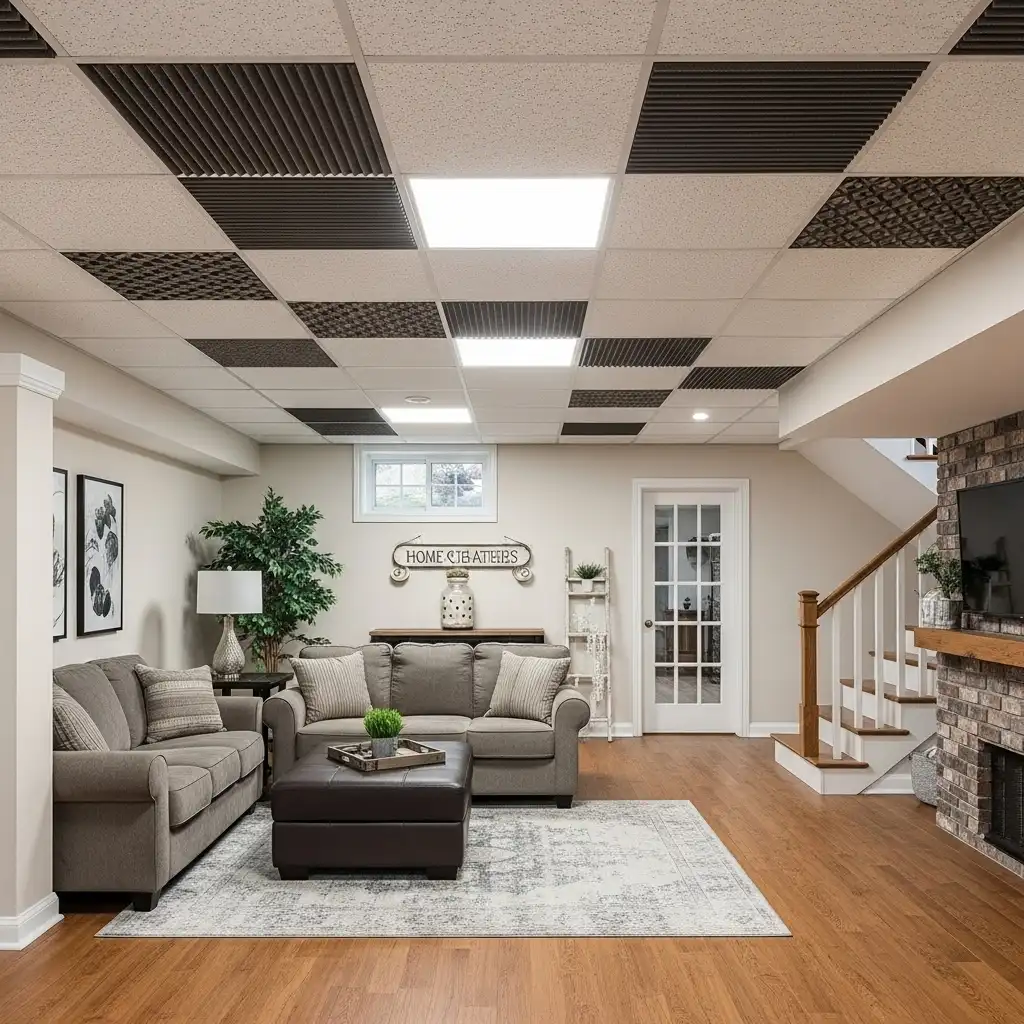
The drop ceiling has come a long way from the boring, white commercial tiles of the past. Modern options include stylish, slim-line grids and tiles in various textures, colors, and even faux tin or wood looks. Read our guide on drop ceiling for more ideas.
- Pros: Unbeatable utility access—just lift a tile; excellent sound absorption; hides imperfections easily.
- Cons: Reduces headroom the most (by several inches); can feel dated if using basic tiles.
- Pro Tip: Opt for 2’x2′ lay-in tiles instead of the larger 2’x4′ for a more modern, residential grid pattern.
4. The Rustic Charm: Shiplap or Wood Planks
Best for: Farmhouse, coastal, or rustic styles; adding warmth and texture.
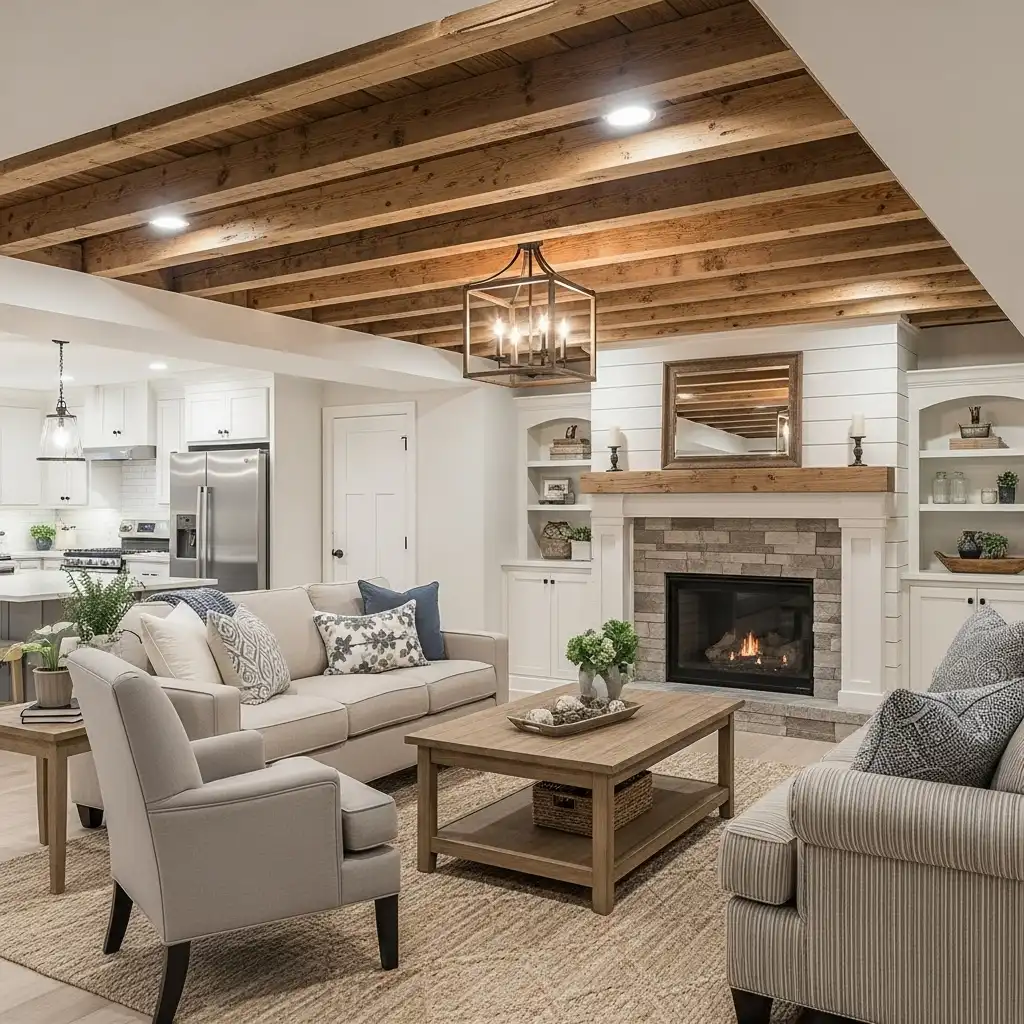
Bring cozy, architectural detail overhead with wood. Shiplap, beadboard, or reclaimed wood planks installed between the joists create a warm, inviting ceiling that feels like a custom feature. For a deep dive, check out our Shiplap Ceiling: The Ultimate Guide. You can also explore other wood styles like Tongue and Groove Ceiling designs or get inspired by these Wood Plank Ceiling Ideas.
- Pros: Adds immense visual warmth and character; can be painted or stained to match any decor.
- Cons: Cost can be high; installation is more labor-intensive than other options.
- Pro Tip: For a budget-friendly approach, use plywood cut into strips and finished with paint to achieve the shiplap look for less.
5. The Modern Minimalist: Suspended Fabric
Best for: A soft, modern look on a tight budget.
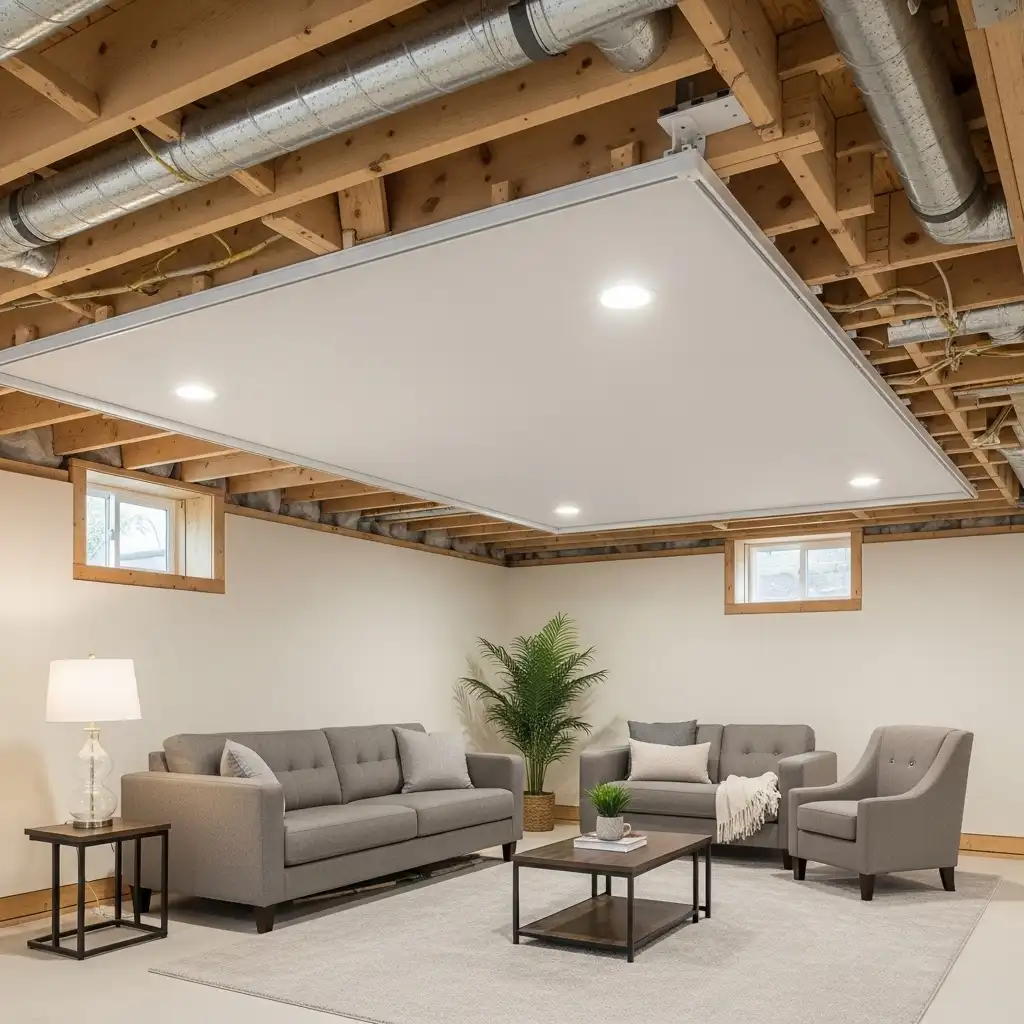
This innovative solution involves stretching a lightweight fabric across a specialized track system installed around the room’s perimeter. It creates a smooth, seamless ceiling that can hide a multitude of sins.
- Pros: Creates a very clean, modern appearance; relatively inexpensive; quick installation.
- Cons: Not durable (can be punctured); offers no sound dampening for the space above it; limited access to utilities.
- Pro Tip: This is a great DIY-friendly option for creating a sleek look in a home office or media room without major construction.
6. The Textured Look: Tin Tiles
Best for: Adding vintage glamour and dramatic flair.
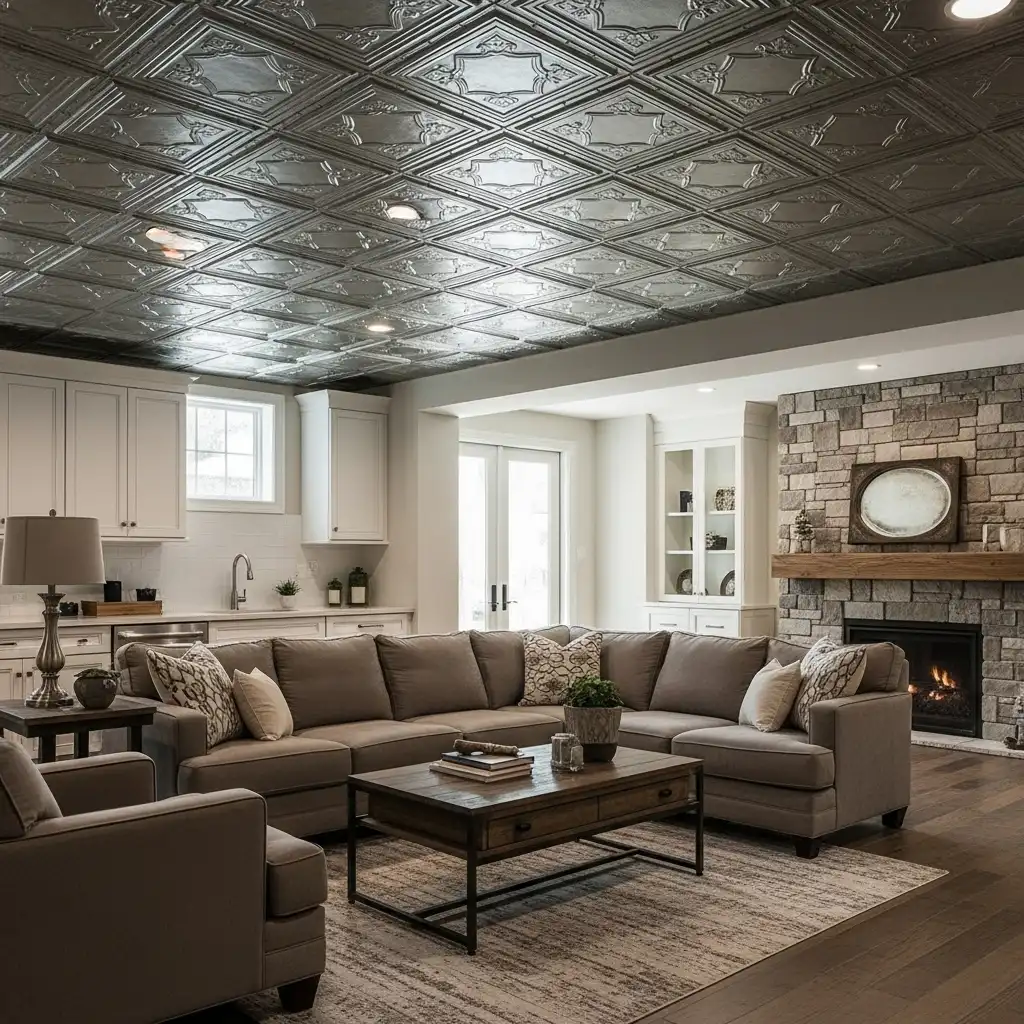
For a dose of old-world elegance, consider metal ceiling tiles. Available in real tin or more affordable aluminum, these pressed tiles come in a huge variety of ornate and modern patterns.
- Pros: High visual impact and luxurious feel; durable and long-lasting; often lightweight.
- Cons: Can be expensive; may not suit every design style; can feel loud and cavernous.
- Pro Tip: Many modern tin tiles are glue-up panels designed to be installed directly over a drywall substrate, making them easier for DIYers.
7. The Simple & Clean: Painted Joists and Subfloor
Best for: Ultra-budget-friendly, utilitarian spaces like workshops or storage areas.
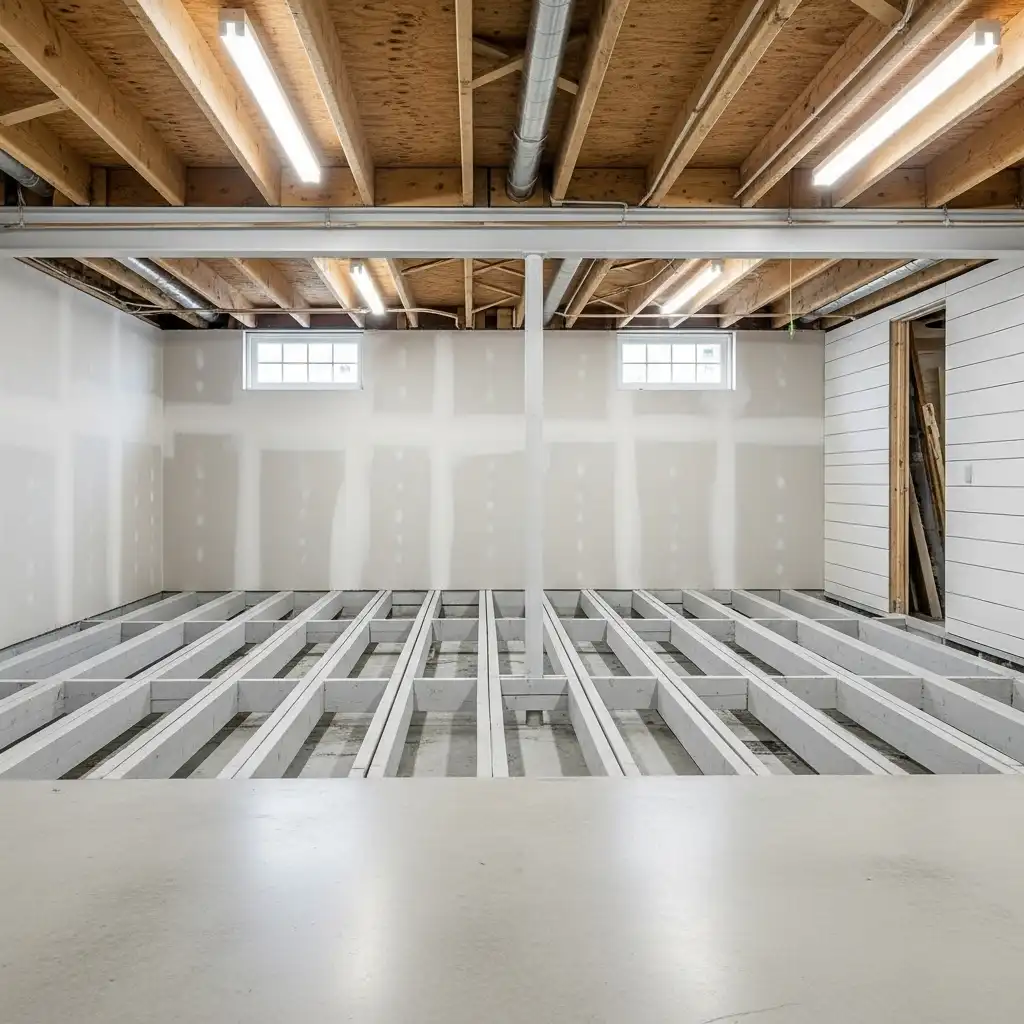
If you don’t need a fully finished look but want something neater than raw exposure, this is your answer. Simply paint the floor joists and the subfloor of the room above with a bright, clean white or a light gray.
- Pros: Extremely low cost and easy; reflects more light, brightening the space; maintains full utility access.
- Cons: Still has an “unfinished” utilitarian feel; offers no noise reduction.
- Pro Tip: Use a paint sprayer for a fast, even coat that gets into all the nooks and crannies. To add definition without closing the space in, explore ideas for adding Wood Beams on the Ceiling.
8. The Architectural Accent: Faux Wood Beams
Best for: Adding dimension and drama to a drywall or painted ceiling.
Credits: @getshelfhelp
Install lightweight polyurethane or real wood beams onto a finished ceiling. This instantly adds rustic, traditional, or even modern architectural interest without the structural complexity.
Pros: Dramatic visual impact; can define spaces in an open floor plan; lightweight faux options are easy to install.
Cons: Real beams can be heavy and expensive; faux beams may look less authentic up close.
Pro Tip: Paint beams a contrasting color (e.g., dark beams on a white ceiling) for maximum definition, or match them to the ceiling for a subtle coffered effect.
9. The Flexible Modernist: Suspended Wood Slats
Best for: A contemporary, organic feel with partial concealment.
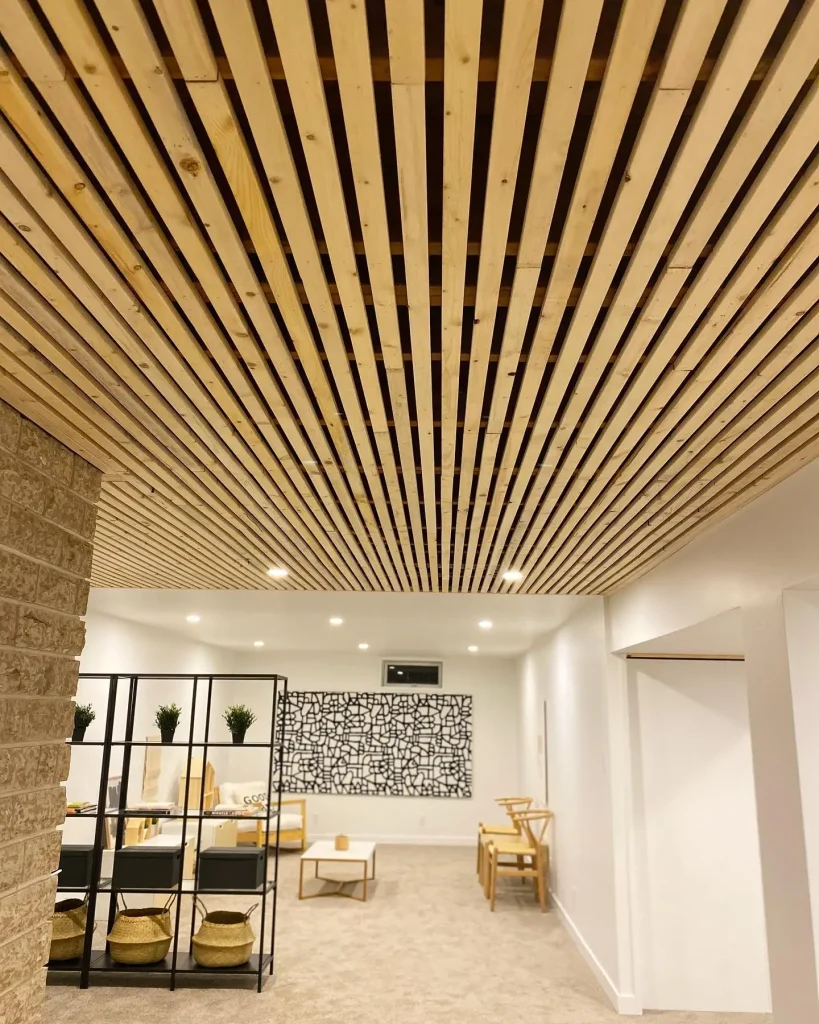
Source: @heatherkellyrealtor
This involves hanging spaced wood slats (like 1x4s or 2x2s) from a grid system. It creates a rhythmic, linear pattern that partially hides utilities while maintaining an open, airy feel.
Pros: Modern and stylish; provides some visual screening; allows for integrated LED strip lighting between slats.
Cons: Moderate cost; dust can collect on top of slats; only partial utility access.
Pro Tip: For a stunning effect, run LED strip lights along the top of the joists so the light washes down between the slats.
10. The Lightweight Alternative: PVC or Vinyl Planks
Best for: Damp environments or a clean, uniform look that’s easy to clean.
Moisture-resistant PVC planks, often used for wall cladding, can be installed on ceilings. They create a clean, often white, surface that’s ideal for basements prone to humidity.
Pros: 100% waterproof and mold-resistant; easy to wipe clean; often click-together for simple installation.
Cons: Can have a “plastic” look or feel; may not add warmth; styles are somewhat limited.
Pro Tip: This is an excellent choice for basement bathrooms, laundry rooms, or utility areas where moisture is a concern.
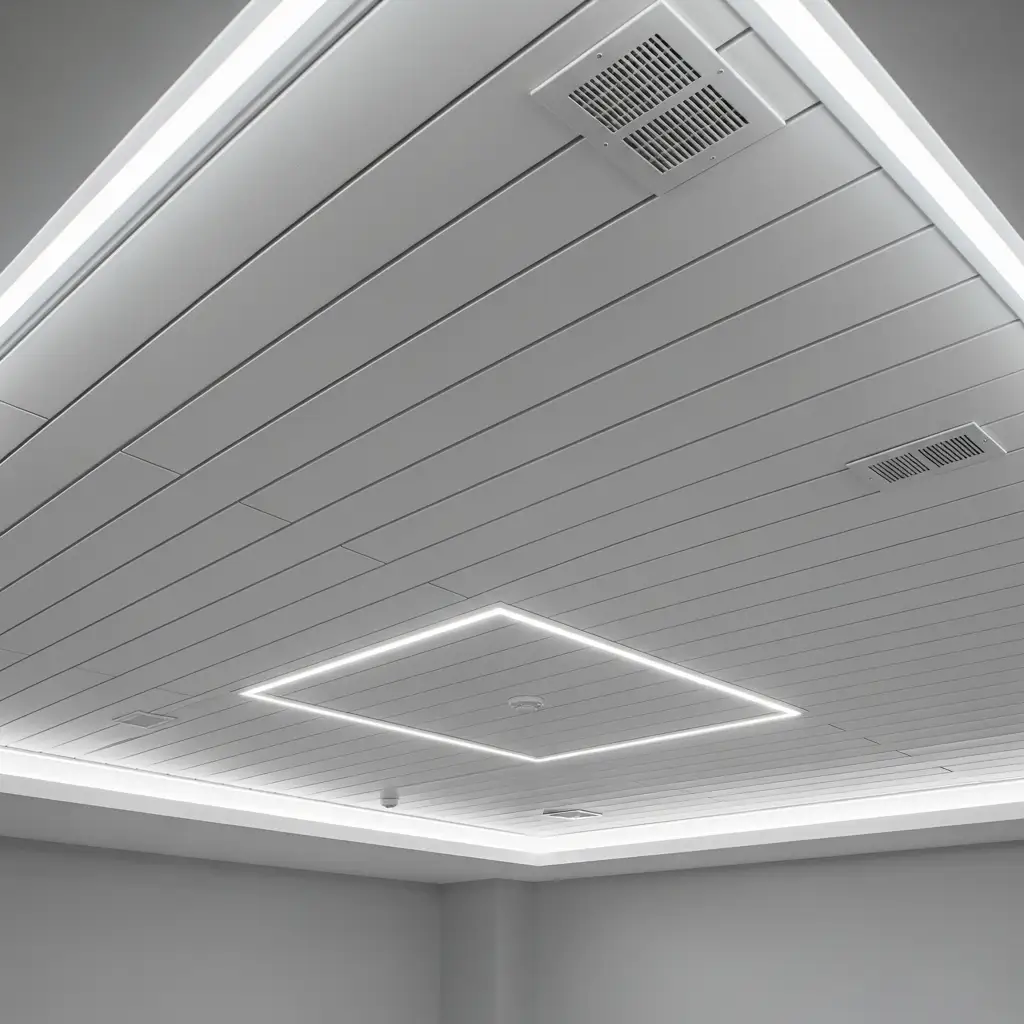
11. The Pattern Play: Coffered or Tray Ceiling (with Drywall)
Best for: Formal spaces like a home office, library, or media room where you want to add grandeur.
Source: @toplight_electric
This advanced drywall technique involves building down a grid or perimeter framework to create sunken panels or a central recess. It adds significant architectural depth and luxury. Read more about tray ceiling to try it in your basement.
Pros: Ultimate high-end, custom look; adds perceived value; fantastic for layered lighting.
Cons: Very expensive and complex; requires expert installation; reduces headroom significantly.
Pro Tip: Use this only in basements with higher-than-average ceiling heights (at least 9 feet), as it consumes a lot of vertical space.
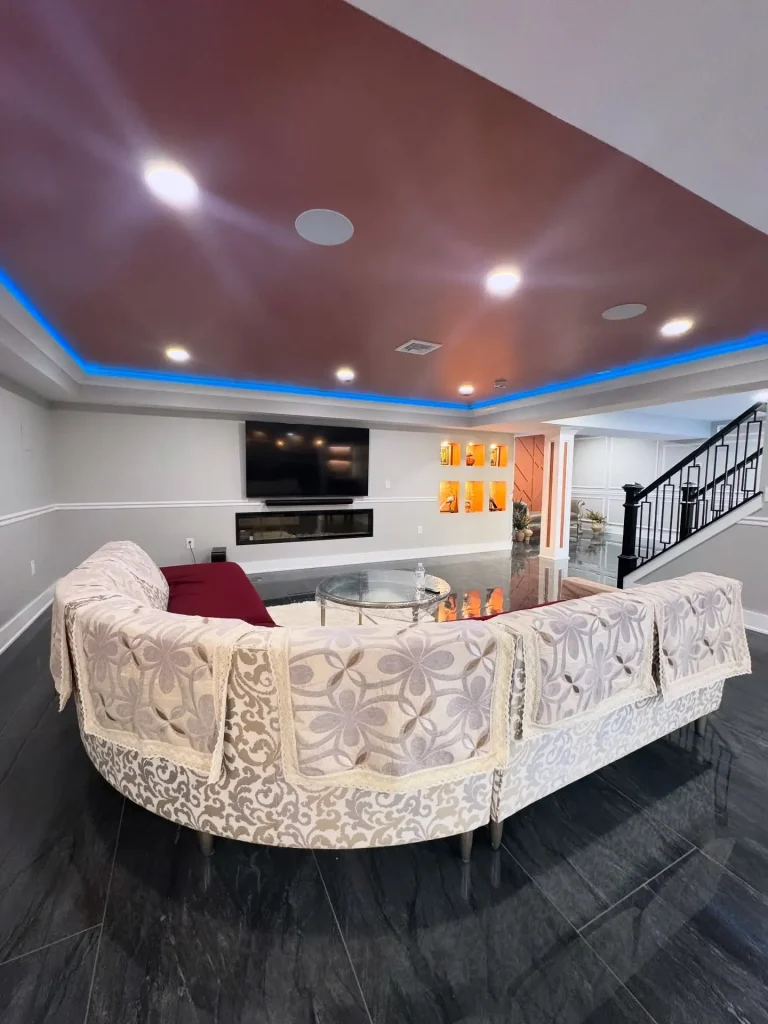
12. The Hybrid Solution: Drywall Clouds or Bulkheads
Best for: Strategically hiding specific elements while keeping an open feel.
Source: @bgpropertyservicesllc
Instead of drywalling the entire ceiling, build drywall “clouds” or soffits (bulkheads) around ductwork, beams, or to define specific areas. The rest of the ceiling can be painted.
Pros: Hides only the problem areas; maintains an open, architectural feel; provides spots for built-in lighting.
Cons: Can look awkward if not well-designed; still requires drywall finishing skills.
Pro Tip: Outline the drywall shapes with integrated LED cove lighting for a modern, floating effect.
The Bottom Line
Your basement ceiling doesn’t have to be a design compromise. Whether you choose the polished finish of drywall, the accessible utility of a drop ceiling, or the stylish exposure of painted joists, the perfect solution is out there. Consider your budget, your style, and—most importantly—how much you value headroom and utility access. Then, look up and get ready to transform your basement from the top down
FAQs for Your Basement Ceiling Project
1. What is the cheapest option for finishing a basement ceiling?
The most budget-friendly option is a painted joist and subfloor ceiling. It requires only paint (and potentially a rental sprayer for ease) and a day of labor. This approach gives the space a cleaner, brighter, and more intentional look than leaving everything exposed, without the cost of installing any new materials. For a slightly more finished look on a budget, a suspended fabric ceiling is another affordable alternative.
2. I need to access pipes and wires but hate the look of a standard drop ceiling. What are my options?
Modern Drop Ceiling: Look for updated systems with slim-line grids and stylish tiles that mimic tin, wood, or other textures. This maintains easy access without the commercial feel.
Exposed & Painted Ceiling: Embrace the industrial look by painting all the exposed elements a uniform dark color. This provides permanent, effortless access and can make the ceiling feel higher.
Drywall with Access Panels: You can install a drywall ceiling but strategically place discrete access panels near key utility points like water shut-offs and cleanouts.
3. My basement has very low ceilings. Which option is best to maximize headroom?
An exposed and painted ceiling preserves every inch of your available height. By painting the joists, ducts, and pipes a dark color, you create a cohesive look that can actually make the space feel less cramped. If you prefer a solid ceiling, drywall is your next best bet, as it only sacrifices about half an inch of headroom, unlike a drop ceiling which can lower the height by 4 to 8 inches.
4. Is it okay to drywall over my basement ceiling joists?
Yes, it is structurally safe and very common. However, the main drawback is the loss of easy access to utilities. Before you drywall, ensure all electrical, plumbing, and HVAC systems are in good working order and where you want them. It’s also crucial to plan your lighting layout in advance and to install access panels for any future needs, like shut-off valves or junction boxes, to avoid costly drywall repairs down the line.