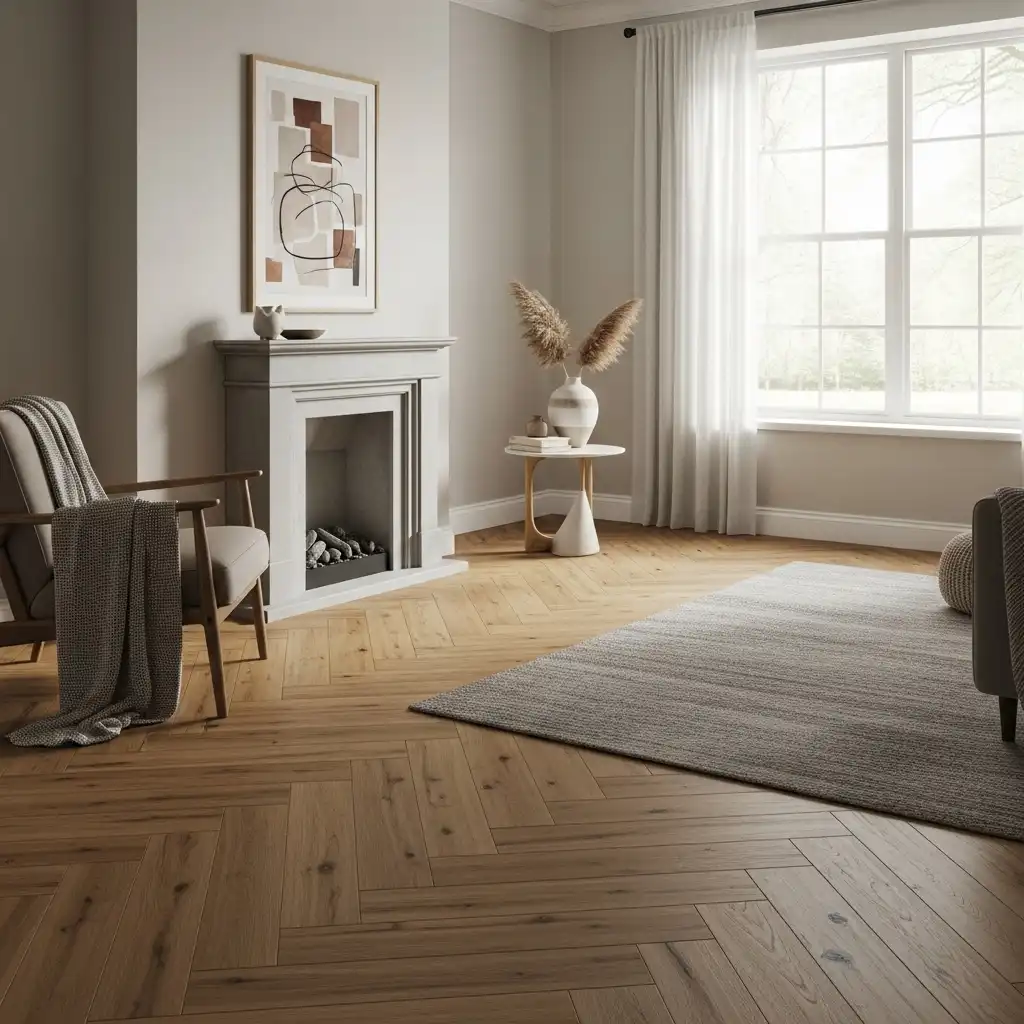
You’ve seen it grace the pages of every design magazine and flood your social media feeds: the stunning herringbone floor. But is this iconic zigzag pattern a practical choice for your lifestyle and budget? Beyond the beautiful photos, what does it really take to install and maintain one?
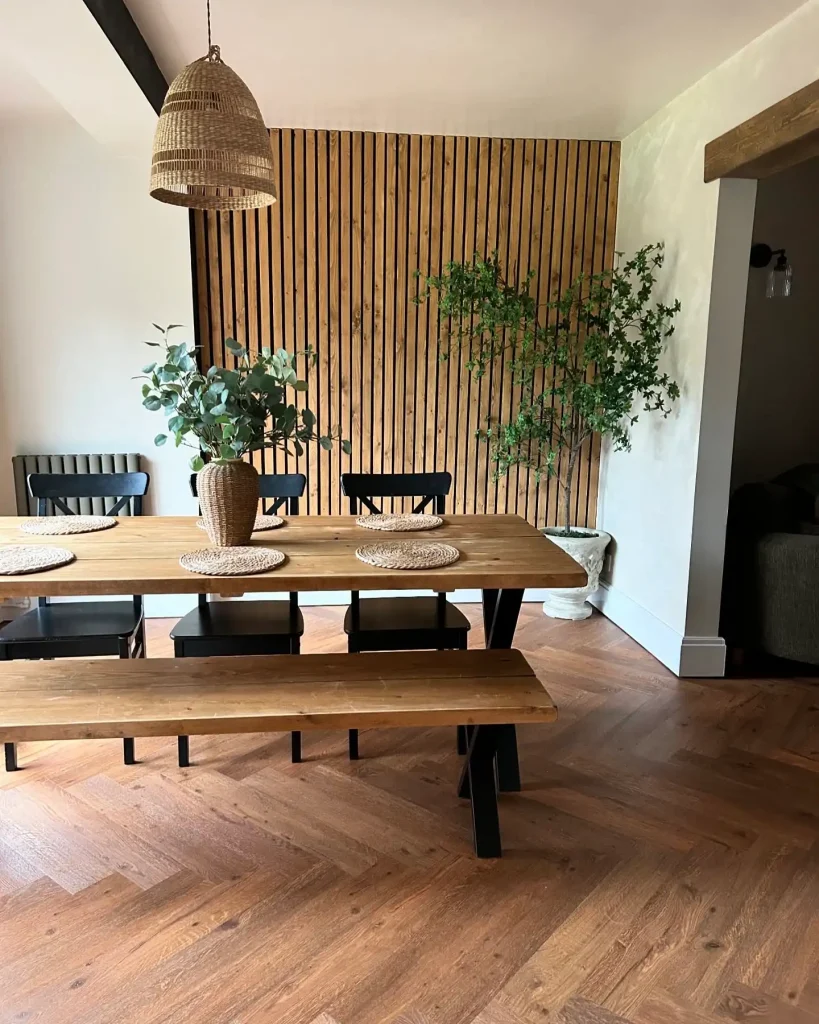
Credits:@casacrank
This definitive guide cuts through the noise to answer all your practical questions—breaking down the costs, installation realities, material options, and daily care to help you decide if a herringbone floor is the perfect foundation for your dream space.
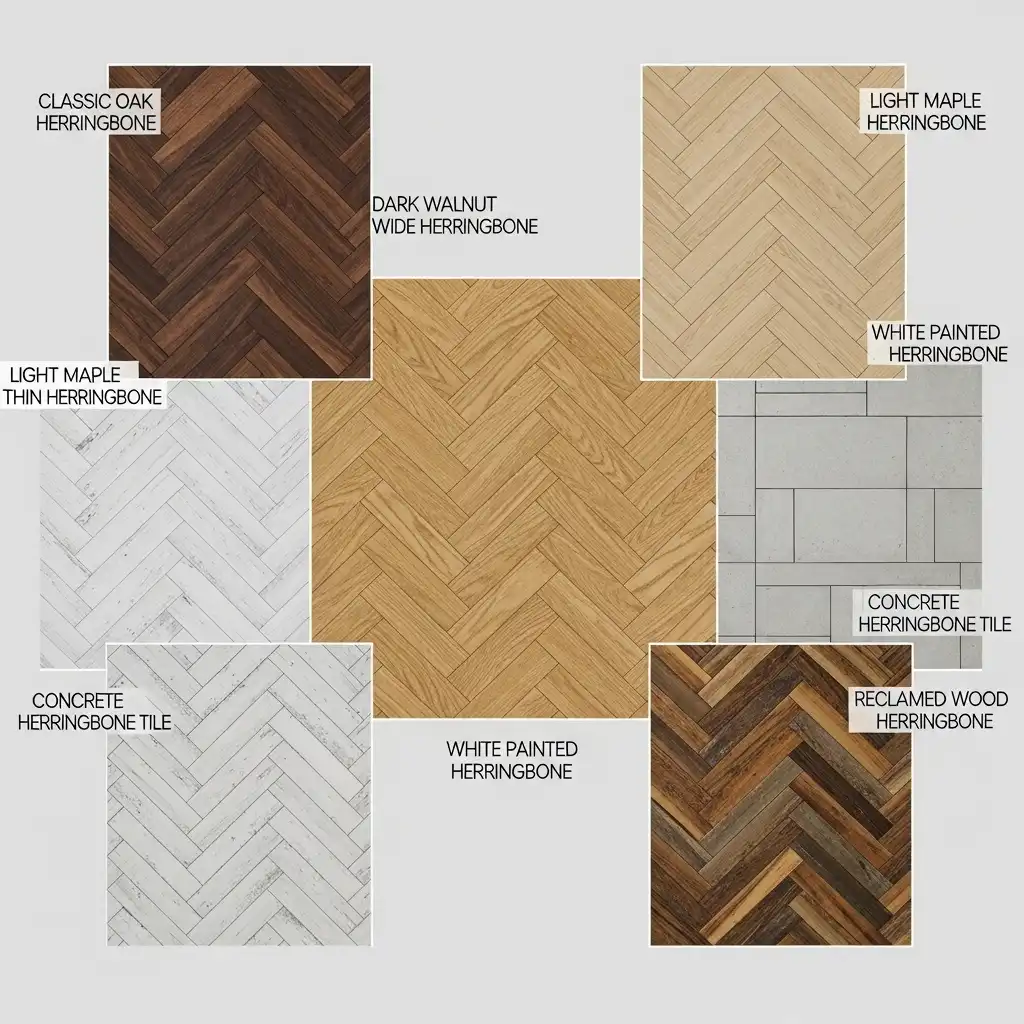
Types of Herringbone Flooring
The herringbone pattern can be achieved with a variety of materials, catering to different budgets, rooms, and lifestyle needs.
Solid vs. Engineered Wood Herringbone
Solid Wood Herringbone is the traditional and most authentic choice. It can be sanded and refinished multiple times, offering unparalleled longevity. However, it’s more susceptible to humidity and temperature changes, making it best for stable environments and ground floors. So, when you’re thinking to remodel kitchen try these ideas.
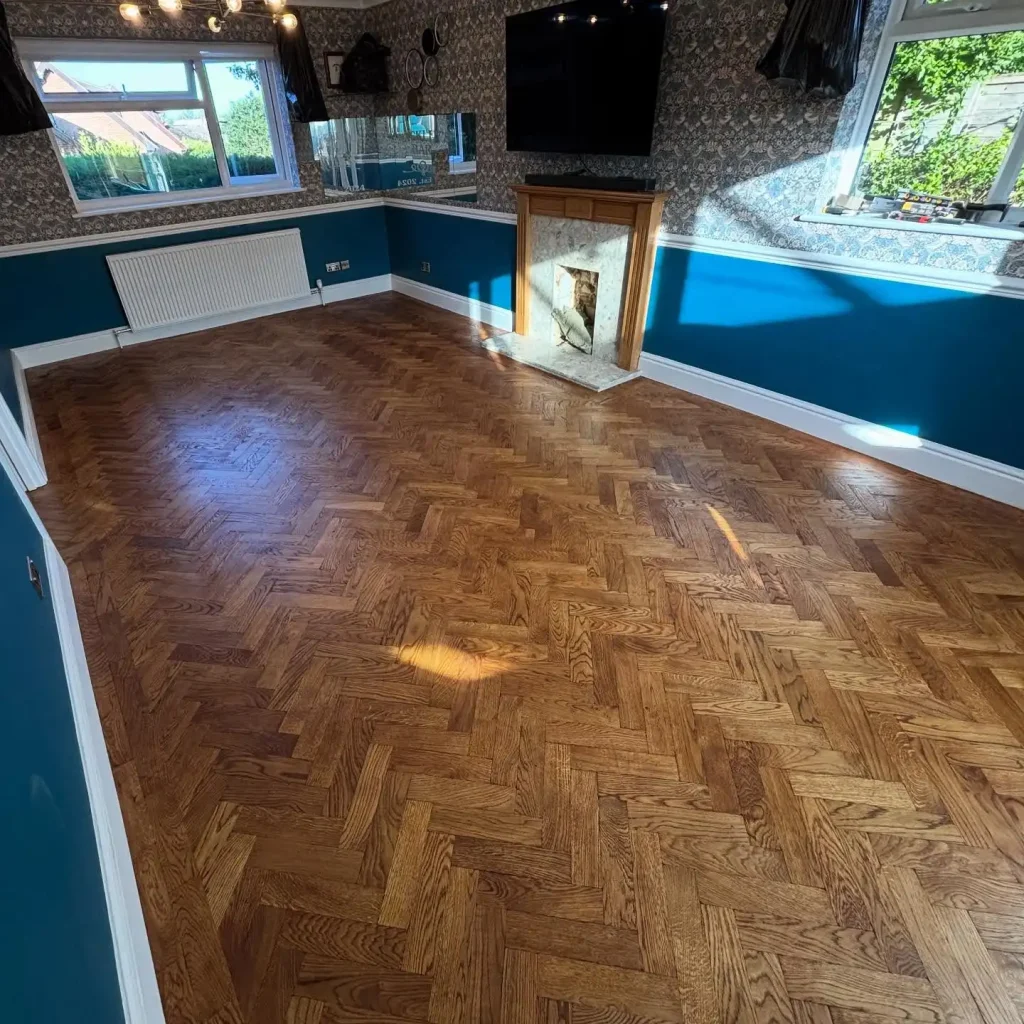
Credits: @britwoodfloors
Engineered Wood Herringbone provides superior stability due to its multi-layer construction and real wood veneer. This resistance to warping makes it an excellent choice for most rooms, including those with underfloor heating. While durable, it typically allows for fewer refinishings than solid wood.
Budget and Moisture-Friendly Options
For budget-conscious homeowners or DIY enthusiasts, Laminate and Luxury Vinyl Plank (LVP) Herringbone offer a viable alternative. These options are typically easier to install and include highly durable, water-resistant properties, making them perfect for high-traffic or moisture-prone areas.

The herringbone pattern can also be achieved with Tile (ceramic, porcelain, or natural stone). This is the ideal choice for bathrooms, kitchens, and other wet areas, offering the pattern’s aesthetic with high water resistance. You can also try these patterns with plywood walls.
Cost and Installation Considerations
The investment in a herringbone floor is generally higher than standard straight-plank flooring due to the material cuts and intricate installation.
Material and Installation Costs
Material costs vary widely, with engineered wood typically ranging from $8 to $15+ per square foot and solid wood from $12 to $20+ per square foot. Laminate/LVP is more affordable, often from $4 to $8 per square foot.
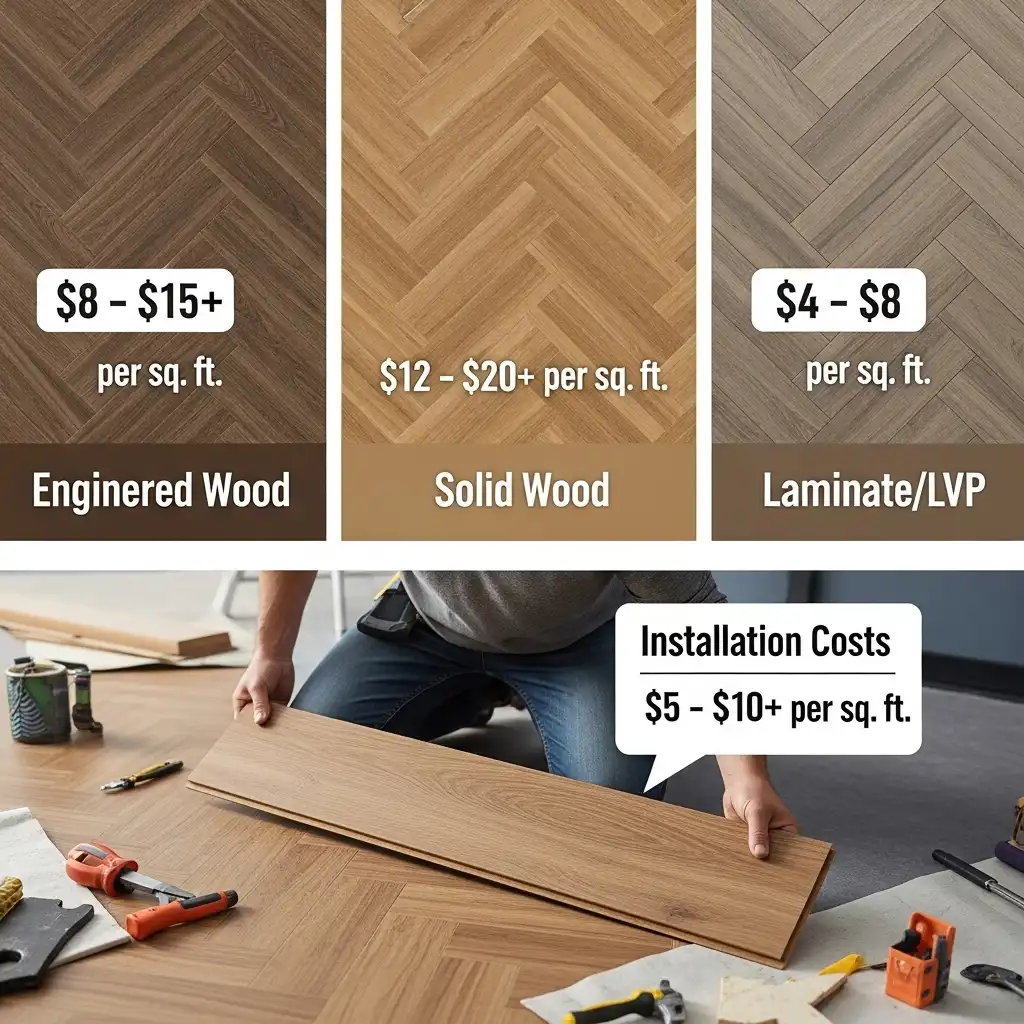
The most significant expense is professional installation, which can add an estimated $5 to $12 per square foot. This is crucial for wood and tile, as the process requires a high degree of skilled craftsmanship to ensure each piece is cut and laid at a precise 90-degree angle.
Installation Process and Tips
The process begins with meticulous subfloor preparation: ensuring it’s clean, dry, and perfectly level. Wood materials must be properly acclimated in the room for up to 72 hours. During installation, skilled professionals will ensure proper expansion gaps are maintained around the perimeter to allow for the wood’s natural movement. For DIY projects, laminate and LVP options are the most straightforward, sometimes using click-lock systems or pre-fabricated tiles.
Design and Maintenance
The herringbone pattern is highly flexible, allowing you to tailor the look to your personal aesthetic.
Customizing the Herringbone Look
Plank dimensions significantly affect the feel: narrow planks (2–3 inches wide) create a traditional, dense look, while wider planks (4–6+ inches) offer a modern, bolder aesthetic.
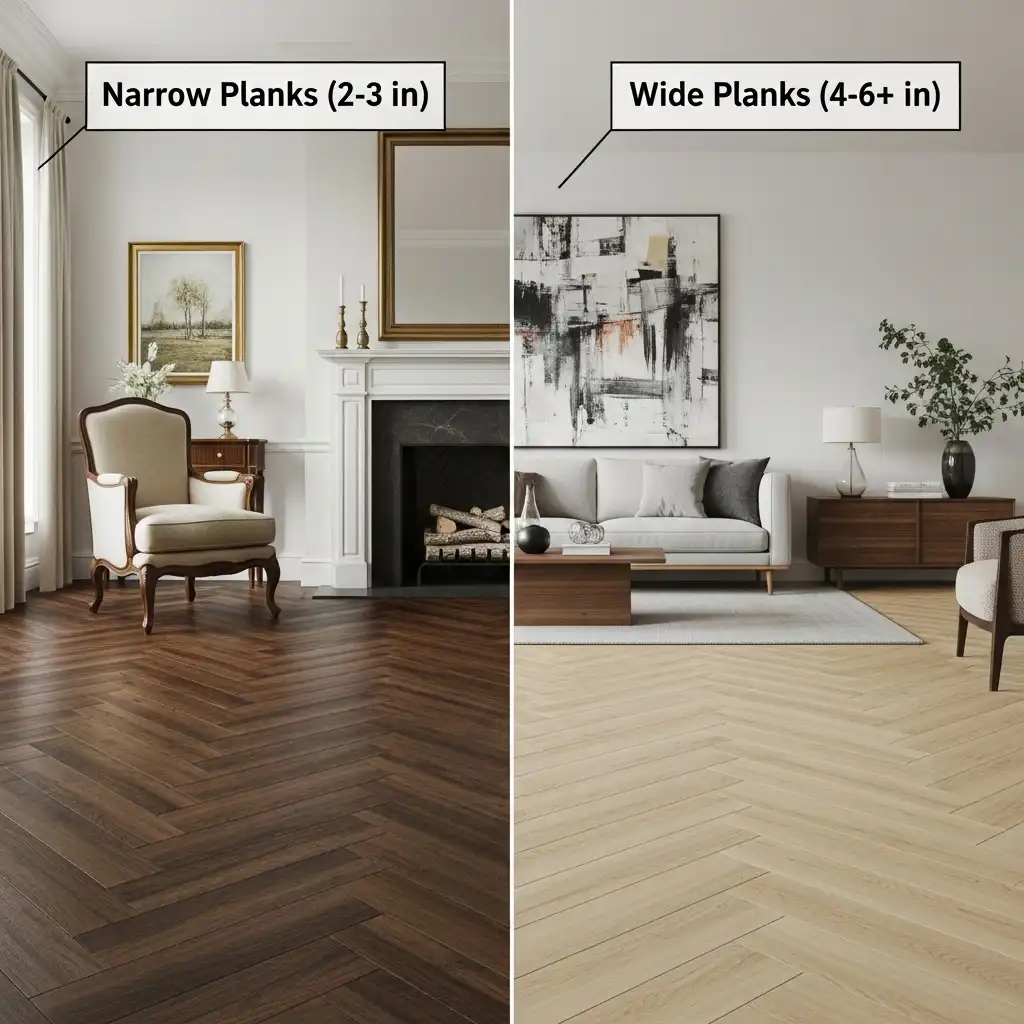
The color and finish set the tone. Light natural tones (like white oak) are popular for a bright, contemporary Scandinavian style, whereas dark stains (like walnut) create a dramatic, formal effect. For a nuanced look, consider a Double Herringbone pattern, which uses two planks side-by-side to create a more substantial visual statement.
Care and Longevity
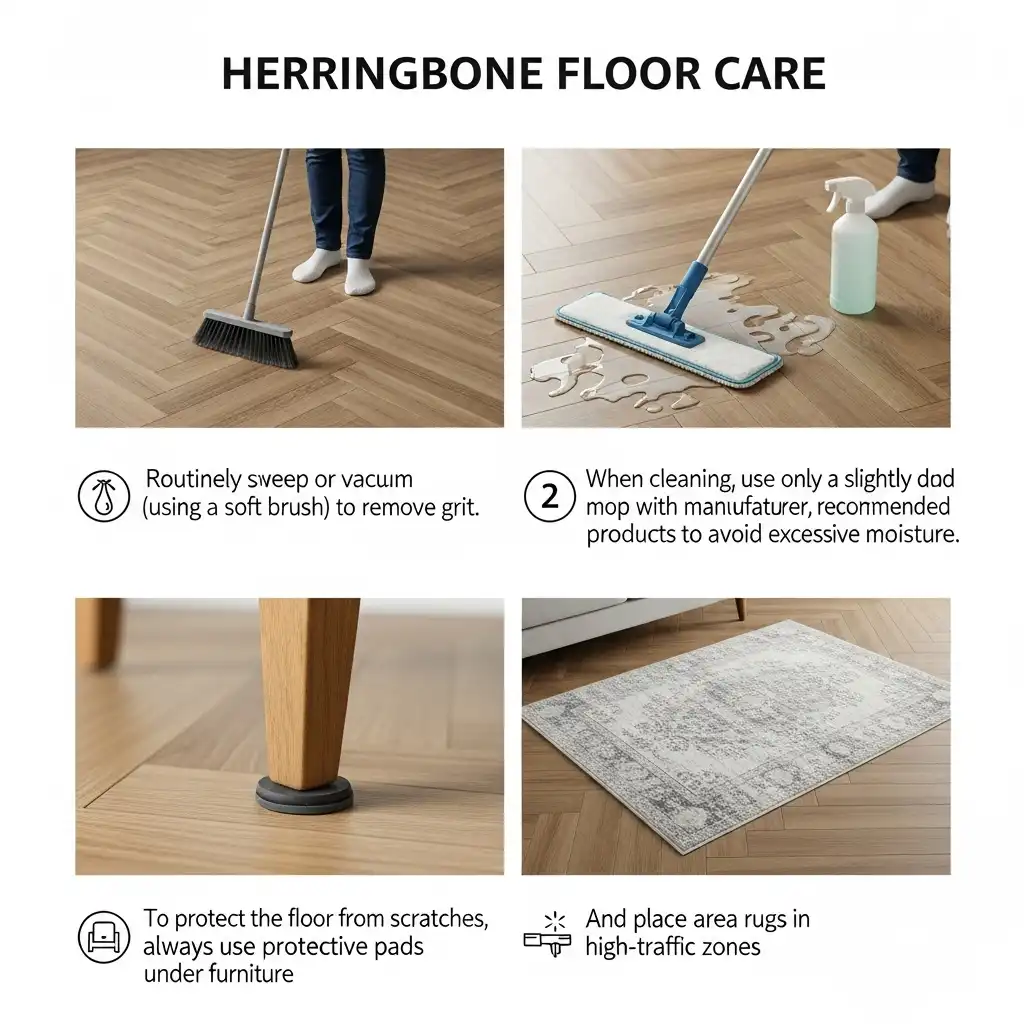
Proper maintenance is simple but essential. Routinely sweep or vacuum (using a soft brush) to remove grit. When cleaning, use only a slightly damp mop with manufacturer-recommended products to avoid excessive moisture. To protect the floor from scratches, always use protective pads under furniture and place area rugs in high-traffic zones.
Frequently Asked Questions (FAQs)
1. What is the difference between Herringbone and Chevron?
The key difference lies in how the planks meet. In a Herringbone pattern, rectangular planks are laid at a 90-degree angle to each other, creating a staggered, “broken” zigzag. In a Chevron pattern, the ends of the planks are cut at an angle (usually 45 degrees) and meet precisely point-to-point, forming a continuous, sharp “V” shape.
2. Does Herringbone flooring make a room look bigger?
Yes, it can. When installed on a diagonal across the room, the pattern’s strong lines naturally draw the eye along the longest point, creating an optical illusion that makes the space appear longer and more dynamic. This effect is often enhanced by using a lighter wood tone.
3. Is Herringbone flooring a permanent trend?
While all flooring styles cycle, herringbone has a rich history dating back centuries and is considered a timeless classic rather than a fleeting trend. Its use in grand European estates ensures it retains a sophisticated, high-end appeal that adds significant property value and is unlikely to ever truly go out of style.
Conclusion
Herringbone flooring is a premium choice that infuses a home with character, depth, and lasting value. By carefully considering the material—whether the tradition of solid wood, the stability of engineered wood, or the practicality of tile—and committing to professional installation, homeowners can ensure their herringbone floor will be a beautiful, durable addition that stands as an elegant feature for decades to come.