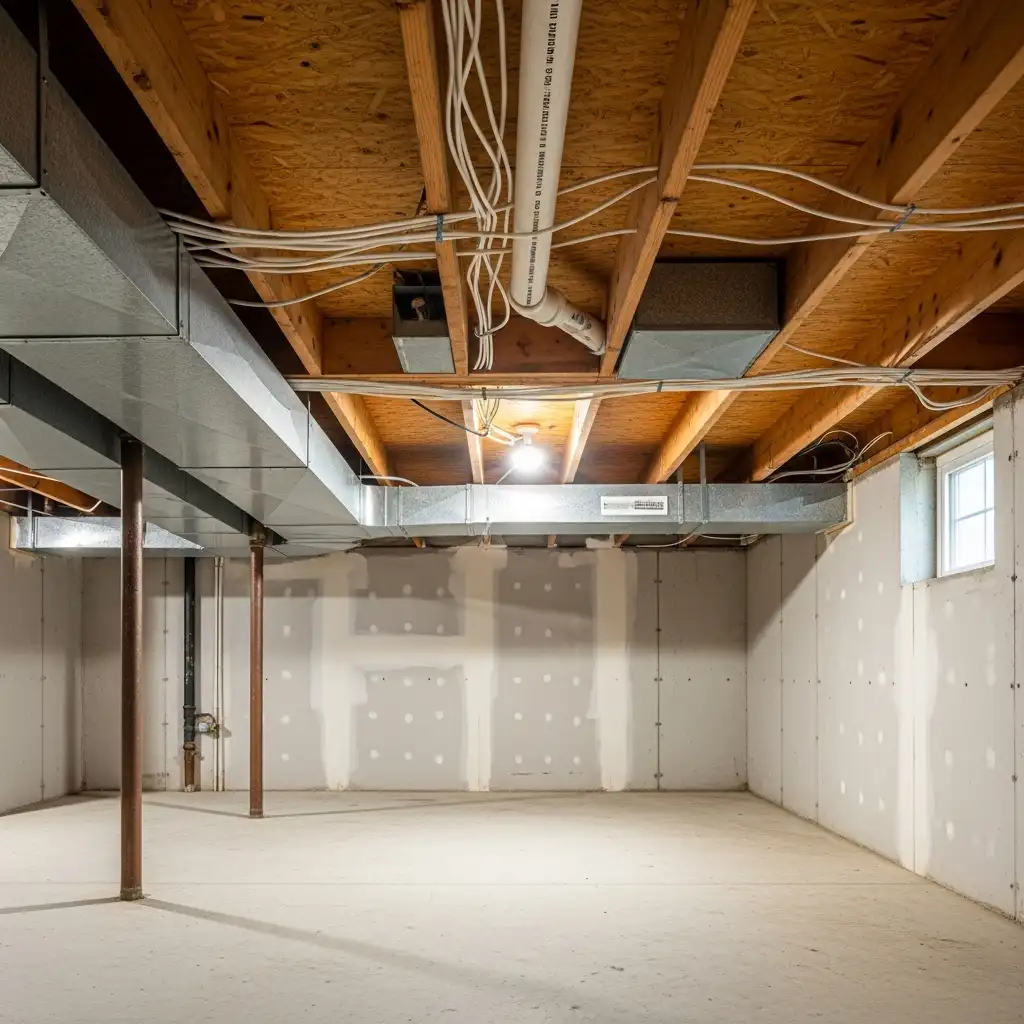
Gone are the days when an unfinished basement ceiling was something to be hidden at all costs. Today, the painted exposed basement ceiling has become a celebrated design choice, turning a utilitarian necessity into a striking industrial-chic statement. It’s a look that is both raw and refined, offering a unique blend of practicality and style.
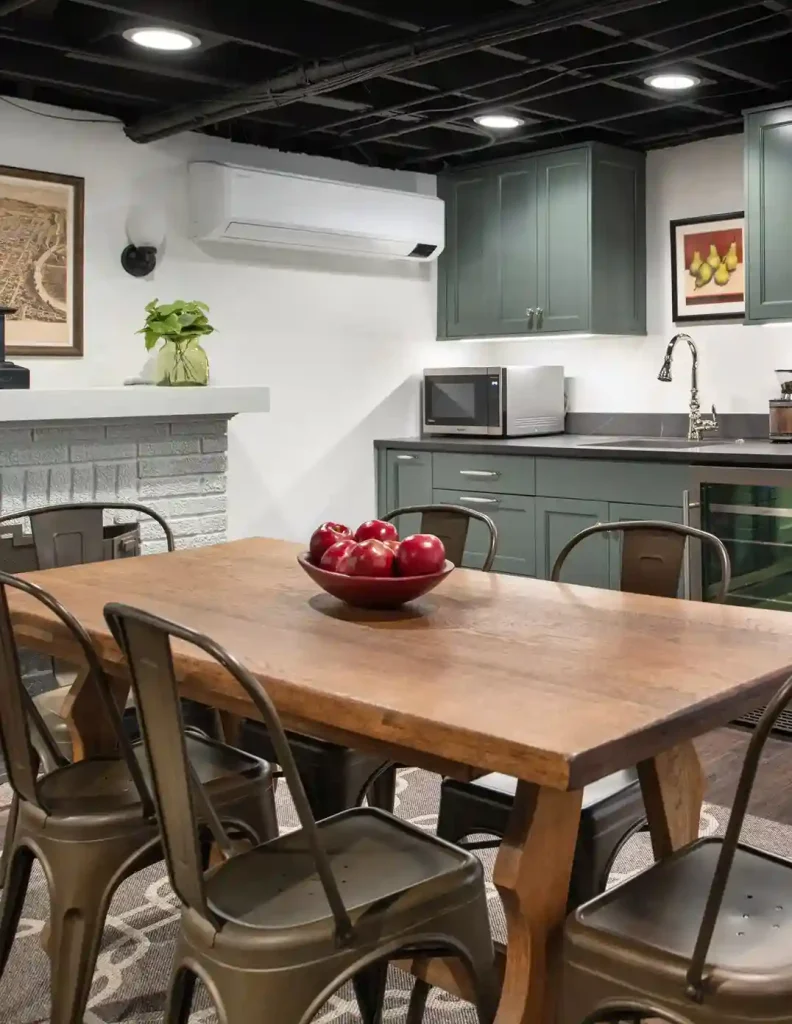
Credits: @oriondesigninc
If you’re considering embracing the open ceiling concept, this guide will walk you through the benefits, the process, and inspiring ideas to transform your basement’s biggest eyesore into its coolest feature.
Why Choose a Painted Exposed Basement Ceiling?
Credits: @matrixbasementfinishing
Before diving in, it’s important to understand the “why.” This approach offers a host of advantages that go beyond mere aesthetics:
- Maximizes Headroom: By eliminating a drop ceiling, you instantly gain valuable inches—or even feet—of headroom, making the basement feel more spacious and airy. See more exposed ceiling ideas.
Credits: @7mapledesign
- Cost-Effective: This is one of the most budget-friendly ceiling options. You save thousands on materials and labor for drywall or ceiling tiles.
Credits: @speichandcompany
- Unbeatable Accessibility: All your electrical, plumbing, and ductwork remain completely accessible for future repairs, upgrades, or inspections.
Credits: @elite_concepts_usa
- Industrial Chic Aesthetic: The exposed structure lends an urban, loft-like vibe that is both modern and timeless.
Credits: @rehabberprobaltimore
- Faster Project Completion: Unlike the messy and time-consuming process of installing a finished ceiling, painting is a relatively quick and straightforward project.
Credits: @scm.stl
How to Paint Your Exposed Basement Ceiling: A Step-by-Step Guide
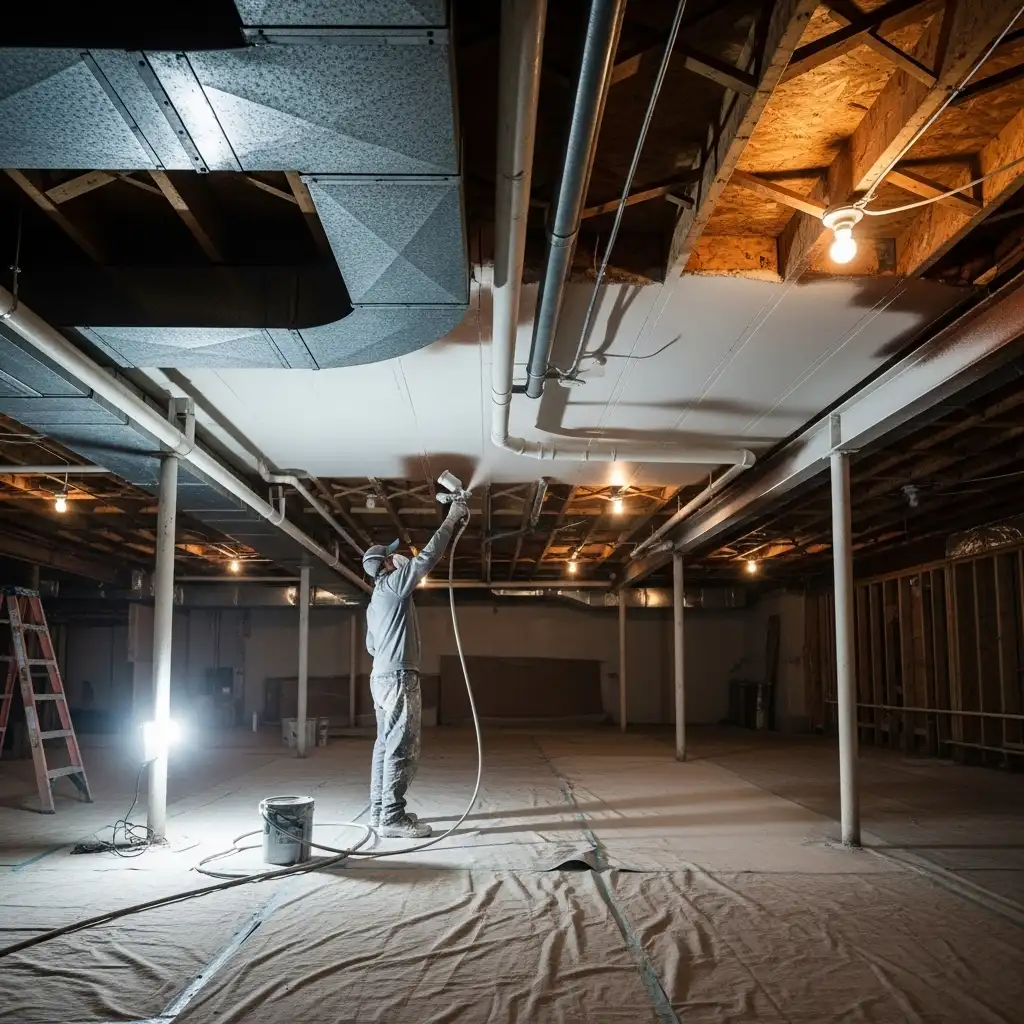
A successful painted ceiling is all in the preparation. Rushing this process will lead to a subpar result.
Step 1: The Deep Clean
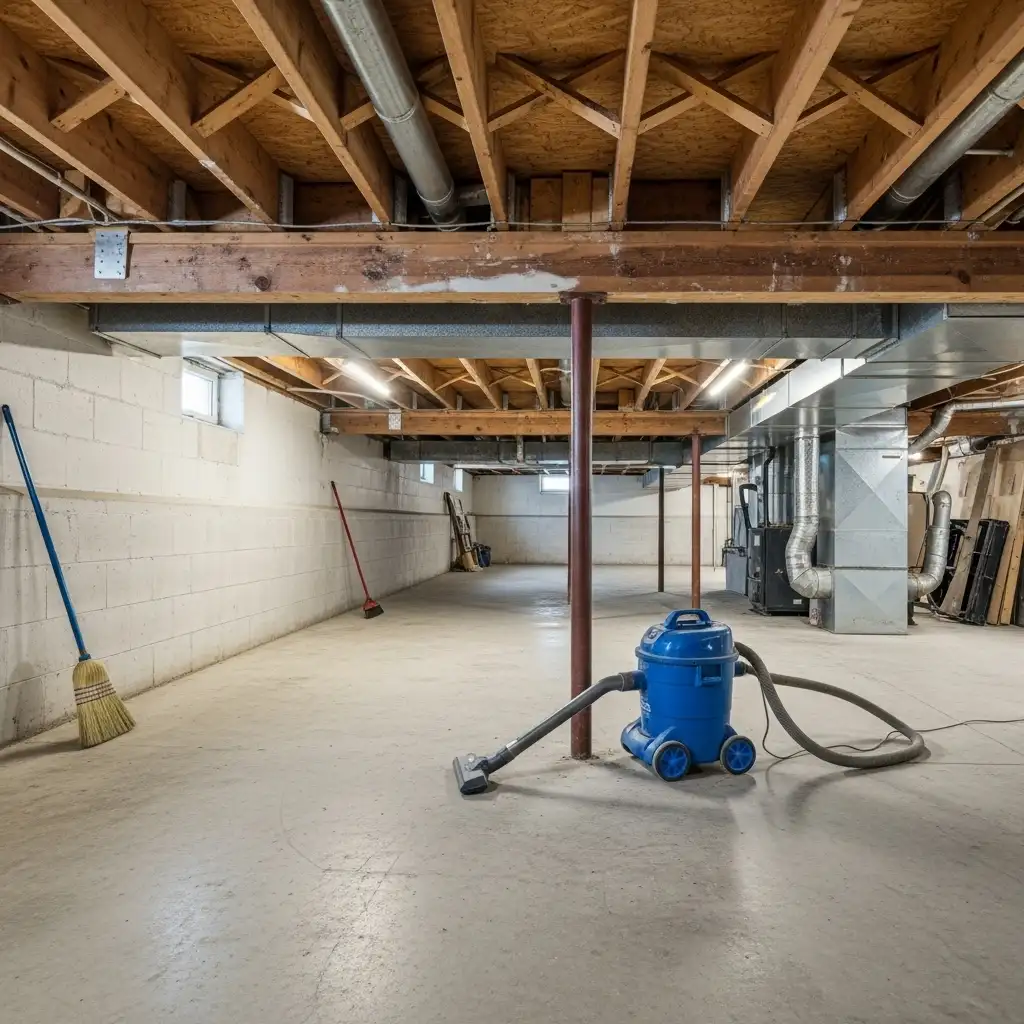
Your first and most important task is to remove all dust, cobwebs, and grime. Use a stiff-bristled broom to sweep the joists and subfloor above. Follow up with a vacuum equipped with a brush attachment to get into all the nooks and crannies. For greasy dust (common near kitchens or old furnaces), you may need to wipe surfaces with a degreasing cleaner.
Step 2: Inspection and Repairs
This is the time to address any issues hidden above.
- Check for Moisture: Look for any signs of water leaks or condensation on pipes and ducts. These must be resolved before you paint.
- Secure Wires: Ensure all electrical wires are properly secured to the joists with appropriate staples or straps.
- Insulate Pipes: Consider insulating cold water pipes to prevent condensation from dripping onto your newly painted surfaces.
Step 3: The Priming Stage
Do not skip primer! A high-quality, stain-blocking primer is essential. It will:
- Seal the raw wood and metal, preventing tannin bleed-through from the wood.
- Create a uniform surface for the topcoat to adhere to.
- Cover any existing stains or discolorations.
Use a paint sprayer for the fastest and most thorough coverage, especially in a complex environment like an exposed ceiling. Be sure to cover every surface you plan to paint.
Step 4: Choosing the Right Paint
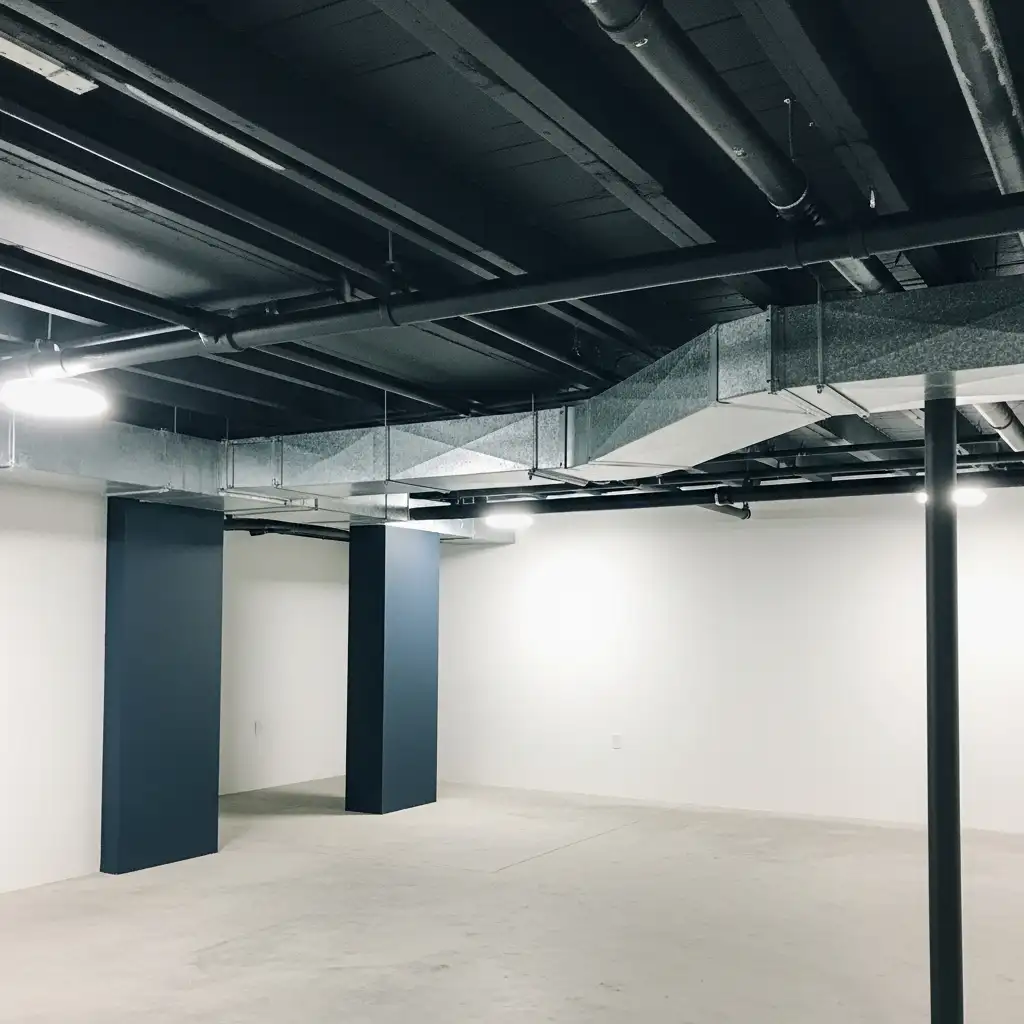
For the topcoat, a flat or matte black paint is the most popular and forgiving choice. It hides imperfections, minimizes glare, and makes pipes and ducts recede visually, creating a cohesive, uniform look. However, dark gray, navy, or even white are also excellent options.
- Black/Charcoal: The industrial standard; modern, sleek, and forgiving.
- White: Brightens the space and makes the ceiling feel higher, but shows every flaw and requires more upkeep.
- Dark Blue or Green: Adds a unique, sophisticated color while still providing the receding effect of a dark hue.
Step 5: Application

Again, a paint sprayer is highly recommended for its speed and ability to coat complex shapes evenly. If you’re using a roller and brush, be prepared for a more tedious process. Apply two thin coats for the best, most durable coverage.
Design Ideas for Your Painted Exposed Ceiling
Once you’ve committed to the painted look, you can get creative with the design.
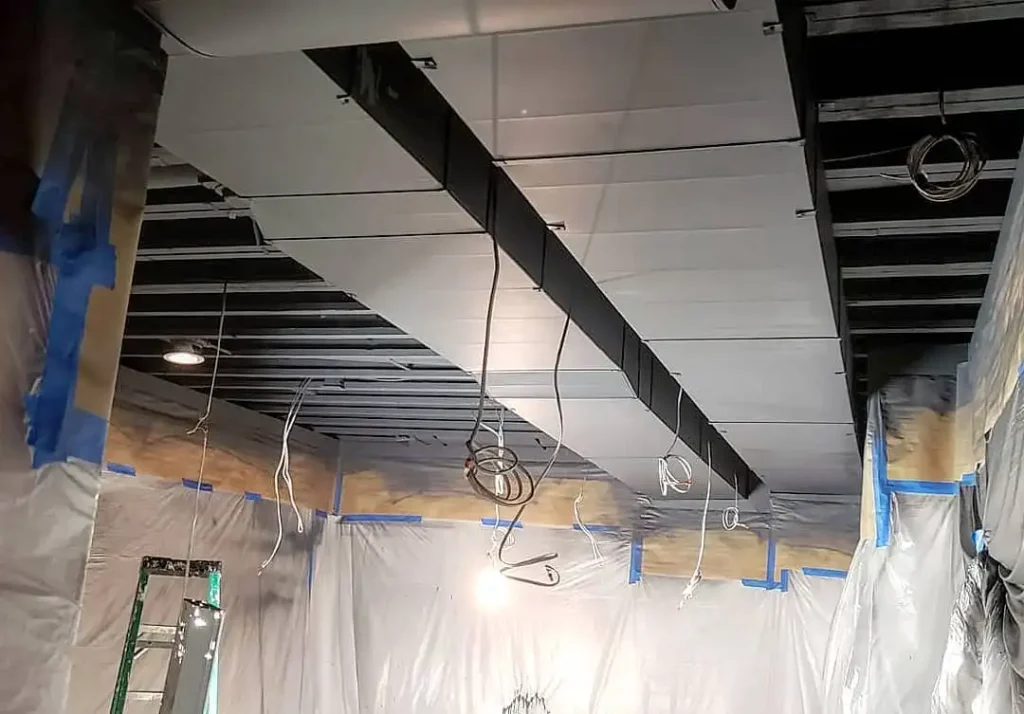
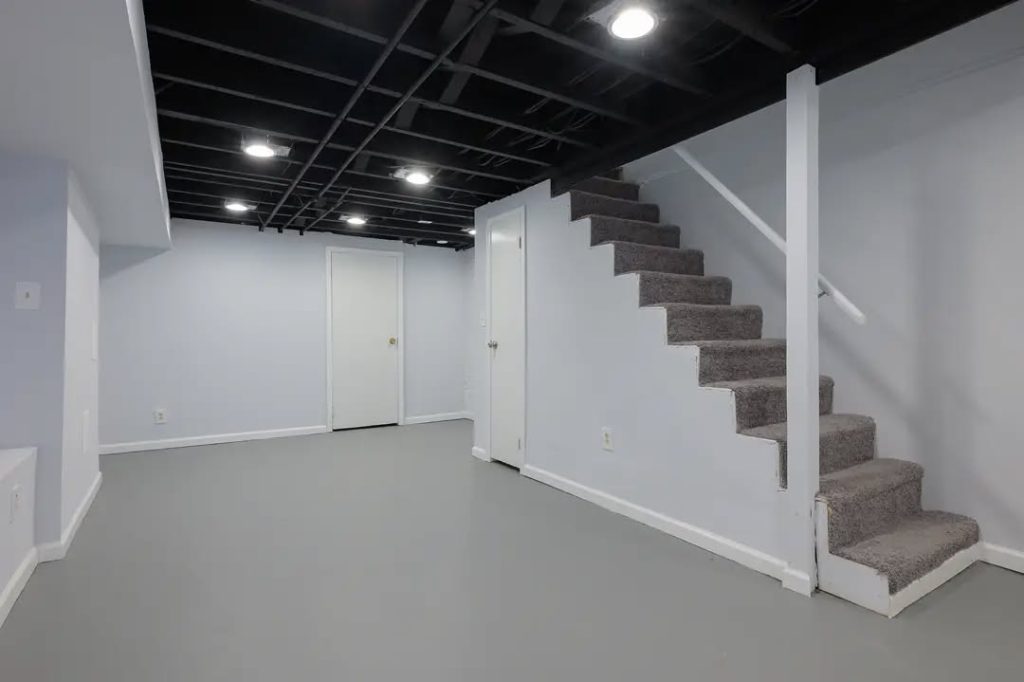
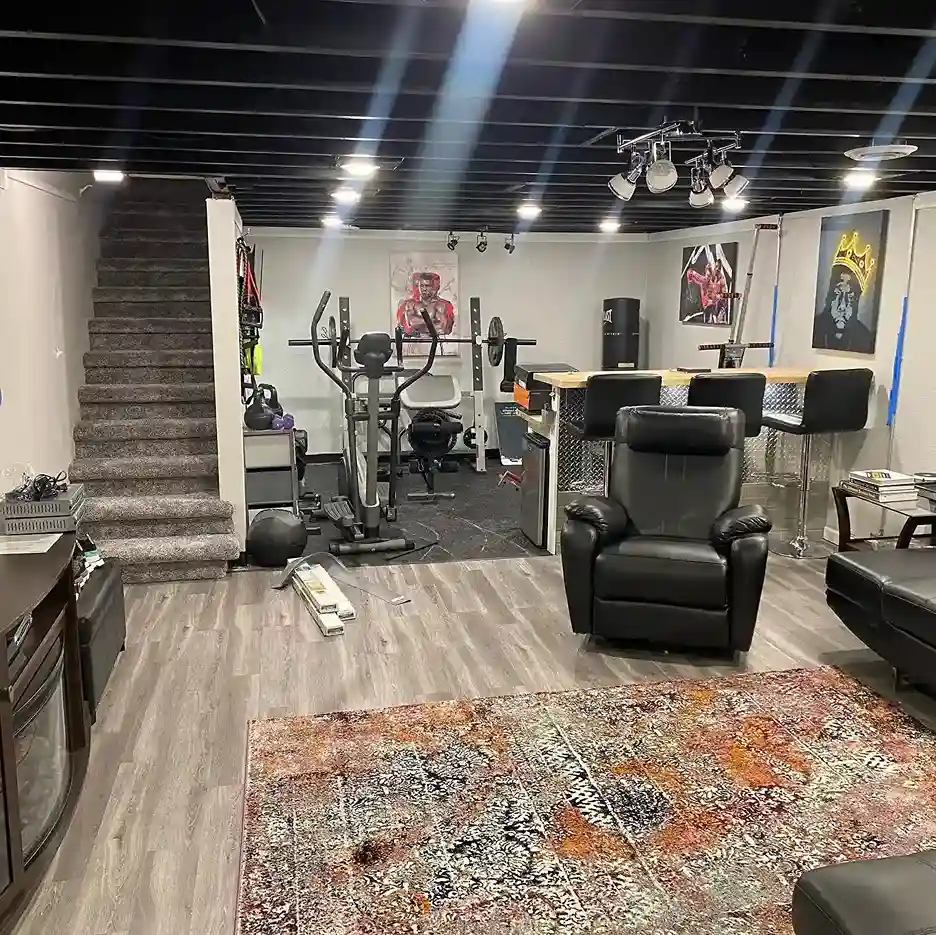
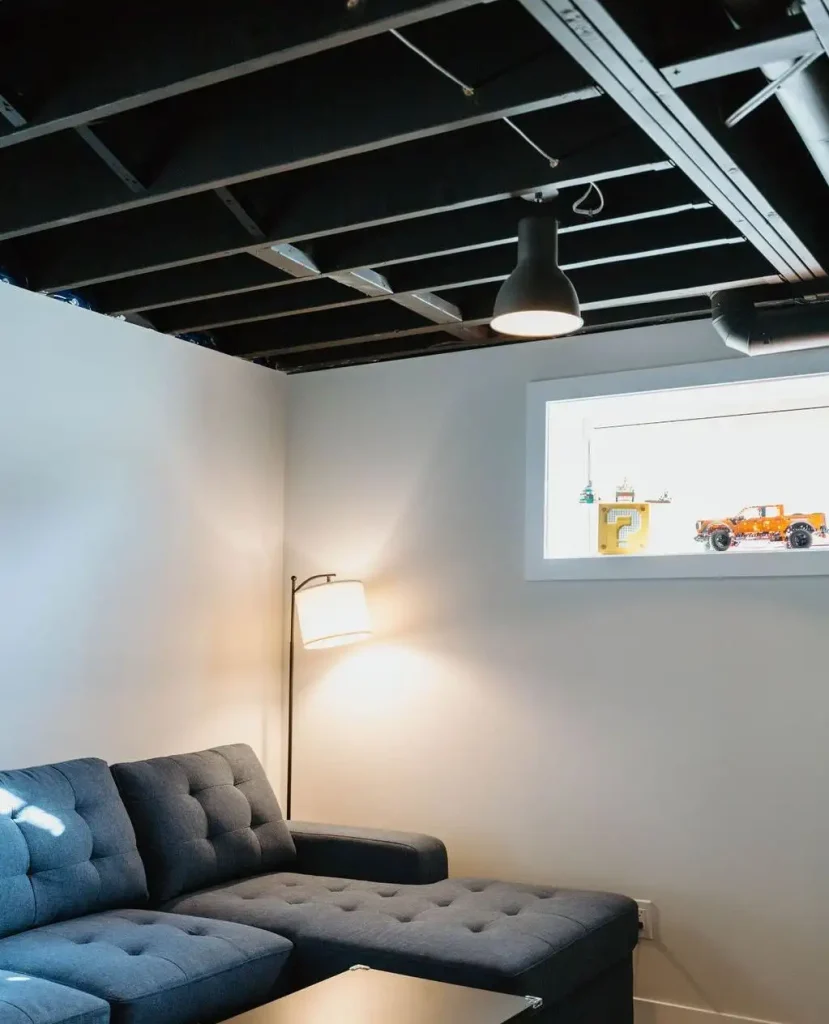
1. The Classic All-Black Ceiling
Credits: @davebelcherpainting
This is the most common and effective approach. Painting everything—joists, ducts, pipes, and wires—a uniform flat black creates a clean, monolithic look. The ceiling becomes a dark, receding plane that emphasizes the living space below. This is a perfect complement to a variety of styles, from Earthy Living Room Ideas to a more industrial theme.
2. The Two-Tone Contrast
Credits: @basementpros
For a more architectural statement, try a two-tone scheme. Paint the joists and subfloor one color (e.g., white) and all the mechanicals another (e.g., black). This adds graphic punch and makes the structure of your home a design feature.
3. Highlight with Color
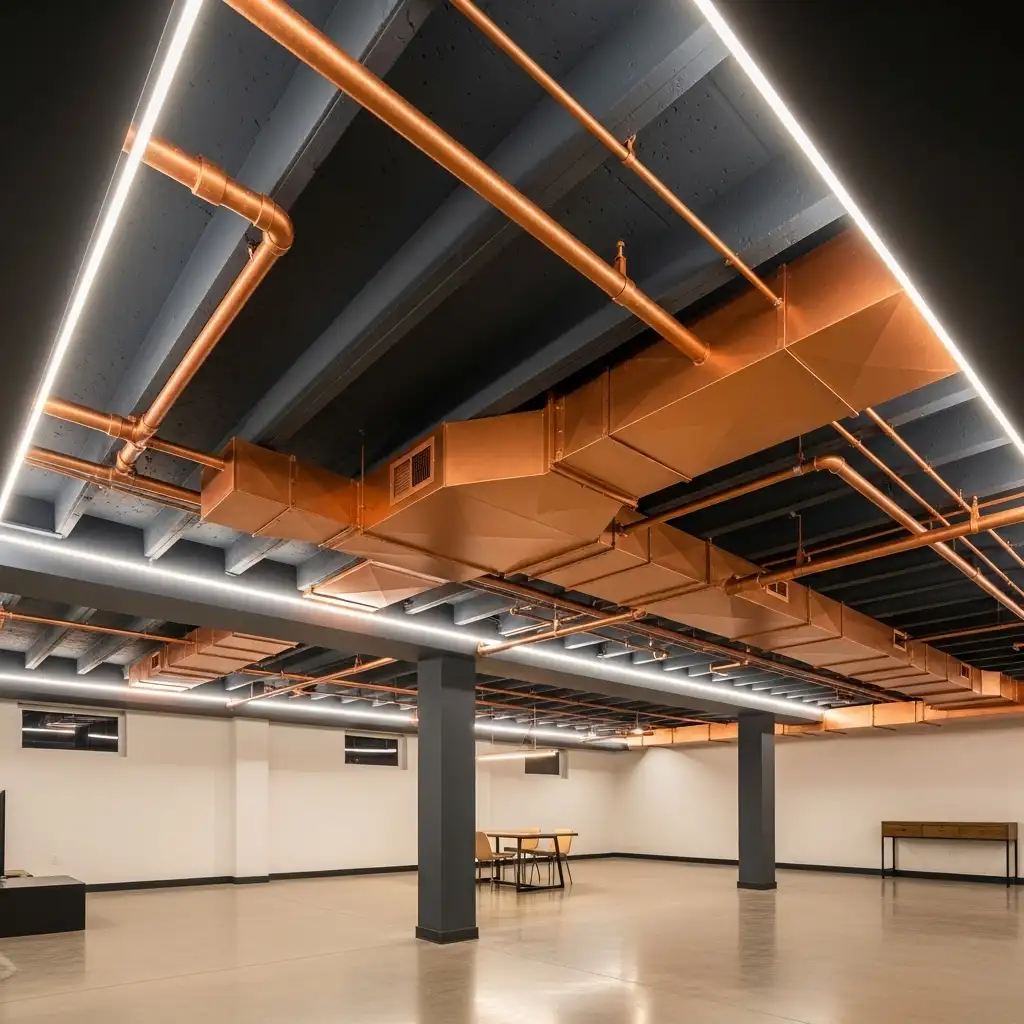
Want to make a bold statement? Paint the ducts, pipes, and electrical conduits in a bright, accent color like copper, bronze, or even a pop of red or yellow, while keeping the joists and subfloor a neutral black or white. This turns functional elements into sculptural art.
4. Incorporate Smart Lighting
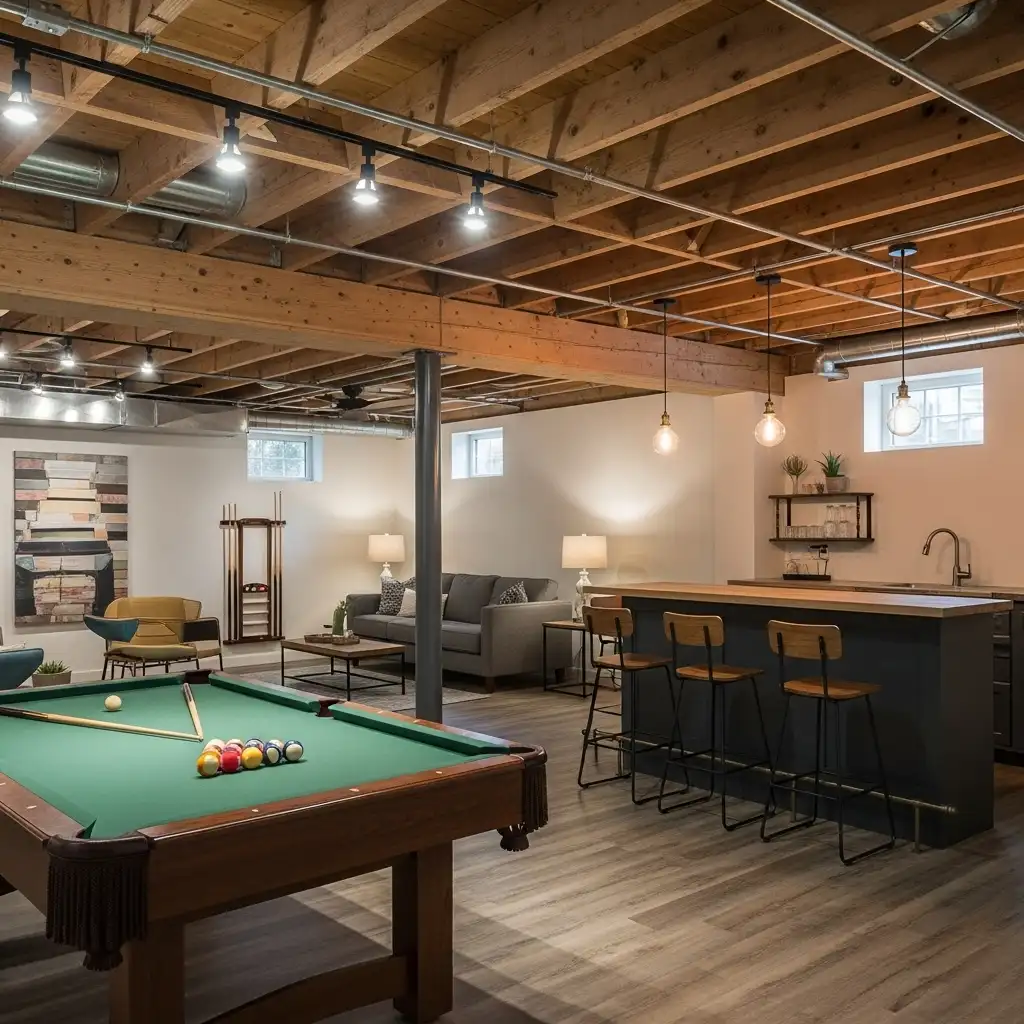
An exposed ceiling is the perfect opportunity for creative lighting. You can easily install:
- Track Lighting: Provides flexible, directional light.
- Pendant Lights: Drop pendants over a pool table, bar, or seating area to define zones.
- Edison Bulbs: Enhance the industrial feel with vintage-style filament bulbs.
For more inspiration, explore our Guide to Ceiling Lights.
Potential Drawbacks to Consider
While the benefits are significant, it’s important to be aware of the downsides:
- Noise: Sound will bounce more freely in a room with hard surfaces. Combat this by adding plenty of soft materials like rugs, curtains, and upholstered furniture.
- Insulation: You lose the thermal and acoustic insulation that a finished ceiling provides. If your basement is cold, ensure your walls are well-insulated and consider area rugs for the floor.
Frequently Asked Questions (FAQs)
1. Is it safe to paint electrical wires and plumbing pipes?
You can paint around them, but it’s generally not recommended to paint directly over electrical wires or plumbing pipes themselves. The paint can make future identification and repairs difficult. For plumbing, painting is usually fine, but it’s best to mask off any important valves or fittings. For electrical, it’s safest to paint the joists and subfloor, allowing the wires to remain their original color or bundling them neatly with colored ties.
2. What is the best type of paint to use?
A water-based latex paint in a flat or matte sheen is ideal. Flat sheen is non-reflective, which helps hide imperfections and reduces glare from overhead lights. It is also more forgiving to touch up if needed. Avoid glossy paints, as they will highlight every flaw and pipe.
3. Can I do this in a rental home?
This is a significant alteration that your landlord would likely need to approve. Because it changes the fundamental finish of the space, it may not be reversible, making it a less-than-ideal project for a rental unless you have explicit permission.
4. How do I deal with a low-height basement?
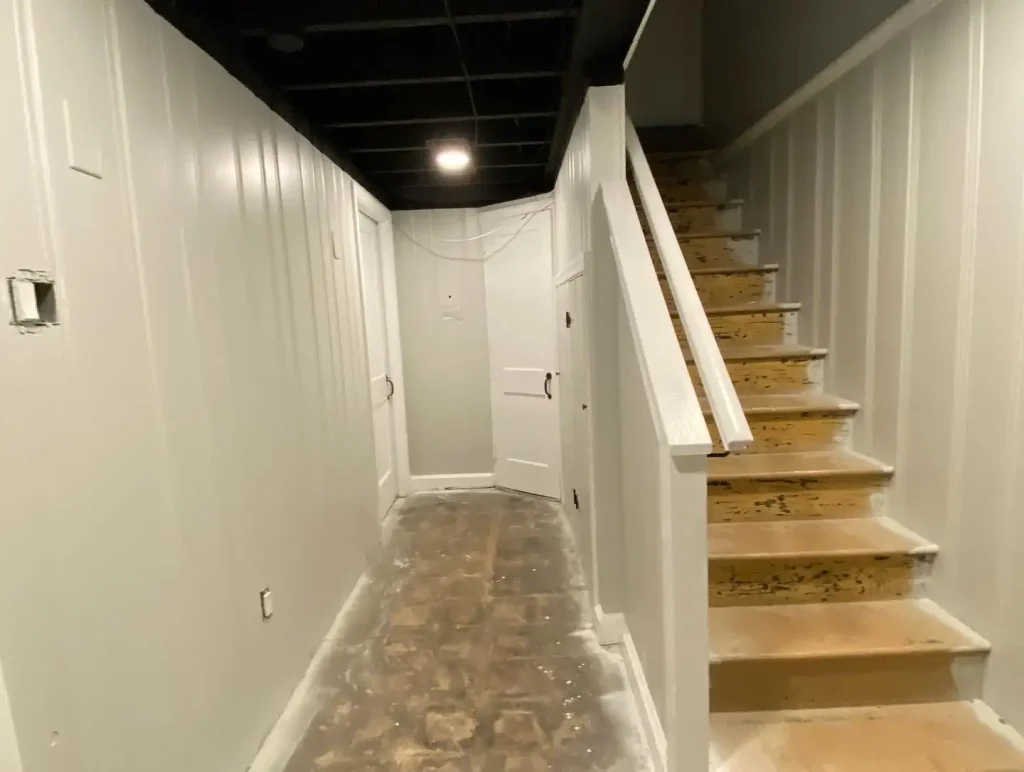
An exposed ceiling is actually a fantastic solution for a low basement! By removing the drop ceiling, you gain back every possible inch of height. Painting it a dark, receding color like black or charcoal will make the ceiling feel less oppressive and visually higher than a white, textured Popcorn Ceiling ever could. For more ideas on handling low spaces, see our guide to Basement Painted Ceiling Low Height Spaces.
Conclusion
Ultimately, the painted exposed basement ceiling is a testament to the power of embracing a space’s raw, industrial character. It proves that style doesn’t have to be expensive or complicated. By choosing this practical and sophisticated approach, you transform functional necessities into intentional design elements, creating a unique, modern basement that feels larger, more accessible, and full of urban charm. It’s a bold choice that pays off in both form and function, turning the very foundation of your home into its most striking feature.