The herringbone tile floors pattern has become one of the most sought-after design elements in modern homes. This distinctive V-shaped weave creates movement and visual interest that can transform any space.
Whether you’re planning a bathroom renovation or updating your kitchen floors, this guide covers everything you need to know about herringbone tile installation.
Understanding the Pattern and Materials
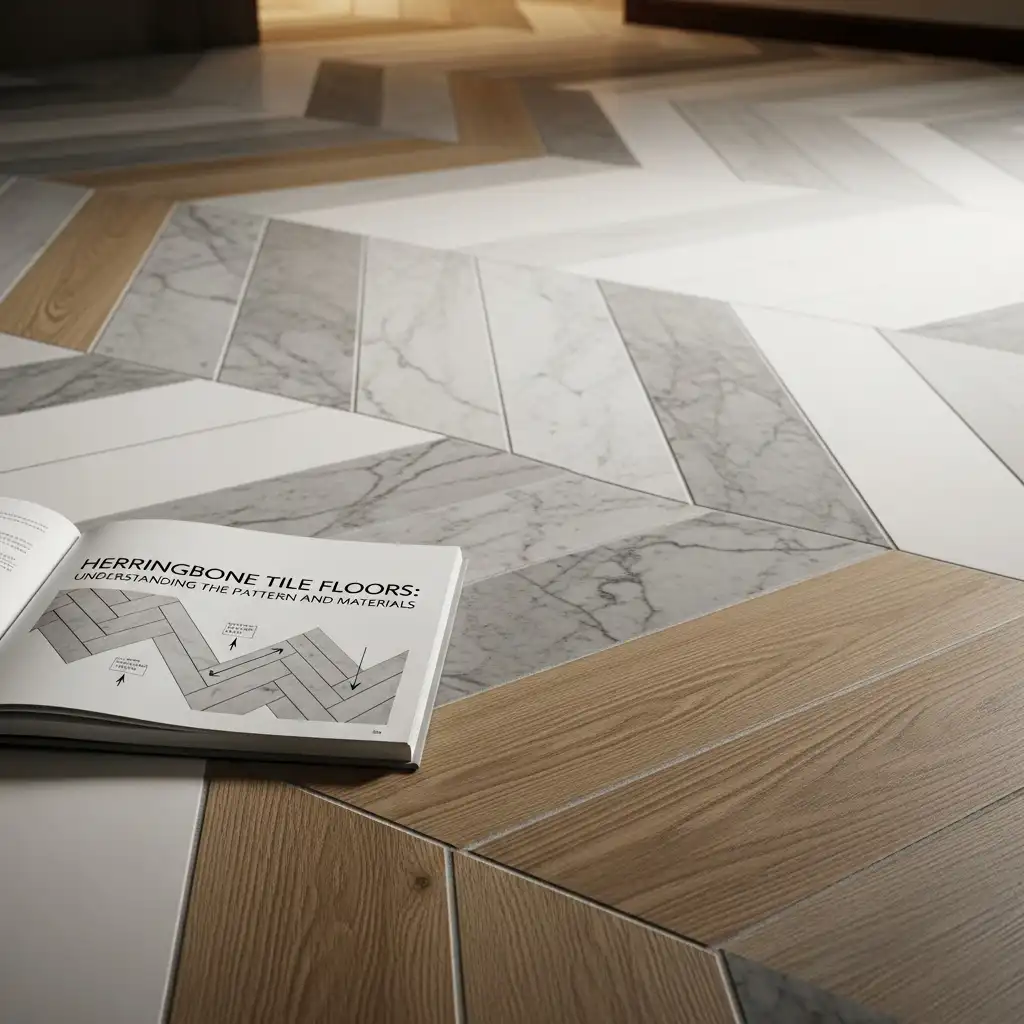
The classic herringbone pattern is created by arranging rectangular tiles in a distinctive, staggered V-shape. This elegant design can be achieved with diverse materials, from durable porcelain and luxurious marble to warm wood-look options.
What Makes Herringbone Unique?
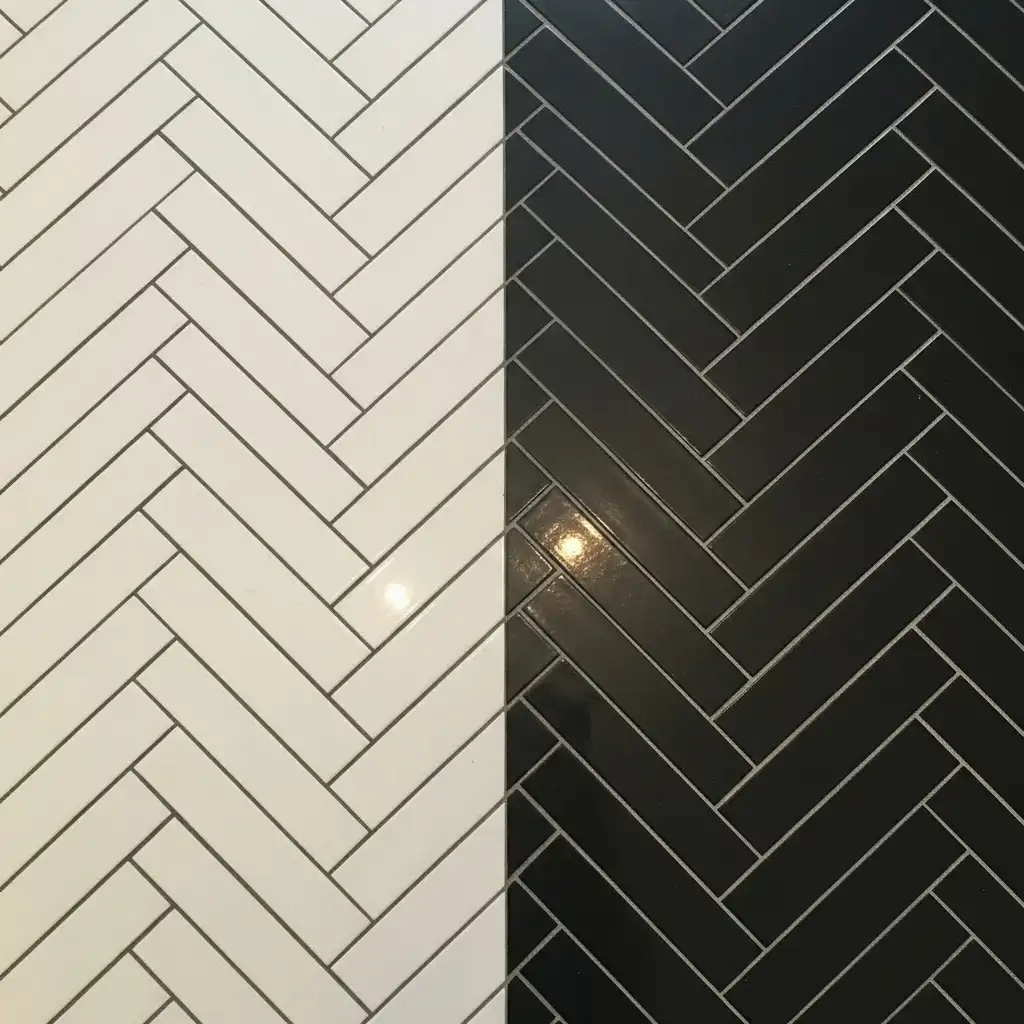
The herringbone floor pattern features rectangular tiles arranged in a broken zigzag formation. Unlike chevron patterns where points meet perfectly, herringbone tiles connect at 90-degree angles, creating a textured, dynamic look. This ancient pattern, dating back to Roman roads, has evolved into a contemporary design staple that works in both traditional and modern settings.
Material Choices Explained
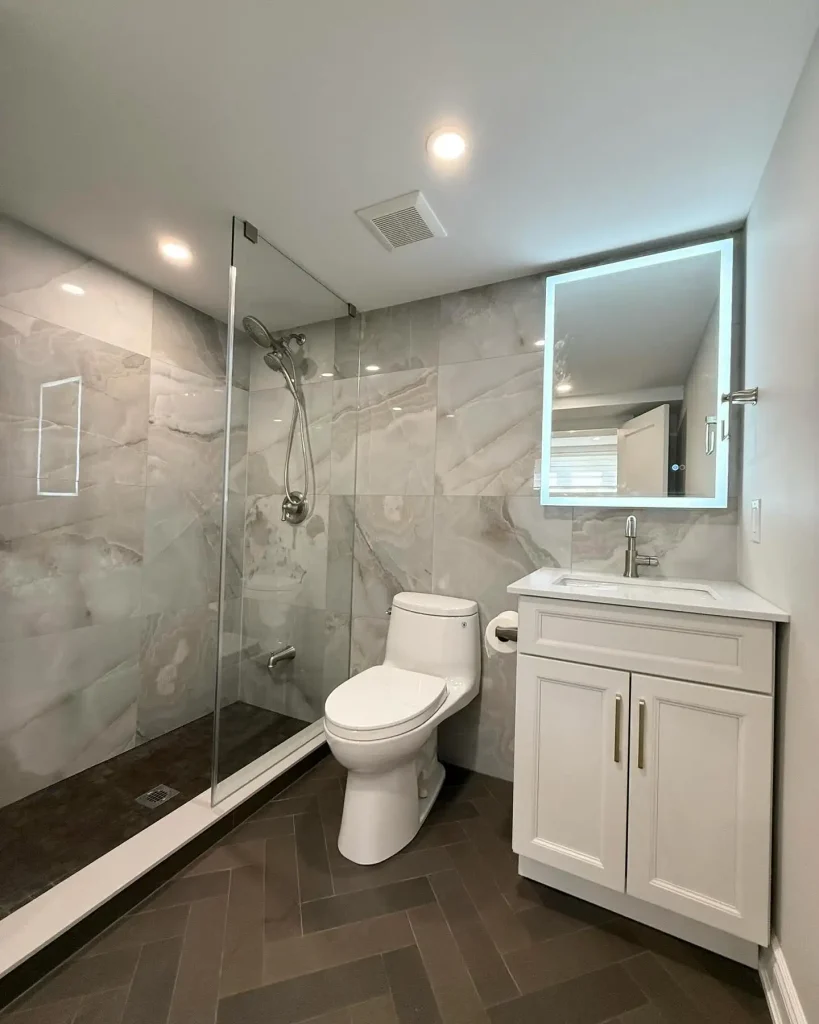
- Porcelain Tiles: Fired at high temperatures, these tiles are dense and virtually impervious to water, making them highly durable for wet or high-traffic areas like for bathroom tiles. They resist scratches and chips better than ceramic and are the most popular choice for long-lasting herringbone floors.

Credits: @delphiniumdesign
- Ceramic Tiles: Softer and fired at lower temperatures, ceramic is the most budget-friendly tile option and is easier for DIY installation. Though less dense than porcelain, its extensive range of colors and designs makes it perfect for interior, moderate-traffic floors.
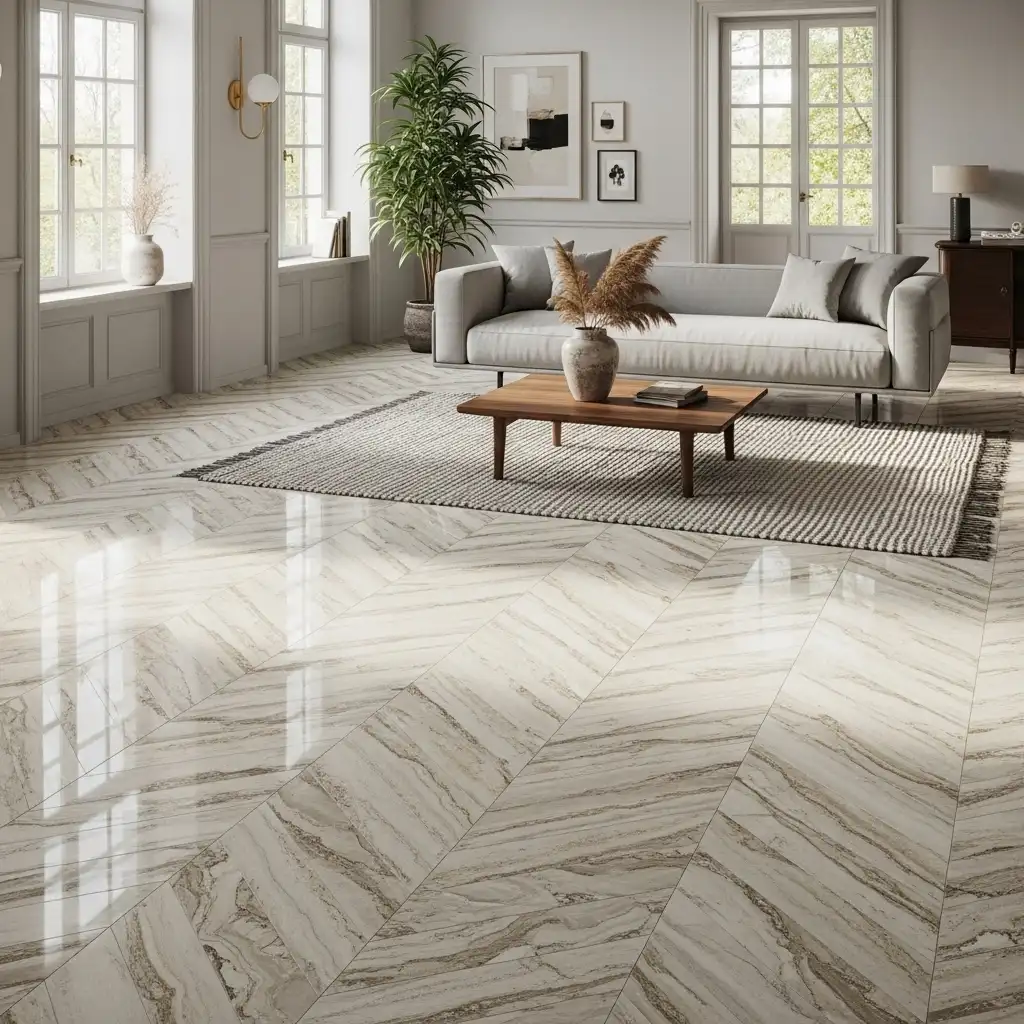
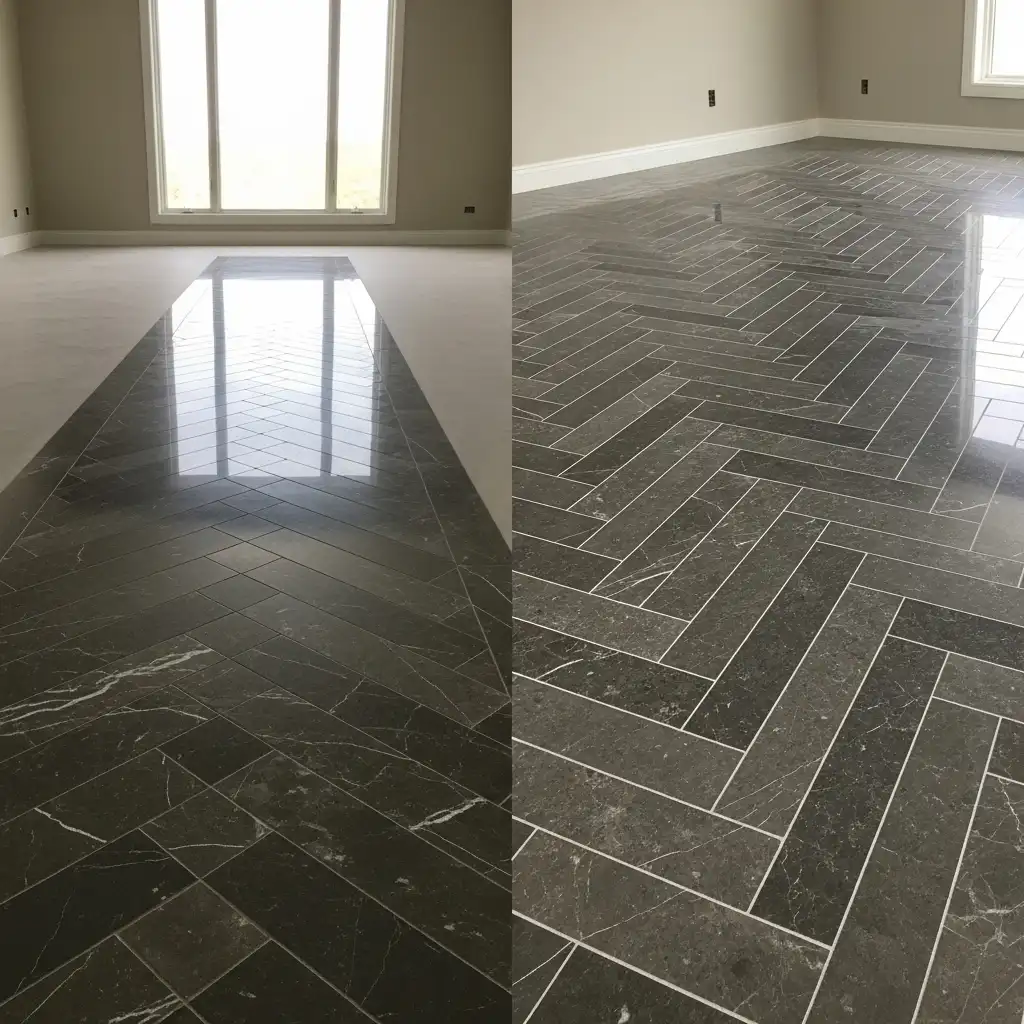
- Natural Stone: Materials like marble and travertine offer unmatched elegance and a unique, luxurious character through natural veining and variations. As a porous material, natural stone requires regular sealing to maintain its beauty and protect it from stains and moisture.
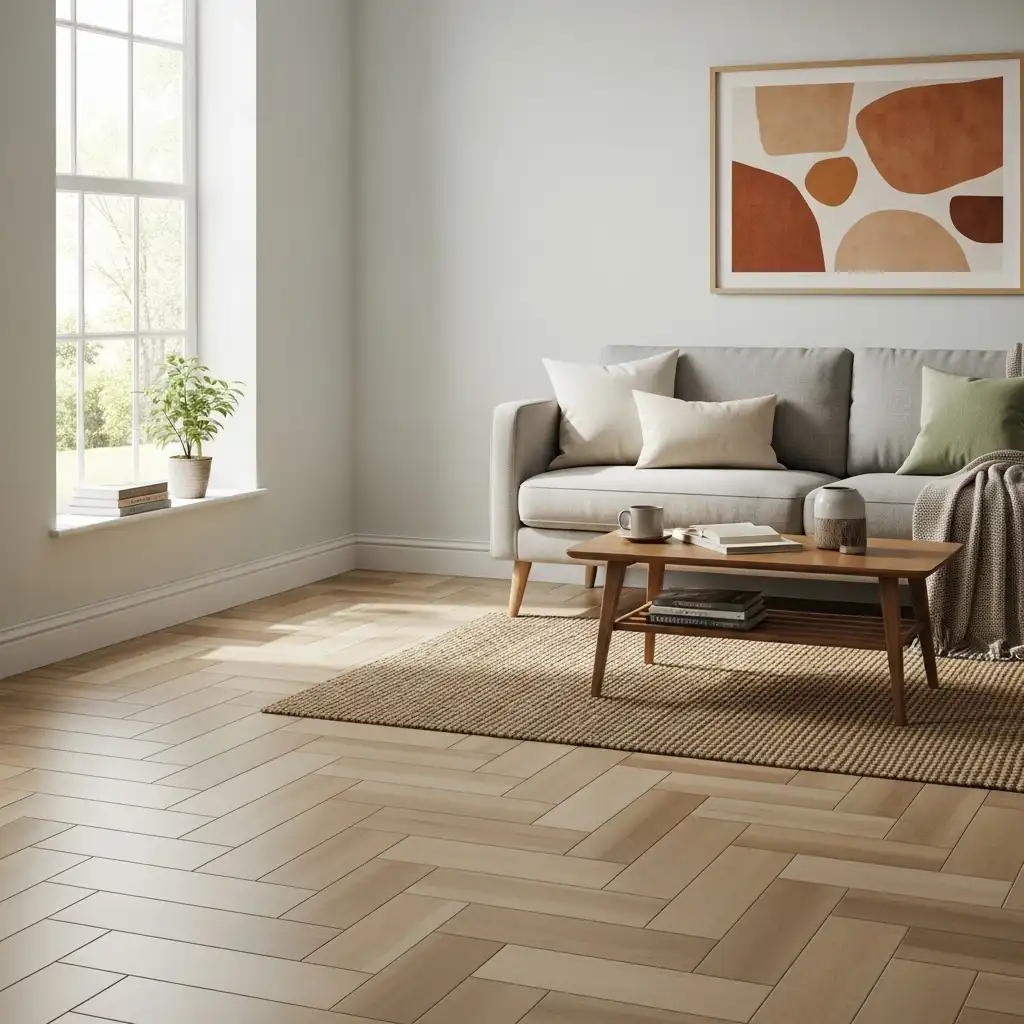
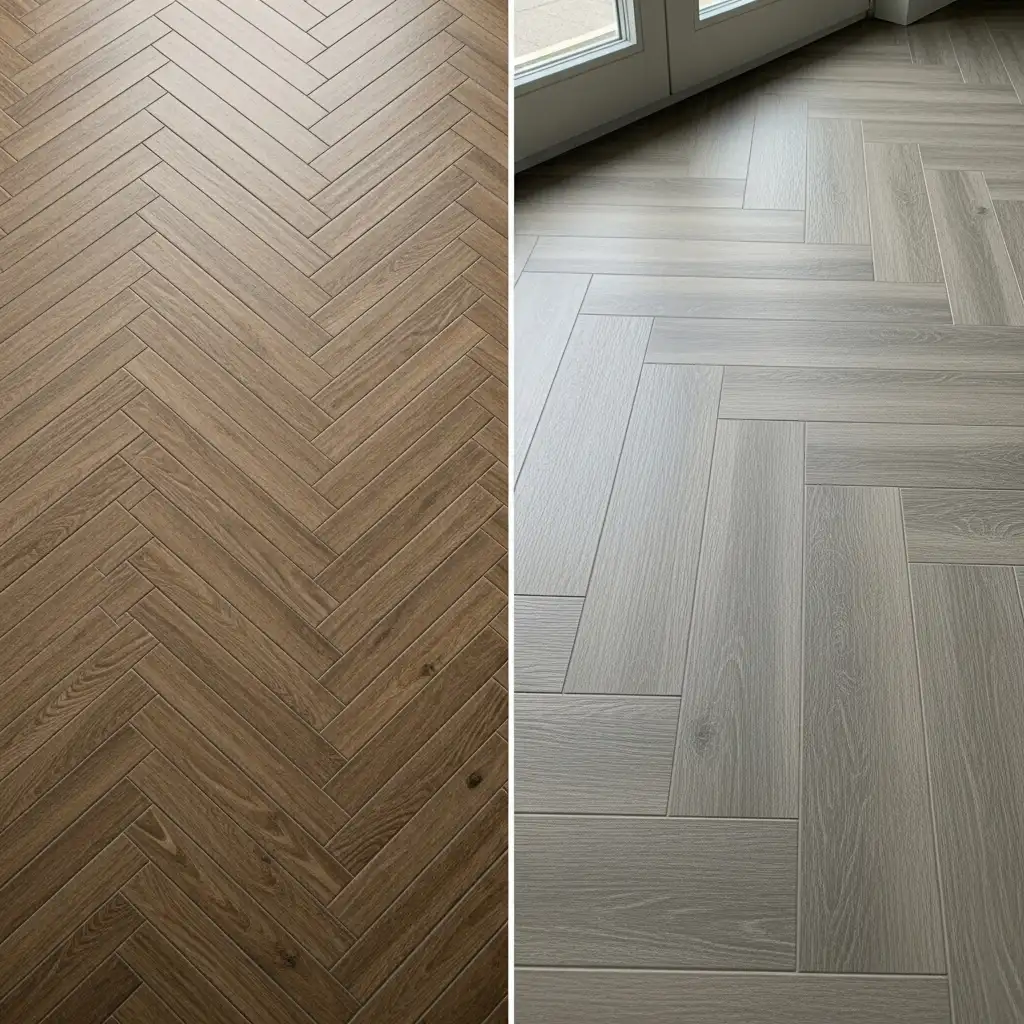
- Wood-Look Porcelain: This modern marvel mimics the warm aesthetic of classic wood parquet using advanced printing technology on a porcelain body. It delivers the look of timber with the high-performance benefits of tile, making it ideal for bathrooms and kitchens.
Credits: @ryan.renos
Costs and Installation Process
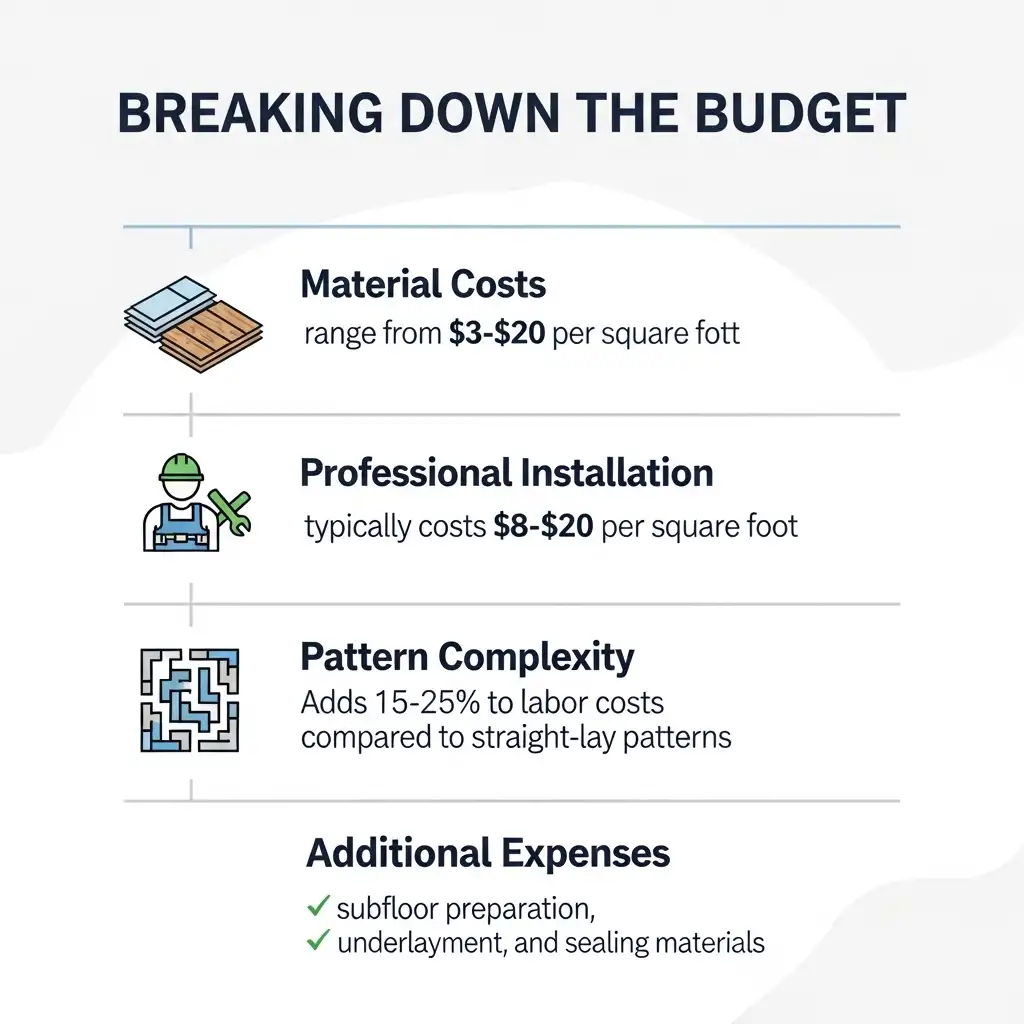
Breaking Down the Budget
Material costs range from $3-$20 per square foot, while professional installation typically costs $8-$15 per square foot. The pattern’s complexity adds 15-25% to labor costs compared to straight-lay patterns. Additional expenses include subfloor preparation, underlayment, and sealing materials.
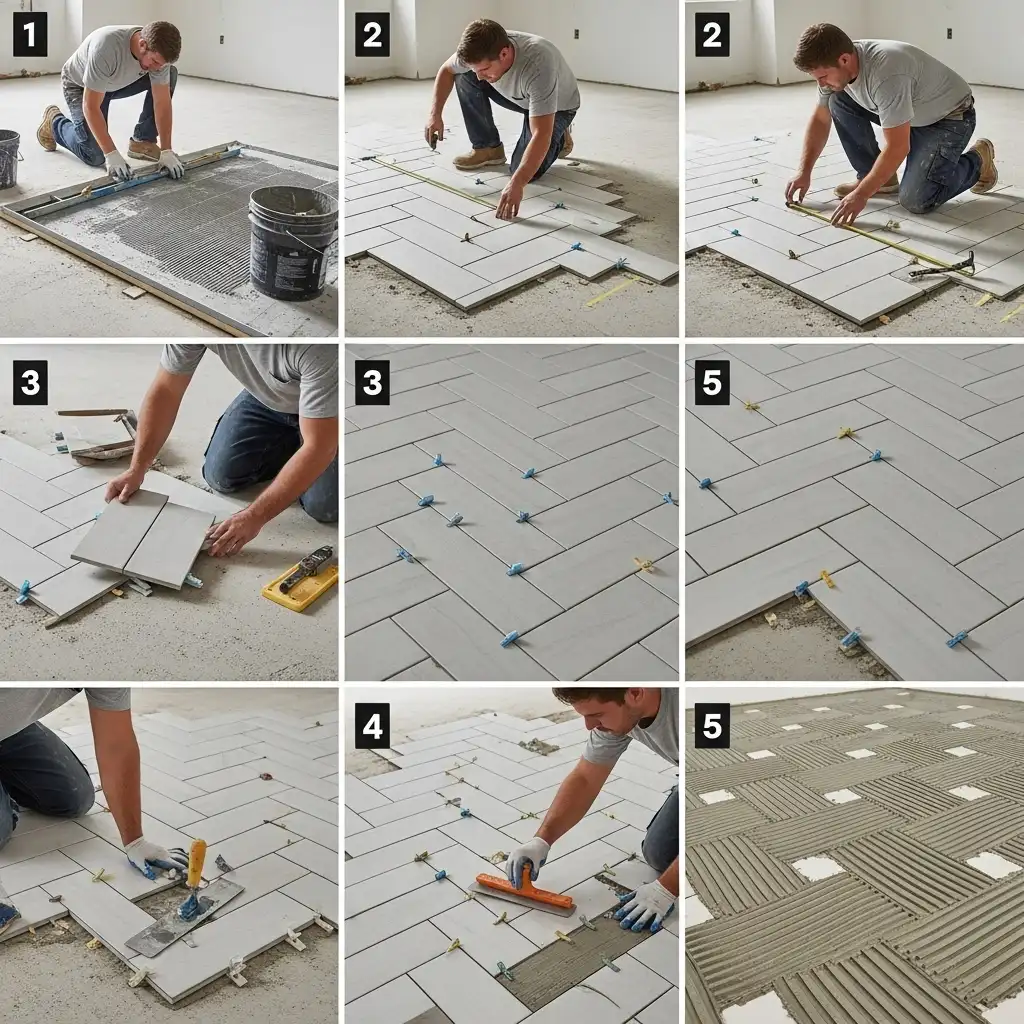
Professional Installation Steps
- Subfloor leveling and preparation
- Precise layout planning from room center
- Careful tile placement at 45-degree angles
- Meticulous spacing and alignment
- Grouting and final sealing
Design Options and Maintenance
Customizing Your Look
- Tile Size: Opting for smaller tiles yields a dense, intricate pattern that highlights a more traditional herringbone style. Larger format tiles create a less busy, more contemporary look, speeding up installation and emphasizing overall floor texture.
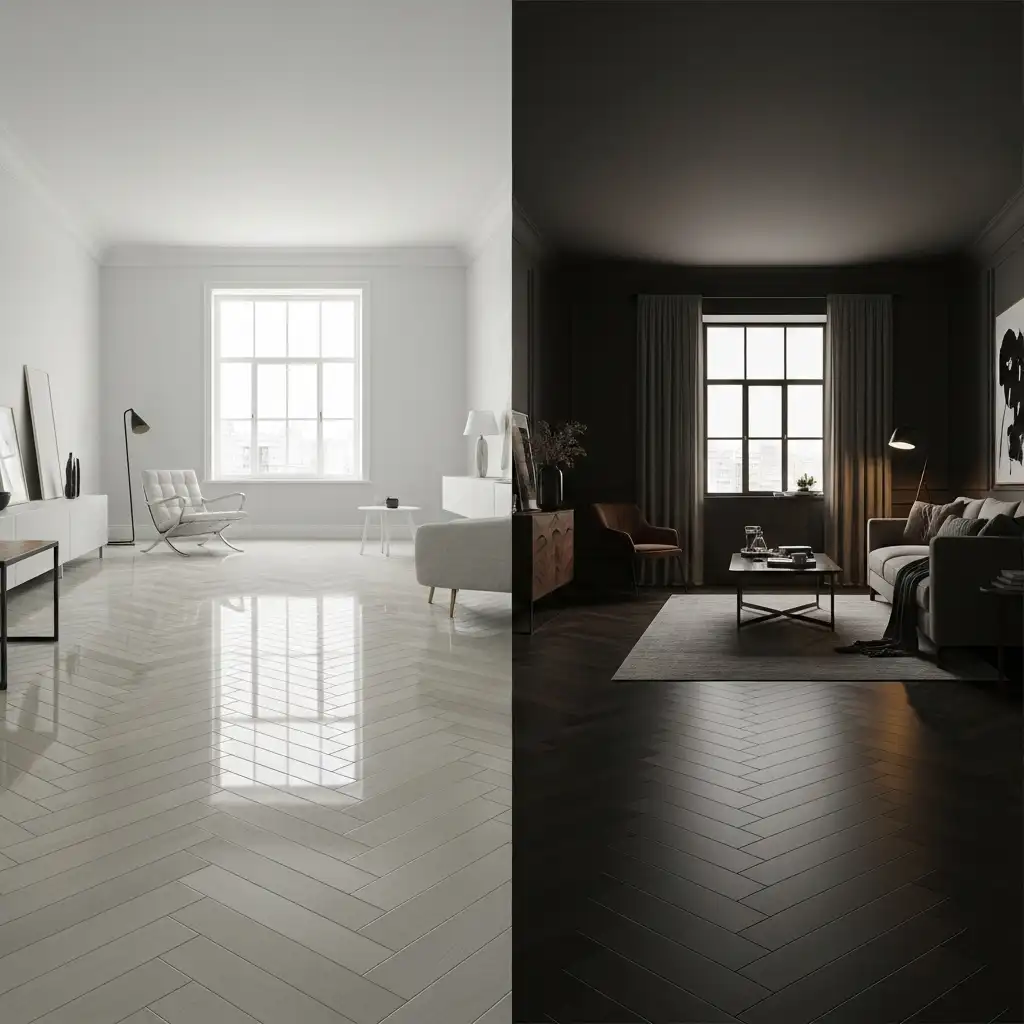
- Color Selection: Choosing light tones helps reflect light, making a room feel more open, airy, and spacious. Conversely, using dark colors adds depth and drama, providing a rich, striking, and grounding visual effect.
- Grout Choices: Using a contrasting grout color (e.g., white grout with black tiles) will sharply outline and emphasize the distinctive V-shape of the herringbone pattern. A matching grout color blends with the tile, creating a smoother, unified surface where the pattern is more subtly perceived.
- Pattern Direction: Orienting the pattern to run the length of a room can visually elongate the space and draw the eye toward a focal point. Laying the pattern diagonally can introduce a dynamic sense of movement and create an illusion of greater width.
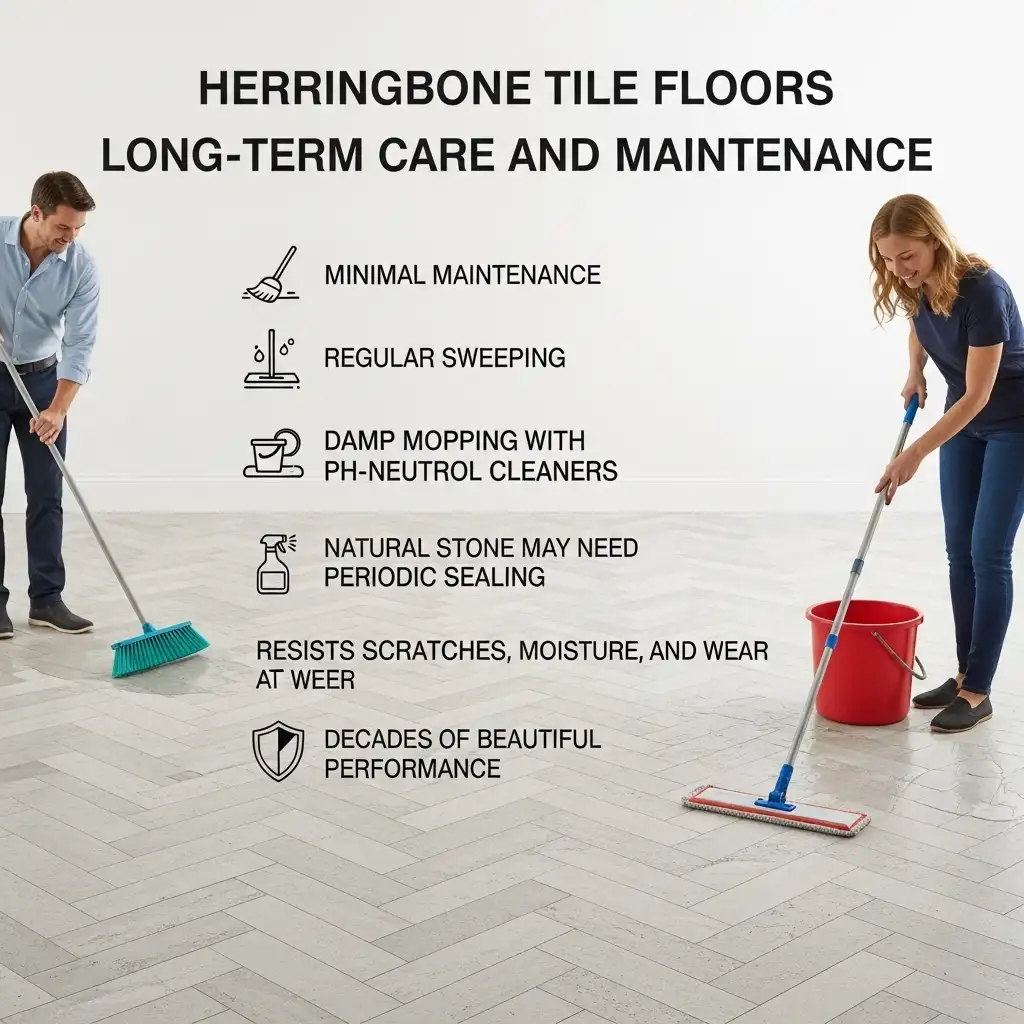
Long-Term Care and Maintenance
Herringbone tile requires minimal maintenance. Regular sweeping and damp mopping with pH-neutral cleaners keeps floors looking new. Natural stone may need periodic sealing. The durable surface resists scratches, moisture, and wear, ensuring decades of beautiful performance.
Frequently Asked Questions
Does herringbone tile make rooms look larger?
Yes, the directional pattern can manipulate spatial perception. When installed parallel to the longest wall, it makes narrow spaces appear wider and creates a sense of movement that benefits smaller rooms.
Can I install herringbone tile myself?
While possible for experienced DIYers, the pattern’s complexity presents significant challenges. The precise angles and numerous cuts demand advanced skills. Most professionals recommend hiring experienced installers for best results.
How long does herringbone tile last?
With proper installation and maintenance, herringbone tile floors can last a lifetime. The materials are extremely durable, and the pattern maintains its visual appeal indefinitely.
Herringbone tile flooring combines timeless elegance with practical durability. While it requires careful planning and professional installation, the result is a stunning architectural feature that adds significant value to your home. Understanding the costs, installation process, and design options will help you create a beautiful, long-lasting floor that elevates any space.