Your kitchen serves as the heart of your home, a bustling hub for cooking, gathering, and everyday life. While a full renovation can feel daunting and expensive, many impactful updates fall well within the realm of DIY kitchen ideas. You do not need professional help or a massive budget to transform this vital space. In fact, DIY projects can save American homeowners an average of 30-50% on labor costs compared to hiring professionals for similar tasks. A few strategic projects can breathe new life into your kitchen, enhancing both its look and its functionality.
These do-it-yourself projects range from simple cosmetic changes to more involved upgrades. They allow you to personalize your kitchen, express your style, and add significant value without extensive demolition. Ready to roll up your sleeves? Explore these 12 achievable DIY kitchen ideas designed to refresh your space and make it truly your own.
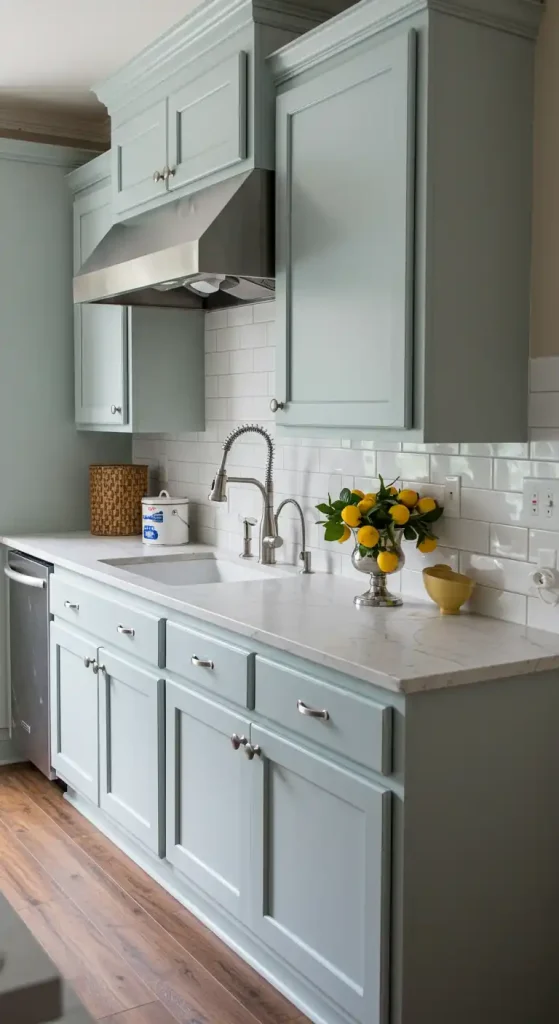
1. Paint Kitchen Cabinets: A Fresh Face for Your Space
Painting your existing kitchen cabinets offers one of the most transformative and budget-friendly DIY kitchen ideas. A new color radically alters the entire feel of your kitchen, making it brighter, more modern, or simply more “you.” This project requires patience but delivers dramatic results. Materials for painting kitchen cabinets typically cost between $200-$1,000 for DIYers, a fraction of the $3,000-$10,000+ for professional painting or refacing.
How to achieve this:
- Prepare Surfaces: Remove cabinet doors and drawers. Clean all surfaces thoroughly to remove grease and grime.
- Sand Lightly: Use fine-grit sandpaper to scuff up existing finishes. This provides a better grip for the new paint.
- Prime Properly: Apply a high-quality primer designed for cabinets. This ensures paint adhesion and prevents bleed-through.
- Apply Paint Evenly: Use a high-quality brush or roller for smooth, even coats. Allow adequate drying time between coats.
- Reassemble Carefully: Once fully cured, reattach hardware and rehang doors and drawers.
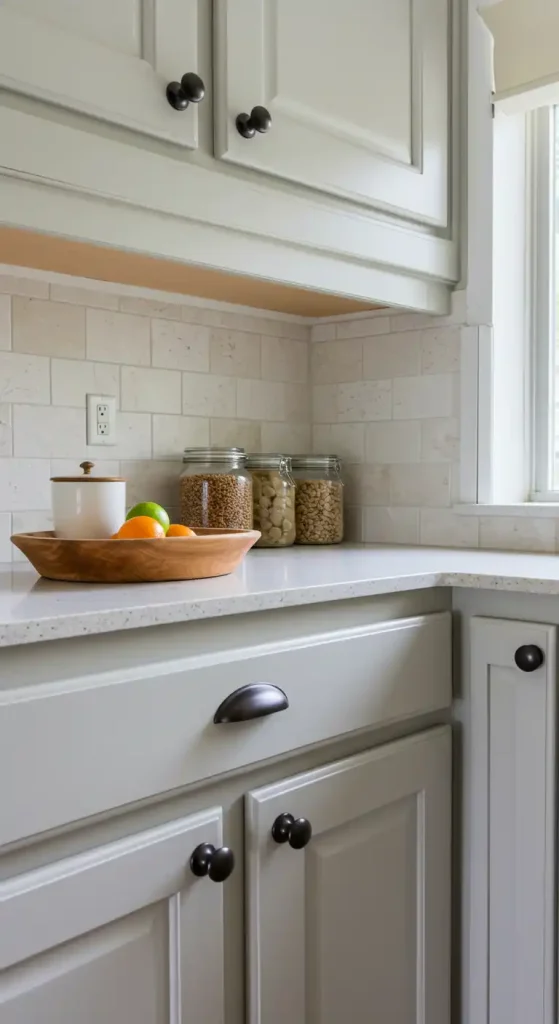
2. Update Cabinet Hardware: Jewelry for Your Cabinets
Sometimes, the smallest change makes the biggest impact. Swapping out old or dated cabinet pulls and knobs offers a quick, inexpensive, and highly effective DIY kitchen idea. New hardware acts like jewelry for your cabinets, instantly upgrading their style from traditional to modern, rustic, or chic. Major hardware retailers like Lowe’s and The Home Depot, accessible in most U.S. cities, offer cabinet hardware starting as low as $2-$5 per piece.
How to achieve this:
- Measure Existing Holes: If reusing existing holes, measure the distance between them (center-to-center) for pulls. Knobs typically use one hole.
- Choose New Hardware: Select knobs, pulls, or cup handles that match your desired aesthetic.
- Install New Hardware: Use a screwdriver to attach the new pieces. Be careful not to overtighten.
- Drill New Holes (If Needed): If your new hardware requires different hole spacing, use a drilling template for accuracy. Fill and sand old holes first.
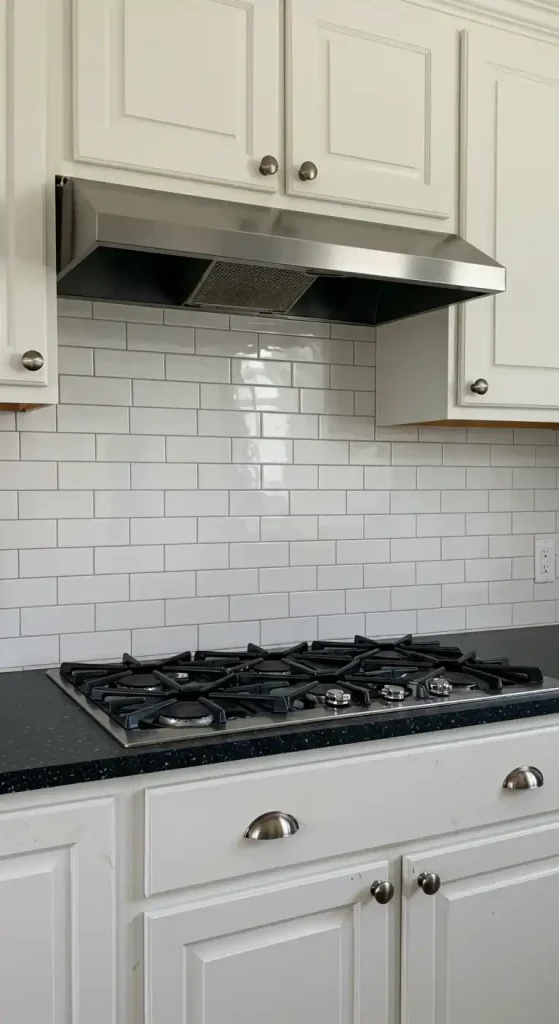
3. Install a New Backsplash: Protect and Beautify Walls
A backsplash serves both functional and aesthetic purposes. It protects your walls from splashes and spills while providing a fantastic opportunity to introduce color, texture, and pattern into your kitchen. Installing a new backsplash is a rewarding DIY kitchen idea that dramatically updates your space. A DIY backsplash project can cost as little as $1-$7 per square foot for materials, making it a budget-friendly visual upgrade.
How to achieve this:
- Prepare Surface: Ensure the wall surface is clean, dry, and free of debris. Remove old caulk or adhesive.
- Choose Material: Select your preferred material: ceramic or subway tiles, peel-and-stick tiles, or even beadboard.
- Plan Layout: Dry-lay your tiles or measure your peel-and-stick sheets to plan the most efficient layout.
- Apply Adhesive: Use appropriate adhesive (thin-set mortar for tiles, strong adhesive for panels).
- Grout and Seal (for Tiles): Apply grout evenly between tiles. After it dries, apply a sealer for protection.
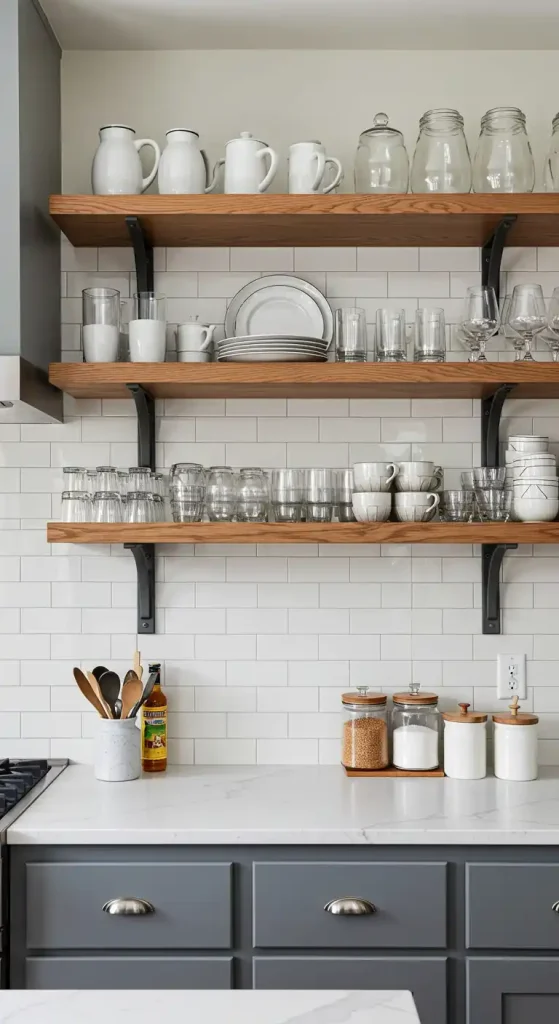
4. Add Open Shelving: Airy Display and Easy Access
Replace some upper cabinets with open shelving to create a more airy and modern feel. This popular DIY kitchen idea allows you to display beautiful dishware, glassware, or decorative items, keeping frequently used essentials within easy reach. This design choice is especially popular in urban lofts and contemporary homes in cities like Portland, Oregon, or Austin, Texas.
How to achieve this:
- Remove Upper Cabinets: Carefully detach and remove any upper cabinets you wish to replace.
- Patch Walls: Repair and paint any wall damage left by the removed cabinets.
- Choose Shelves: Select sturdy shelves made from wood, laminate, or metal. Consider their thickness and finish.
- Install Brackets: Use heavy-duty shelf brackets appropriate for the weight you plan to put on the shelves. Secure them firmly into wall studs.
- Mount Shelves: Place the shelves onto the installed brackets, ensuring they are level and secure.
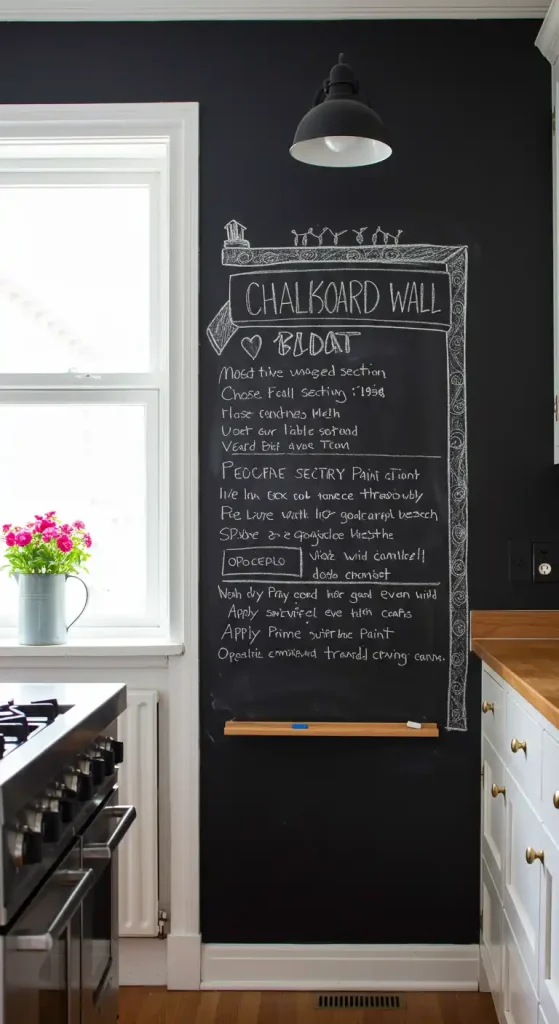
5. Create a Chalkboard Wall: Functional and Fun
Infuse personality and practicality into your kitchen with a chalkboard wall. This playful DIY kitchen idea just like IKEA Kitchen, provides a convenient spot for grocery lists, recipes, daily messages, or even spontaneous artistic expression. It adds a unique, customizable focal point, perfect for family-focused households.
How to achieve this:
- Select a Wall Section: Choose an unused wall or a portion of one, like a pantry door or a specific nook.
- Prepare Surface: Clean the wall thoroughly. Lightly sand if the surface is very smooth.
- Apply Primer: Use a good quality primer, especially if painting over a dark color.
- Apply Chalkboard Paint: Apply several thin, even coats of chalkboard paint. Allow proper drying time between coats.
- Condition the Surface: Once dry, rub the entire surface with the side of a piece of chalk, then erase it. This “conditions” the chalkboard.
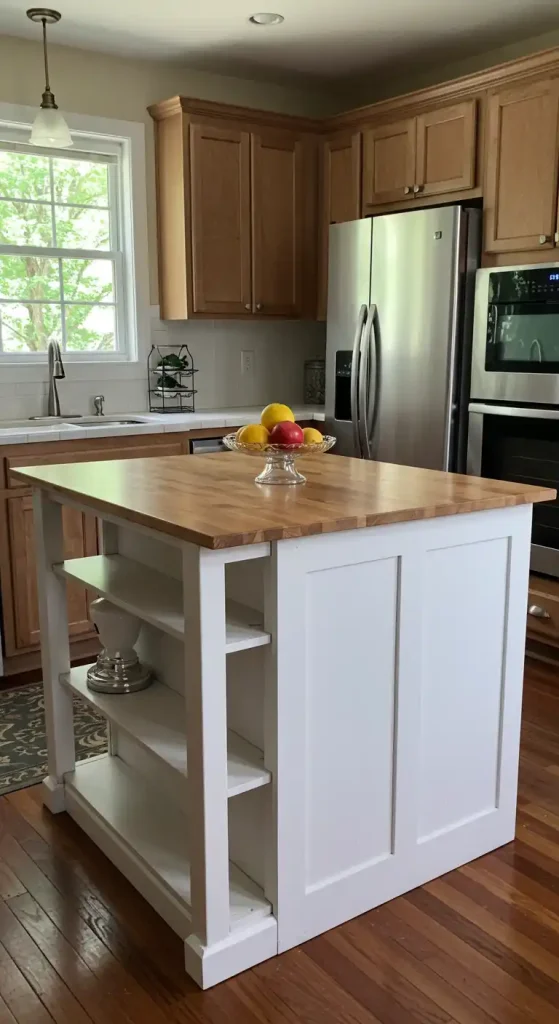
6. Build a Simple Kitchen Island: Extra Workspace and Storage
A kitchen island offers valuable counter space, storage, and a potential casual dining spot. You can construct a functional and attractive island with a few basic materials, making it a highly rewarding DIY kitchen idea. Simple island builds can be done for under $500 in materials, making them much more affordable than custom options.
How to achieve this:
- Gather Materials: Use sturdy wood (e.g., 2x4s for the frame, plywood for sides/shelves) and a durable countertop material.
- Construct a Frame: Build a simple rectangular frame for the base of the island.
- Add Panels and Shelves: Attach plywood or beadboard panels to the sides of the frame. Install shelves or cubbies for storage.
- Install Countertop: Secure your chosen countertop material (e.g., butcher block, laminate) to the top of the island base.
- Finish as Desired: Paint, stain, or seal the island to match your kitchen’s decor.
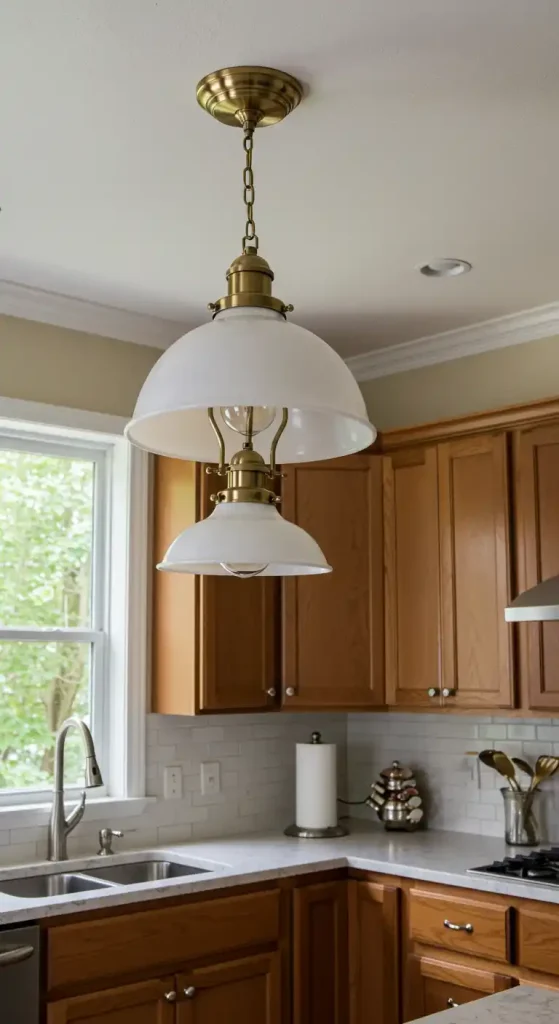
7. Upgrade Lighting Fixtures: Illuminate Your Style
Lighting profoundly impacts a kitchen’s ambiance and functionality. Swapping out old, builder-grade light fixtures for more stylish options is an impactful DIY kitchen idea that sets the mood and enhances visibility for cooking and dining. This quick update often takes less than a day to complete.
How to achieve this:
- Turn Off Power: ALWAYS turn off the power to the circuit at your main breaker box before starting.
- Remove Old Fixture: Carefully detach the old light fixture from the ceiling or wall.
- Connect New Wiring: Follow the manufacturer’s instructions to connect the new fixture’s wires to the house wiring. Match colors (black to black, white to white, ground to ground).
- Secure Fixture: Mount the new fixture securely to the electrical box.
- Install Bulbs: Insert light bulbs. Turn the power back on and test your new light.
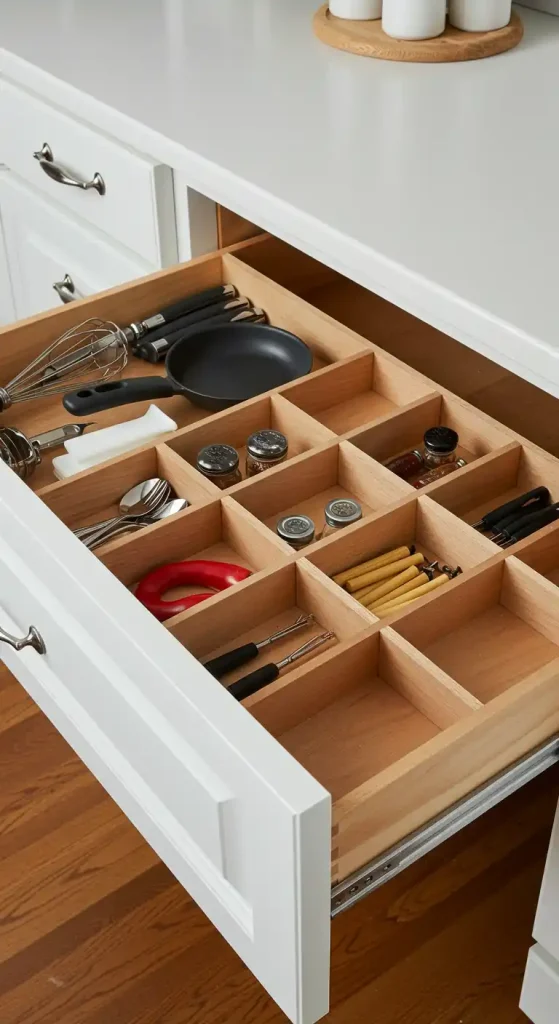
8. Organize Drawers with DIY Inserts: Tidy and Efficient
Cluttered kitchen drawers waste time and space. Customizing drawer interiors with DIY inserts creates a tidy, efficient system for utensils, spices, or small gadgets. This practical DIY kitchen idea streamlines your cooking process, a small change that yields big benefits.
How to achieve this:
- Measure Drawers: Measure the interior dimensions of your drawers (length, width, depth).
- Choose Materials: Use thin wood strips, MDF, or even sturdy foam board for dividers.
- Cut and Assemble Dividers: Cut the material to create a grid or specific compartments that fit your items. You can use wood glue or small nails for assembly.
- Place Inserts: Fit the custom inserts into your drawers. You can leave them loose or secure them with a bit of adhesive.
- Arrange Items: Place your utensils, spices, or other items neatly into their new compartments.
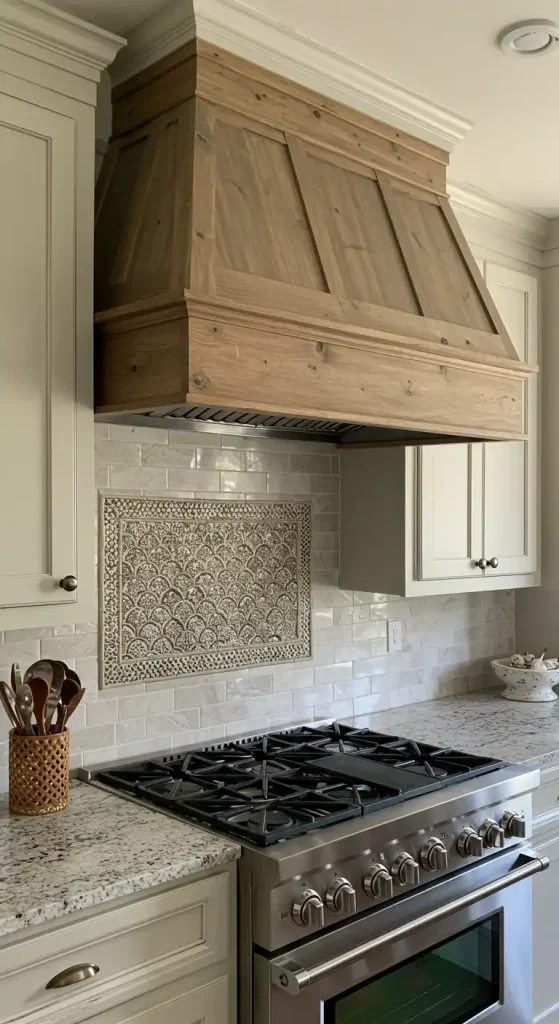
9. Add a Decorative Range Hood Cover: Stylish Concealment
Conceal a standard, often unattractive, range hood behind a custom-built decorative cover. This DIY kitchen idea transforms a necessary appliance into an attractive architectural feature that integrates seamlessly with your kitchen’s design. This adds a custom look often seen in high-end kitchen remodels without the associated expense.
How to achieve this:
- Install Basic Range Hood: Mount a standard, insert-style range hood to your wall or cabinet.
- Build a Frame: Construct a simple wooden frame around the hood using lumber or plywood, creating the desired shape for your cover.
- Attach Panels: Cover the frame with materials like shiplap, MDF panels, or even reclaimed wood.
- Finish as Desired: Paint, stain, or trim the cover to match your cabinetry or add a contrasting element.
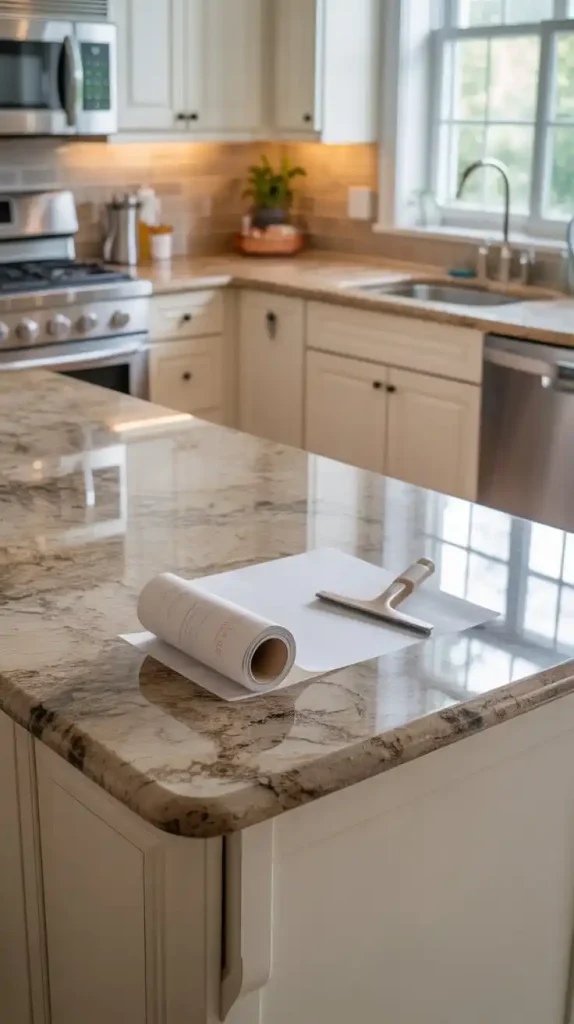
10. Refresh Countertops with Contact Paper or Paint: Surface Makeover
If new countertops are not in the budget, refresh your existing ones with contact paper or specialty countertop paint. This clever DIY kitchen idea provides a temporary but effective aesthetic update, allowing you to mimic the look of granite, marble, or solid colors. Refinishing countertops costs approximately $50-$200 for materials, a stark contrast to the $500-$2,000+ for new laminate or solid surface options.
How to achieve this:
- Clean and Prepare: Thoroughly clean and degrease your countertops. For paint, lightly sand and prime.
- Measure and Cut (Contact Paper): Measure your countertop sections. Cut contact paper slightly larger than needed.
- Apply Carefully: For contact paper, slowly peel the backing and smooth out bubbles with a squeegee. For paint, apply thin, even coats following product instructions.
- Seal Edges: For both options, use a clear sealant around sink edges and seams for durability and water resistance.
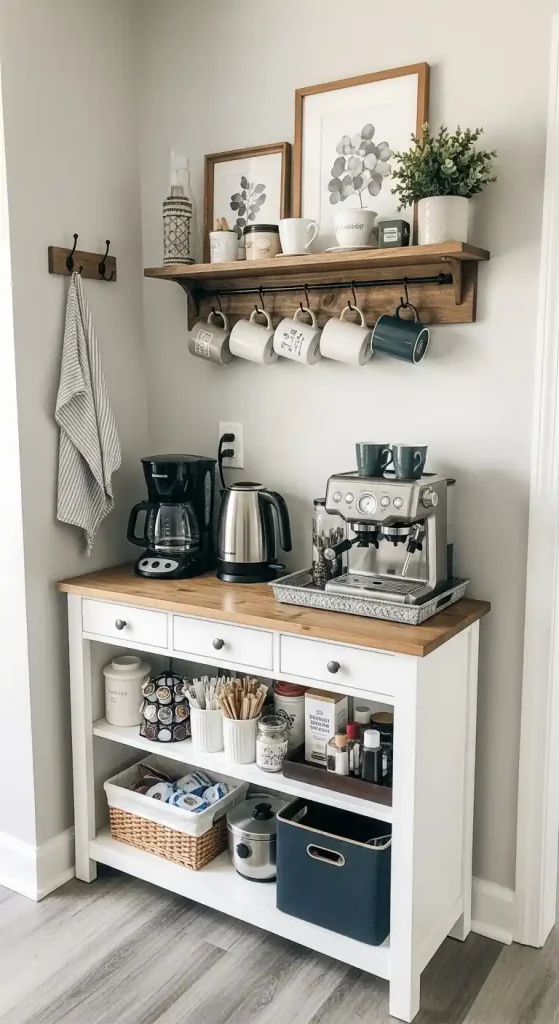
11. Create a Coffee or Beverage Bar: Dedicated Drink Station
Designate a specific corner or small section of your kitchen as a dedicated coffee or beverage bar. This functional and charming DIY kitchen keeps all your drink-making essentials organized and easily accessible, freeing up main counter space. This concept is particularly popular in American homes where coffee culture thrives.
How to achieve this:
- Choose a Spot: Select a countertop area, a small console table, or a repurposed cabinet.
- Add Storage: Use shelves, hooks, or small drawers for mugs, coffee pods, teas, and stirrers.
- Include Appliances: Place your coffee maker, kettle, or espresso machine. Ensure an electrical outlet is nearby.
- Decorate: Add personal touches like a small plant, framed art, or a decorative tray to make the area inviting.
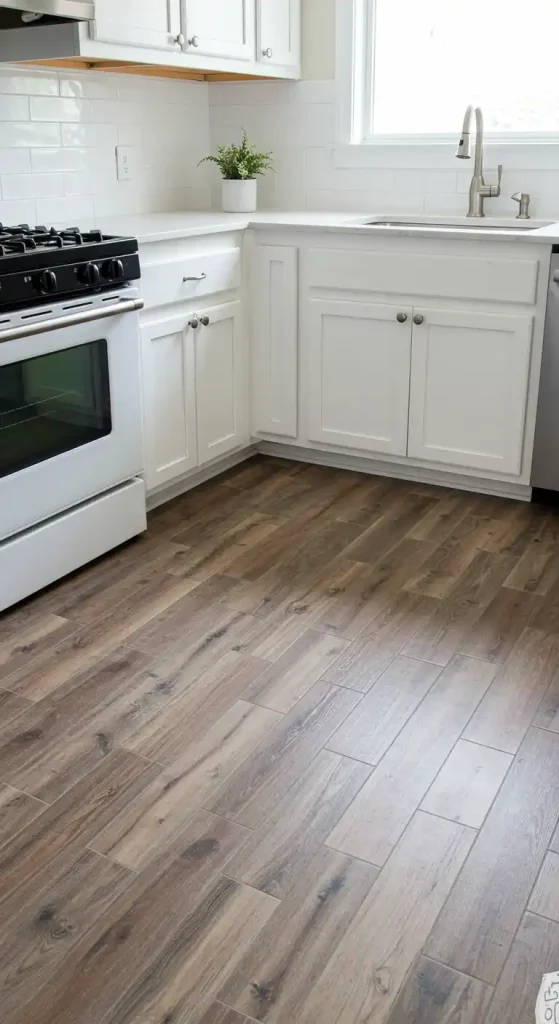
12. Install a Peel-and-Stick Floor: Quick Floor Update
Give your kitchen floor a quick and dramatic makeover with peel-and-stick tiles or planks. This incredibly accessible DIY eliminates the need for messy grout or special tools, making it a perfect project for a weekend. Peel-and-stick flooring installations are often completed in a single weekend, making them a popular choice for quick updates in busy households across the U.S.
How to achieve this:
- Prepare Subfloor: Ensure your existing floor is clean, dry, smooth, and level. Repair any damage.
- Plan Layout: Determine your starting point and plan your tile or plank layout to minimize cuts and maximize visual appeal.
- Begin Laying: Peel the backing from the tiles/planks and firmly press them into place. Work in small sections.
- Trim Edges: Use a utility knife and a straightedge to cut tiles/planks to fit around obstacles or at edges.
- Roll for Adhesion: Once all pieces are down, use a roller (a rolling pin works) to ensure strong adhesion across the entire floor.
Frequently Asked Questions about DIY Kitchen Projects
How much can I truly save with DIY kitchen projects in the U.S.?
DIY kitchen projects offer significant cost savings, primarily by eliminating labor expenses. For a typical kitchen update, labor can account for 30-50% of the total project budget. For instance, professionally painting cabinets can cost thousands, while DIY materials might be only a few hundred dollars. However, consider potential costs for tool rental, unexpected repairs, and your time investment. Proper planning and realistic assessment of your skills help maximize savings and avoid costly mistakes.
What is the most impactful DIY kitchen upgrade for resale value in America?
For resale value, updating kitchen cabinets (painting or refacing) and installing a new backsplash often provide the highest impact. These projects offer a significant visual refresh without extensive structural work. Kitchen updates generally provide a strong return on investment for American homeowners, averaging about 70% of costs recouped at resale. Buyers often prioritize a clean, modern aesthetic in the kitchen, making these visible upgrades highly effective.
Where can I find reliable resources and materials for DIY kitchen projects in the U.S.?
The U.S. offers numerous resources for DIY kitchen enthusiasts. National retail chains like The Home Depot, Lowe’s, and Menards are primary sources for tools, paint, flooring, and hardware. For specialized items like peel-and-stick backsplashes or unique hardware, explore online retailers like Wayfair, Amazon, or Etsy. For guidance, websites like TheSpruce.com, HGTV.com, and numerous YouTube channels offer free tutorials and project guides. Local hardware stores can also provide personalized advice.
Conclusion
Transforming your kitchen does not require a complete overhaul or a massive budget. These 12 DIY kitchen ideas offer accessible, rewarding projects that allow you to personalize your space, enhance its functionality, and add significant charm. From painting cabinets and updating hardware to building custom storage solutions, you have the power to create a kitchen that truly feels like the heart of your American home, all with your own hands. Choose the ideas that best fit your skills and needs, and enjoy the satisfaction of a beautifully refreshed space. Keep visiting Motif Space for more informative blogs on home improvement.