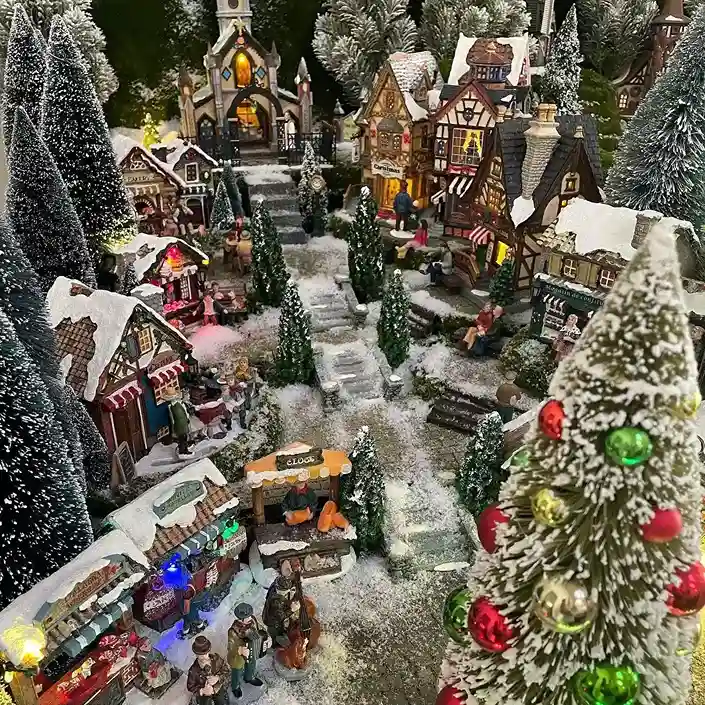
There’s something enchanting about a Christmas village display that captures the imagination like nothing else. The tiny lit windows, miniature snow-covered roofs, and charming scenes of holiday life create a magical world that draws you in and makes you want to peer closer at every delightful detail.
Whether you inherited a collection from your grandmother or you’re just starting to build your own winter wonderland, these 18 creative display ideas will help you showcase your Christmas village in the most beautiful and memorable ways.

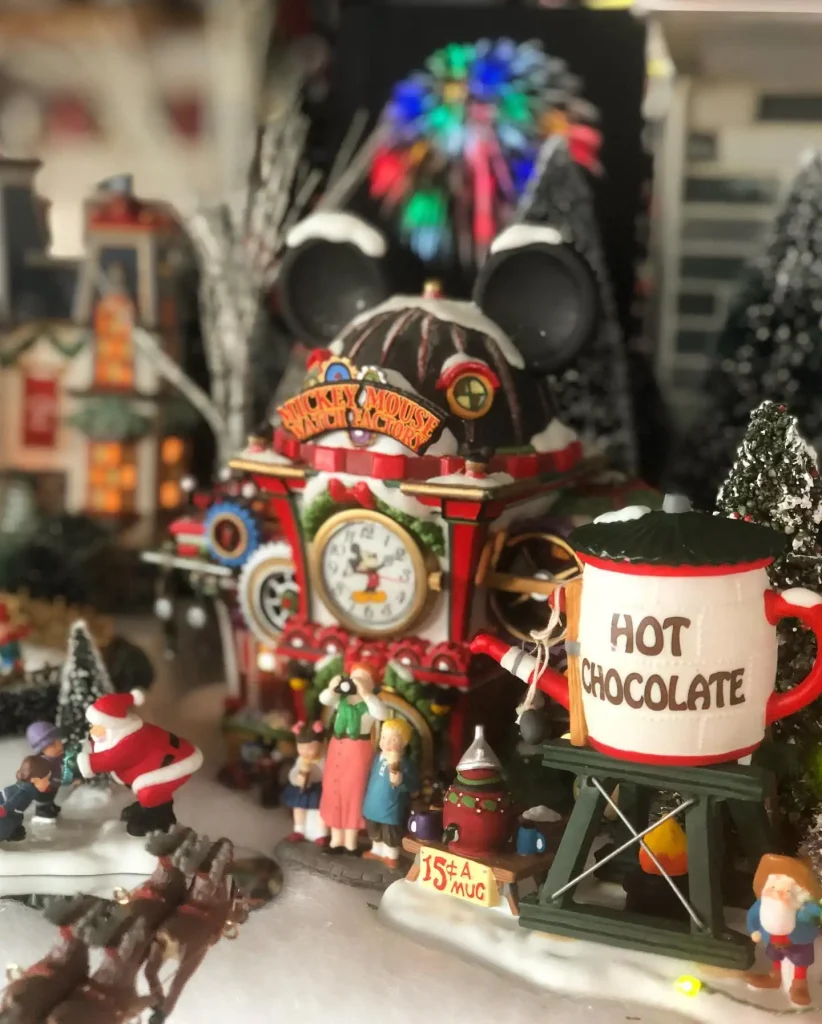
Credits: @modest_home
Why Christmas Villages Are Timeless
Christmas villages have been beloved holiday decorations for generations. They represent idealized versions of cozy towns where it’s always snowing, shops are always cheerfully decorated, and neighbors are always friendly. These miniature worlds offer an escape into nostalgia and fantasy that perfectly captures the spirit of the season.

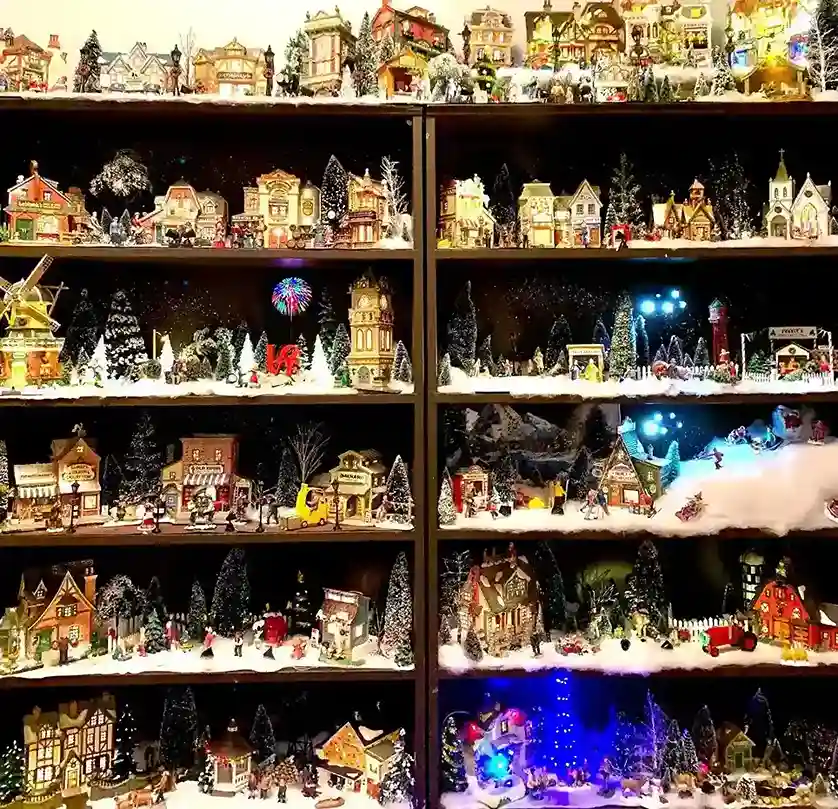
Credits: @bethannesbest
The beauty of Christmas village displays is their versatility. You can go traditional with a classic snow-covered town square, create themed villages around specific eras or stories, or design elaborate landscapes with mountains, skating ponds, and moving figurines. Each year, you can add new pieces, rearrange your layout, or completely reimagine your display.
For those who love vintage aesthetics, Christmas villages pair beautifully with other old-fashioned Christmas decor ideas throughout your home.
1. Classic Mantel Village Display
The fireplace mantel is the quintessential location for a Christmas village. The natural elevation puts your village at eye level, and the mantel’s length provides perfect linear space for arranging buildings.
Credits: @villagesofallseasons
How to Create It: Start with a white or cream table runner to create a snowy base. Arrange buildings from tallest in the center to shorter on the ends, or create a graduated slope effect. Add battery-operated tea lights behind the village for a warm backglow. Drape evergreen garland along the front edge of the mantel, weaving in some of the village’s smaller accessories.
Hang stockings on either end of the mantel rather than in the center, framing your village display. Add small bottle brush trees between buildings and dust everything with artificial snow for that fresh snowfall look.
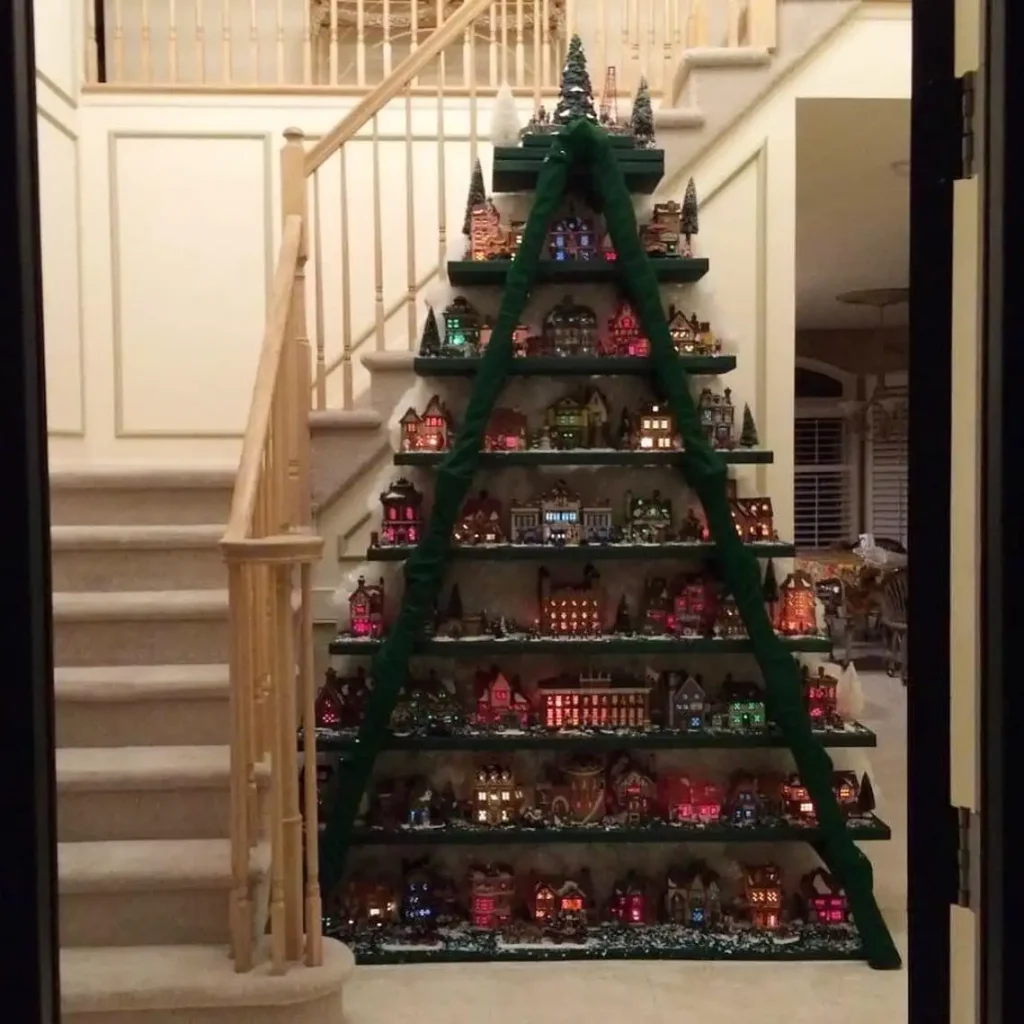
2. Multi-Level Tiered Display
Create dramatic dimension by displaying your village on multiple levels using risers, boxes, or tiered stands hidden beneath your snow blanket.
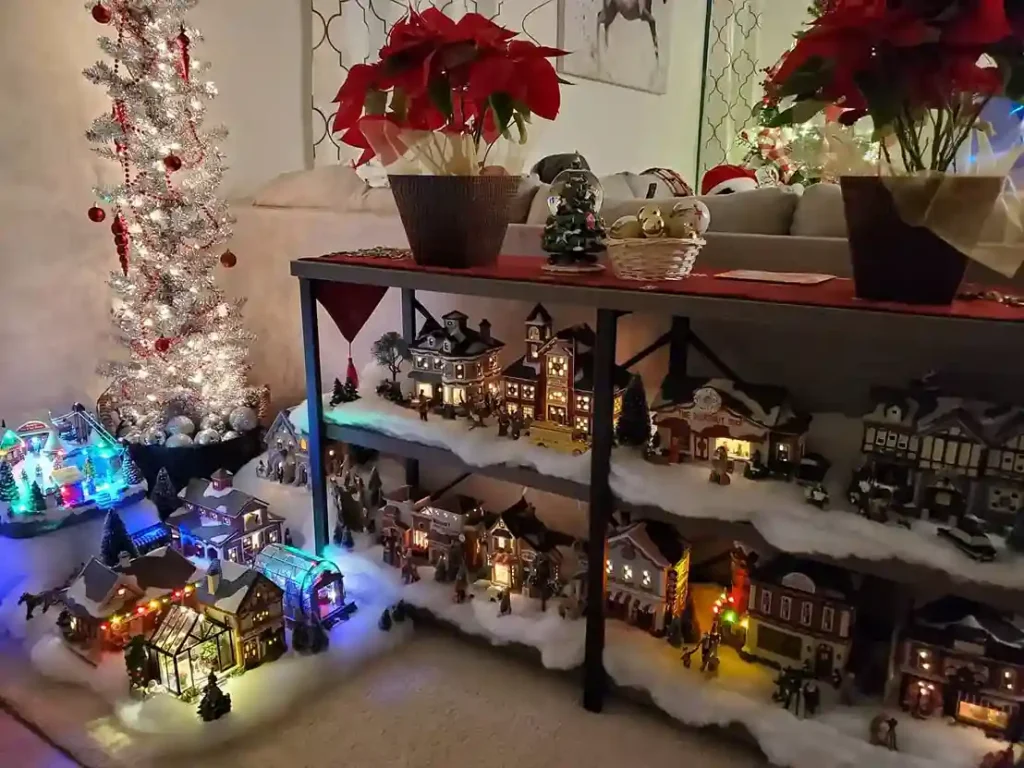
Credits: @rina_athome
How to Create It: Use sturdy boxes, books, or purchased display risers to create different height levels. Cover everything with white fabric, cotton batting, or a snow blanket designed for village displays. This creates hills, elevated areas, and visual interest. Position larger buildings on higher levels toward the back, with smaller buildings and accessories cascading down toward the front.
This approach works especially well on console tables, buffets, or dedicated display tables. The varying heights make every building visible and create a more realistic landscape.
3. Under-the-Tree Village
Transform the space beneath your Christmas tree into a charming village that extends the magic upward into the branches.
Credits: @thehappygardens
How to Create It: Clear a section under your tree and create your village layout on a white tree skirt or snow blanket. Arrange buildings to create streets and pathways that wind through the tree’s trunk area. Use the tree’s lights to illuminate the village from above, creating a magical canopy effect.
Incorporate the tree itself into your village story—perhaps it’s the town’s Christmas tree, or imagine it as a forest at the edge of town. This approach works beautifully with Christmas tree decorations that complement your village’s style and era.
4. Bay Window or Large Window Sill Display
If you have a deep window sill or bay window, it’s an ideal spot for a village display that can be enjoyed both inside and outside your home.
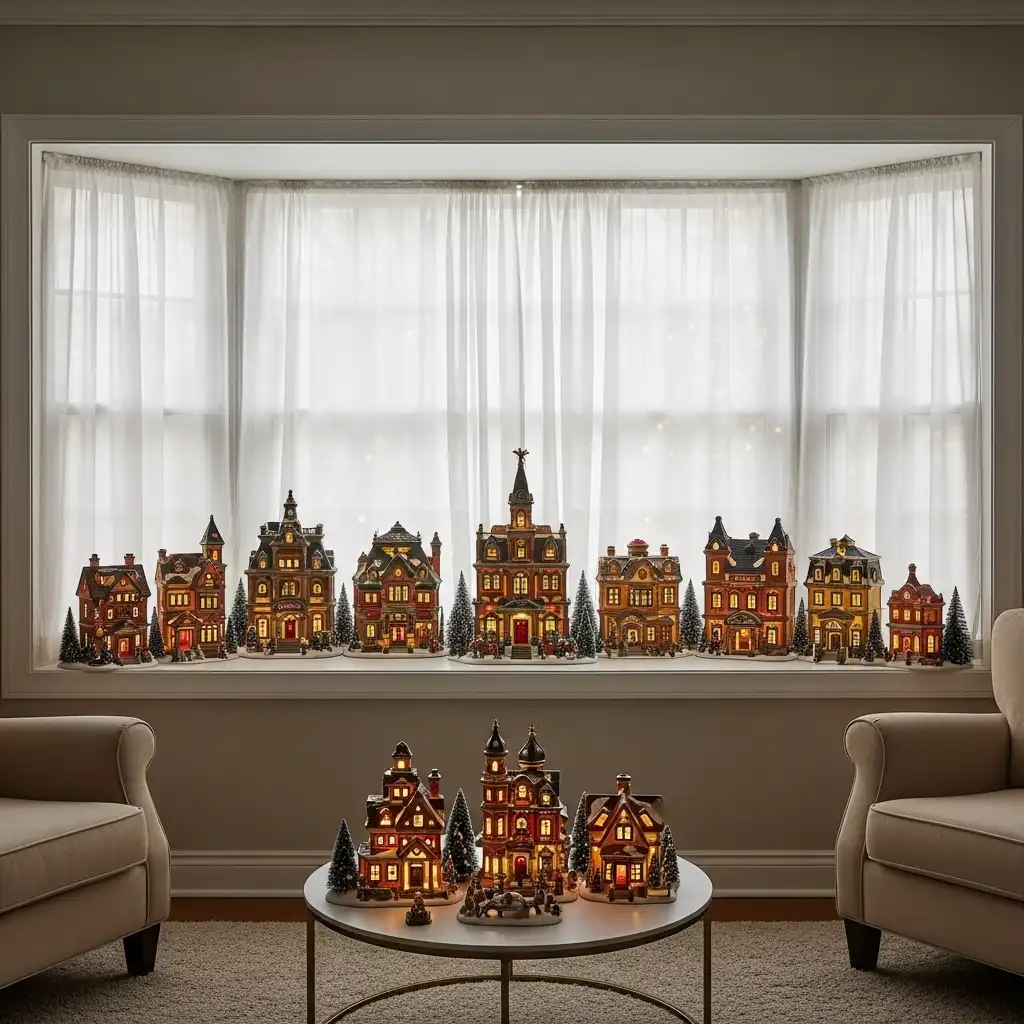
How to Create It: Measure your window sill depth carefully before arranging buildings. Create a single-row village along the length of the window, with taller buildings in the back. The natural light during the day and your village lights at night create beautiful effects.
Add sheer white curtains behind the village to diffuse light and create a dreamy backdrop. From outside, your lit village will create a warm, welcoming glow that enhances your overall exterior holiday display. For more outdoor decorating inspiration, check out our Christmas lights exterior house ideas.
5. Dining Table Centerpiece Village
Make your village the star of holiday meals by creating a long centerpiece display down your dining table.
Credits: @flowers_dunn_n_more
How to Create It: Use a table runner as your base and arrange a linear village down the center of your table. Keep buildings relatively small and leave space for place settings. This works best with a collection of smaller village pieces and accessories.
Add small votive candles, miniature trees, and figurines between buildings. For dinner parties, you can dim overhead lights and let your village lights provide ambient illumination. Guests will love examining the tiny details throughout the meal.
6. Corner Cabinet or Hutch Display
Built-in corner cabinets, china hutches, or display shelves provide perfect protected spaces for village displays, especially if you have curious pets or small children.
Credits: @17chickensandcounting
How to Create It: Use each shelf as a separate village section or scene. Remove some shelving if possible to create taller spaces for larger buildings. The back of the cabinet provides a natural backdrop—consider adding mirror backing to reflect light and make the space feel larger.
String battery-operated fairy lights throughout the shelves to supplement your buildings’ lights. The glass front protects your village while still allowing full visibility, and you can keep your display up longer without worrying about dust.
7. Vintage Suitcase or Trunk Display
Create a portable, self-contained village scene inside a vintage suitcase or trunk for a charming, unexpected display.
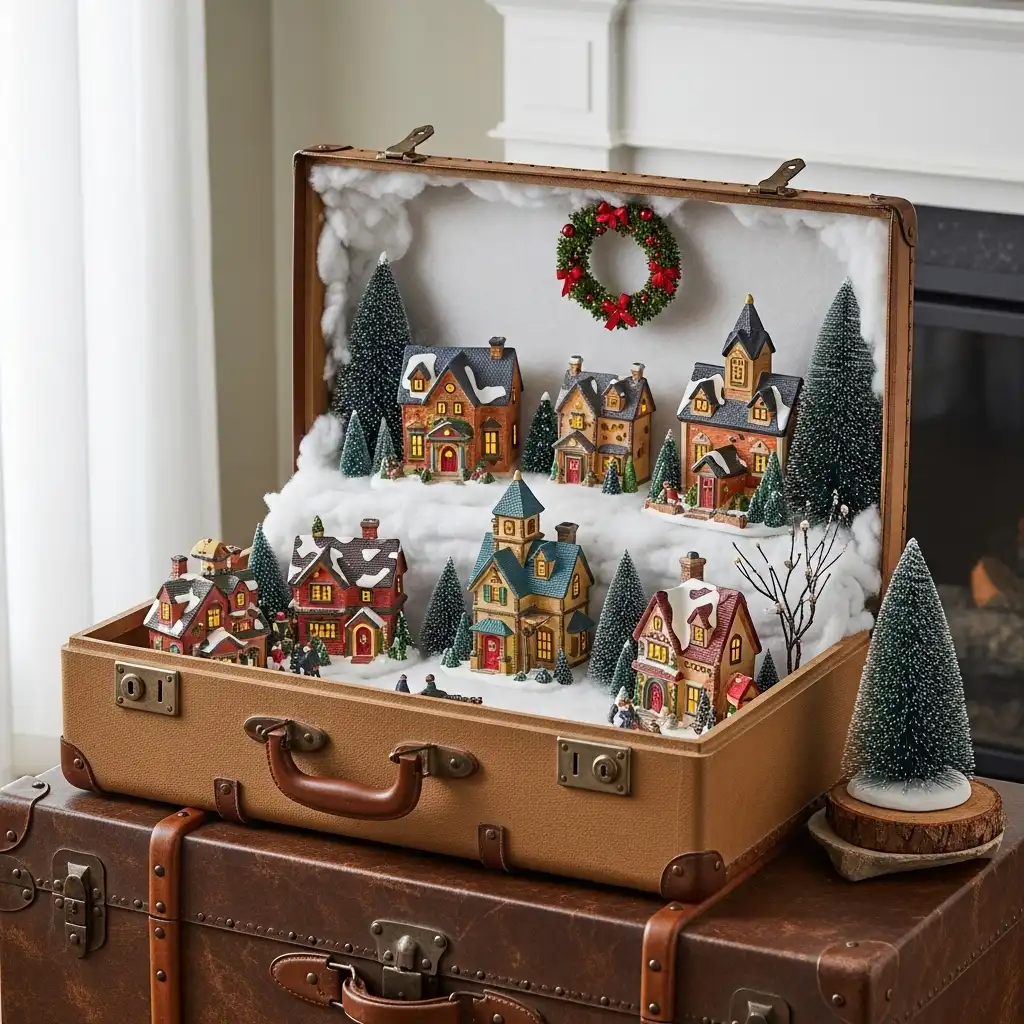
How to Create It: Choose a suitcase or trunk with good depth. Line the interior with white fabric or cotton batting to create a snowy landscape. Arrange a small village scene inside, using the suitcase’s interior as a natural frame.
This approach works beautifully on a coffee table, entry console, or side table. When closed, it’s just vintage luggage; when opened, it reveals a magical winter world. It’s also perfect for those who like to change their decor frequently, as everything packs away neatly. This style fits perfectly with cottage Christmas aesthetics.
8. Bookshelf Village Integration
Weave your village throughout your bookshelf, creating vignettes among your books for an eclectic, collected look.
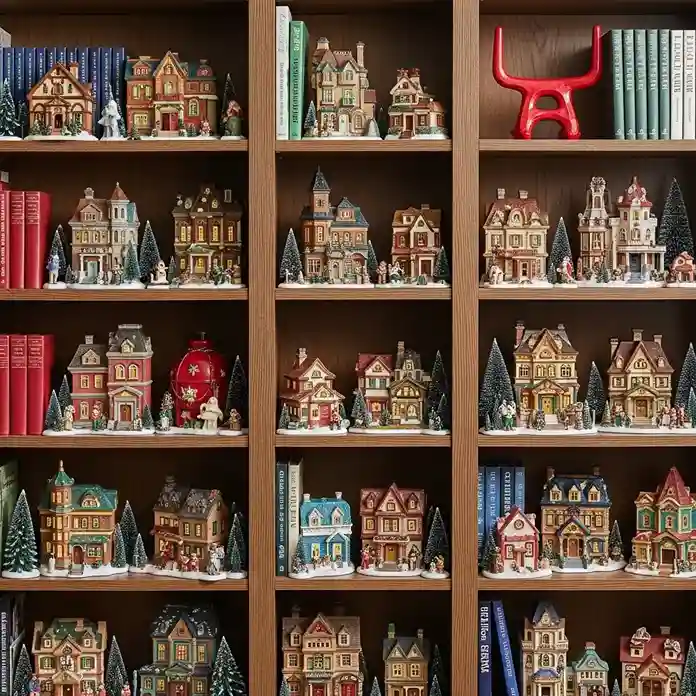
How to Create It: Clear some shelves completely for larger village scenes, and tuck smaller buildings and accessories onto shelves with books. Create little neighborhoods on different levels, connected by an imaginary storyline.
Use books themselves as risers or backdrops. Stack vintage Christmas books beside village scenes, or use red and green book spines to add color. Add small trees, figurines, and snow to each shelf. The mix of books and village pieces creates an intellectual, cozy atmosphere.
9. Mirror-Backed Display for Depth
Use a large mirror as a backdrop to visually double your village size and create stunning light reflections.
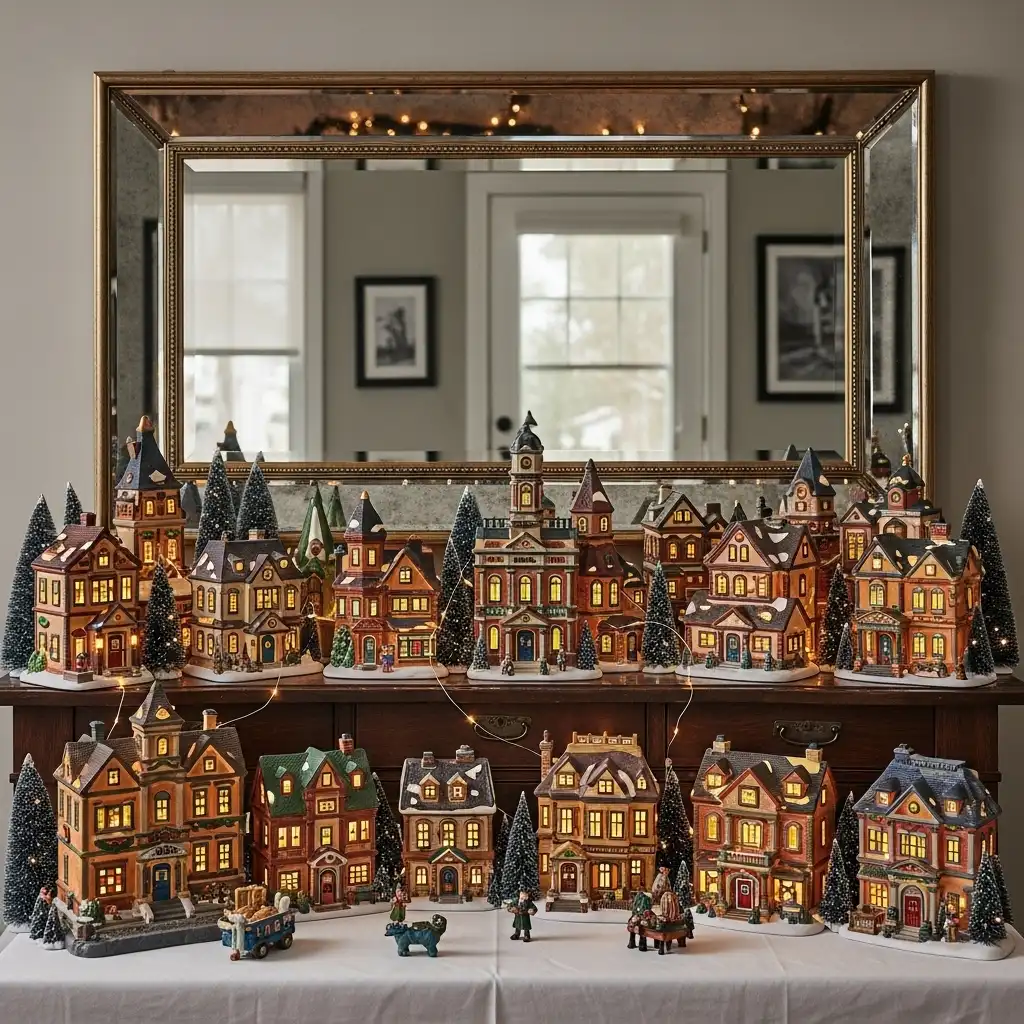
How to Create It: Position a large mirror horizontally on a table or console, or hang it on the wall behind your display surface. Arrange your village in front of the mirror, positioning buildings so their reflections create the illusion of a much larger town.
The mirror doubles your lighting effects, making every lit window reflect and multiply. This technique is especially effective with smaller collections, making them appear much more substantial. Add fairy lights strategically to maximize the reflection effect.
10. Themed Era Village
Commit to a specific time period and create a village that represents that era exclusively.

How to Create It: Choose your era—Victorian, 1950s, Colonial, etc.—and collect buildings and accessories that match. Research the architectural styles, fashion, and details of your chosen period to make your village authentic.
For a 1950s village, include vintage cars, period-appropriate clothing on figurines, and mid-century storefronts. For Victorian, focus on ornate architecture, horse-drawn carriages, and gas lamp street lights. This approach creates a cohesive, museum-quality display that tells a specific story. Pair it with vintage Christmas tree decorating for a fully coordinated look.
11. Snowy Mountain Village
Create dramatic elevation changes and a mountainous landscape for an Alpine-inspired village.
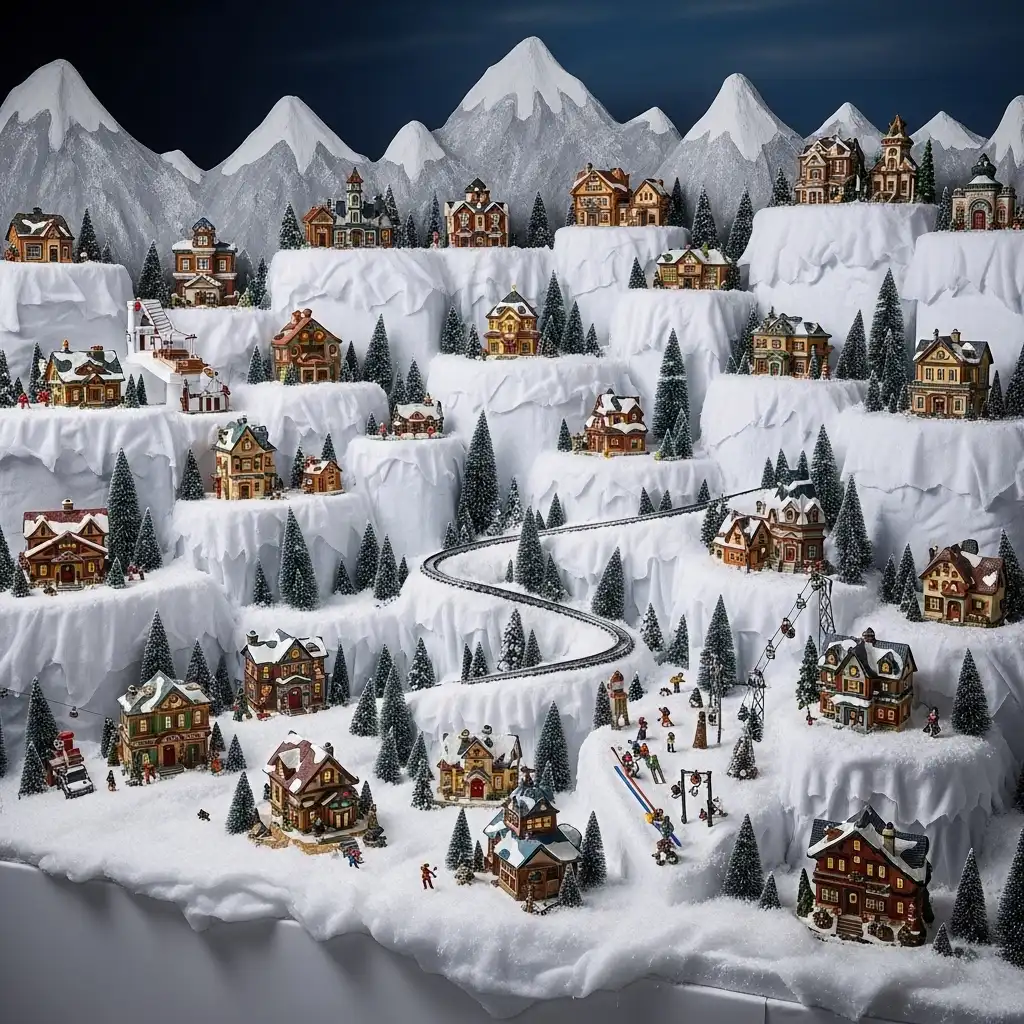
How to Create It: Build up significant height variations using foam boards, boxes, or Styrofoam. Shape the risers to create mountain slopes and valleys. Cover everything with white fabric or snow blanket, smoothing and shaping to create realistic terrain.
Position buildings on various elevations as if they’re built into a hillside. Add a winding road or railway that climbs through the village. Include pine trees scattered on the slopes, and consider adding a ski lodge, ski lift, or winter sports scenes. Dust heavily with artificial snow for an authentic Alpine feel.
12. Village with Working Train
Incorporate a running model train that circles through or around your village for movement and nostalgia.
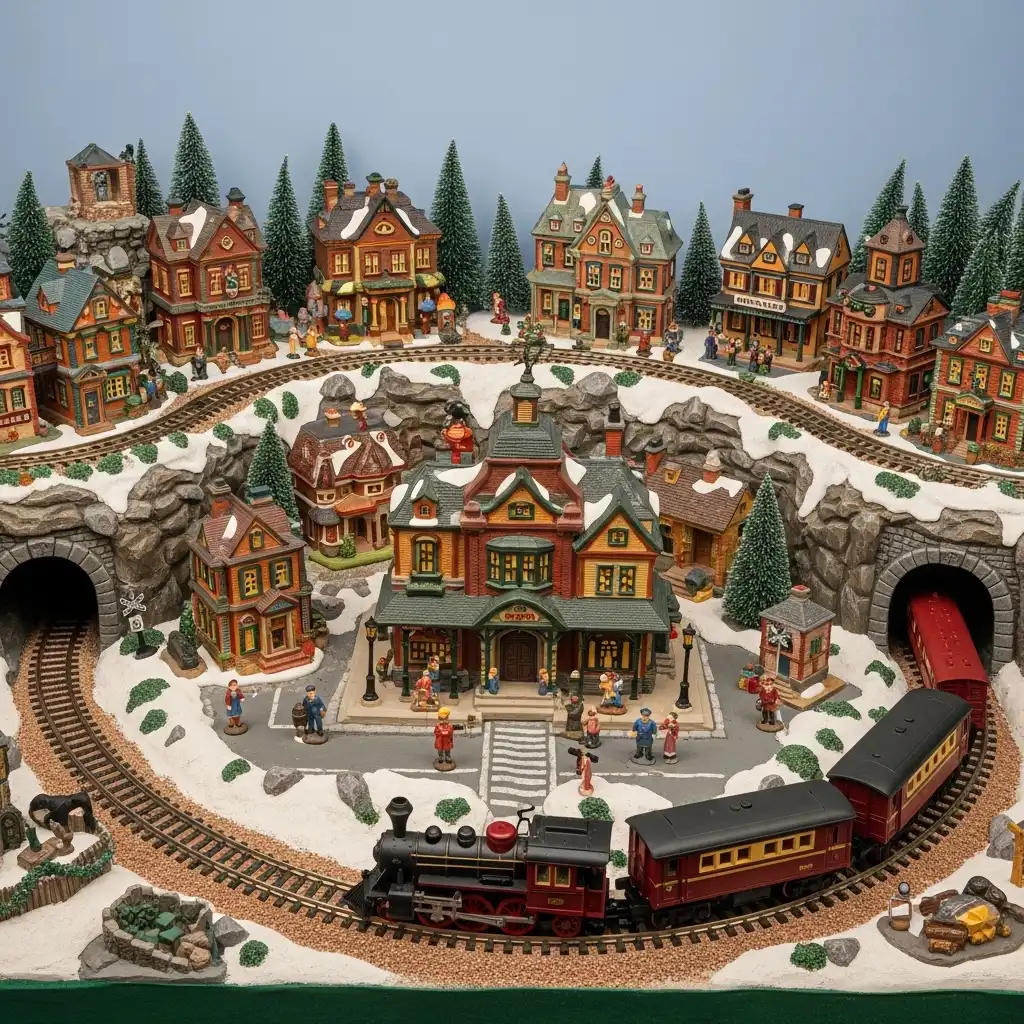
How to Create It: Set up your train track first, then build your village around it. The train can run through the center of town, circle the entire village, or wind through tunnels in your landscape.
Position your train station as a focal point, and arrange other buildings along the track. Add figurines waiting on platforms, crossing guards at intersections, and details that connect the train to village life. The motion of the train brings your entire display to life and fascinates children and adults alike.
13. Water Feature Village
Add a realistic touch by incorporating a “frozen” pond, skating rink, or river into your village.
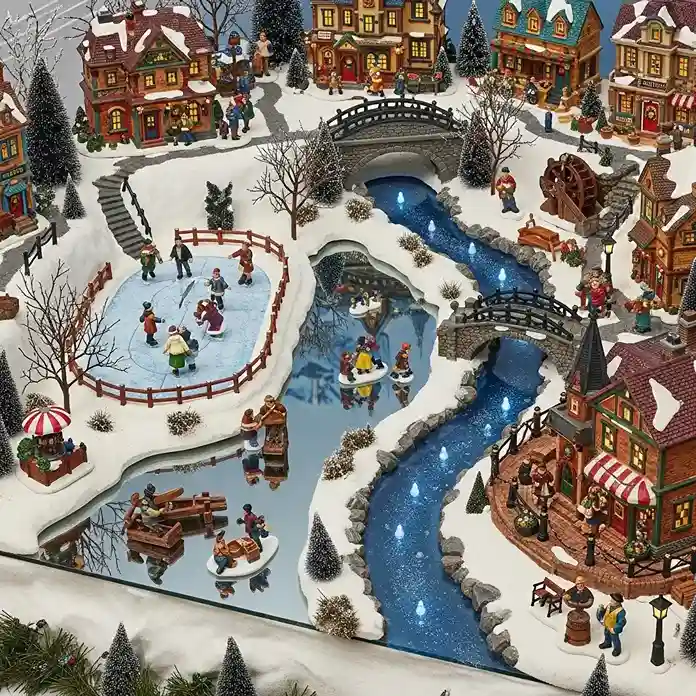
How to Create It: Use a mirror, clear acrylic sheet, or specialized village water products to create a reflective water surface. For a frozen pond, add ice skater figurines and surround it with snow banks and bare trees.
For a river, cut your water material to wind through the village, with a bridge crossing overhead. Add a water mill, fishermen, or a riverside cafe. The reflective surface adds sparkle and realism, and water features become natural gathering spots in your miniature town. Position lights beneath or around the water to make it shimmer.
14. Christmas Market Square Display
Focus your village around a central market square bustling with holiday activity.
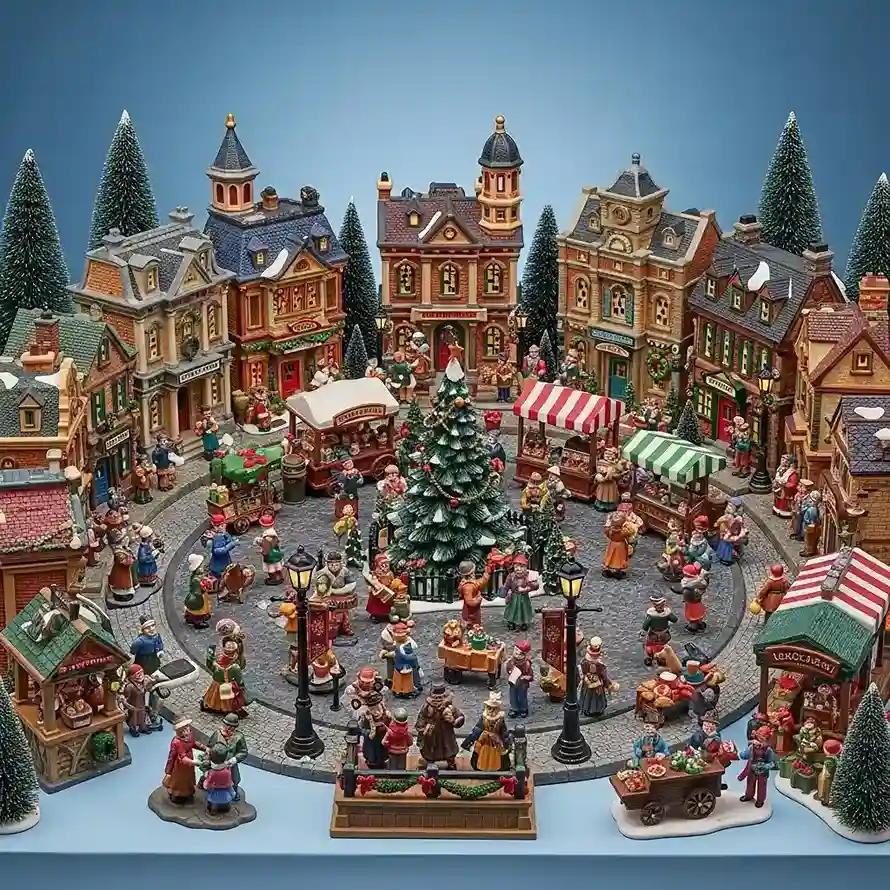
How to Create It: Arrange your buildings in a circle or square shape, leaving an open plaza in the center. Fill the square with market stalls, vendor carts, and numerous figurines shopping, chatting, and celebrating.
Add a large Christmas tree in the center of the square, festive banners, street lamps, and a carolers’ platform. This arrangement creates a natural focal point and tells a story of community gathering. It’s perfect for showcasing your figurine collection and creating animated, joyful scenes.
15. Farmhouse and Countryside Village
Create a rural Christmas village featuring farms, barns, and countryside charm rather than urban buildings.
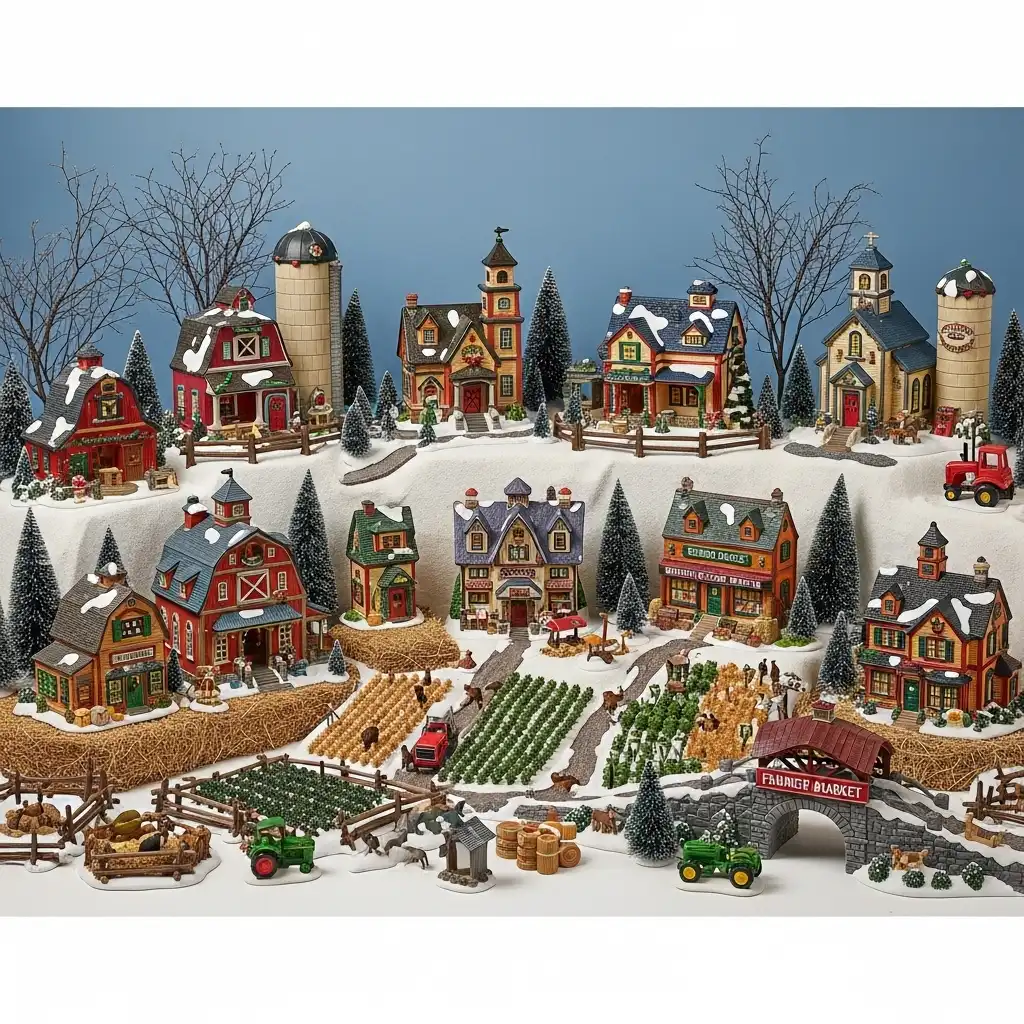
How to Create It: Collect barn buildings, farmhouses, silos, and country churches. Arrange them with plenty of space between structures, as rural buildings would be. Add farm animals, tractors, fields with snow-covered crops, and split-rail fencing.
Include a farmer’s market, country store, and perhaps a covered bridge. Use more natural elements like actual small branches for bare winter trees, hay scattered around barns, and rustic accessories. This style complements French country Christmas decor beautifully throughout your home.
16. Illuminated Backdrop Village
Create a dramatic effect by using a light box or illuminated backdrop behind your village.
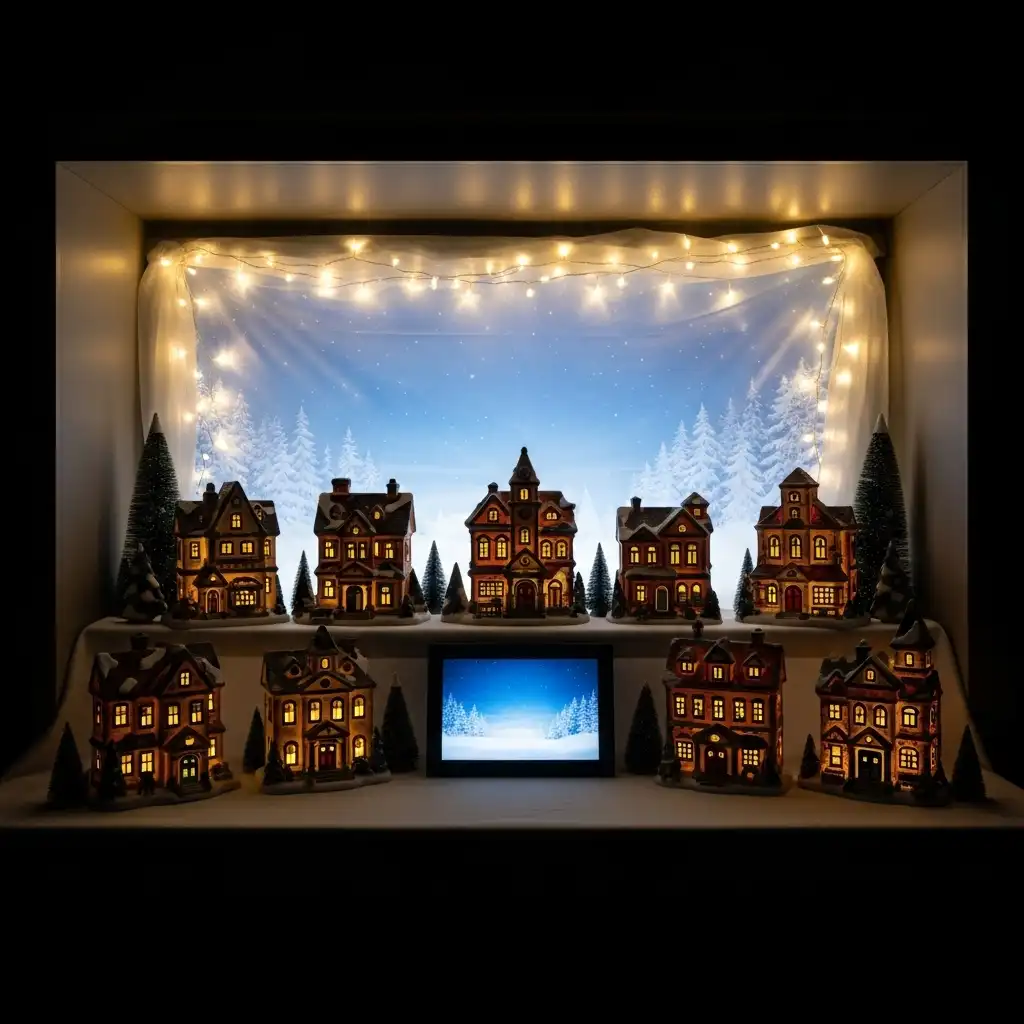
How to Create It: Position LED light panels, string lights behind white fabric, or even use a digital photo frame displaying winter sky scenes behind your village. The backlighting creates a glowing sky effect and silhouettes your buildings dramatically.
This works especially well for smaller displays where you want maximum impact. The illuminated background makes your village visible from across the room and creates professional-looking depth. Add artificial snow falling in front of the light for a magical effect.
17. Bedroom or Bathroom Village Vignette
Extend the holiday magic into unexpected spaces by creating small village vignettes in bedrooms and bathrooms.
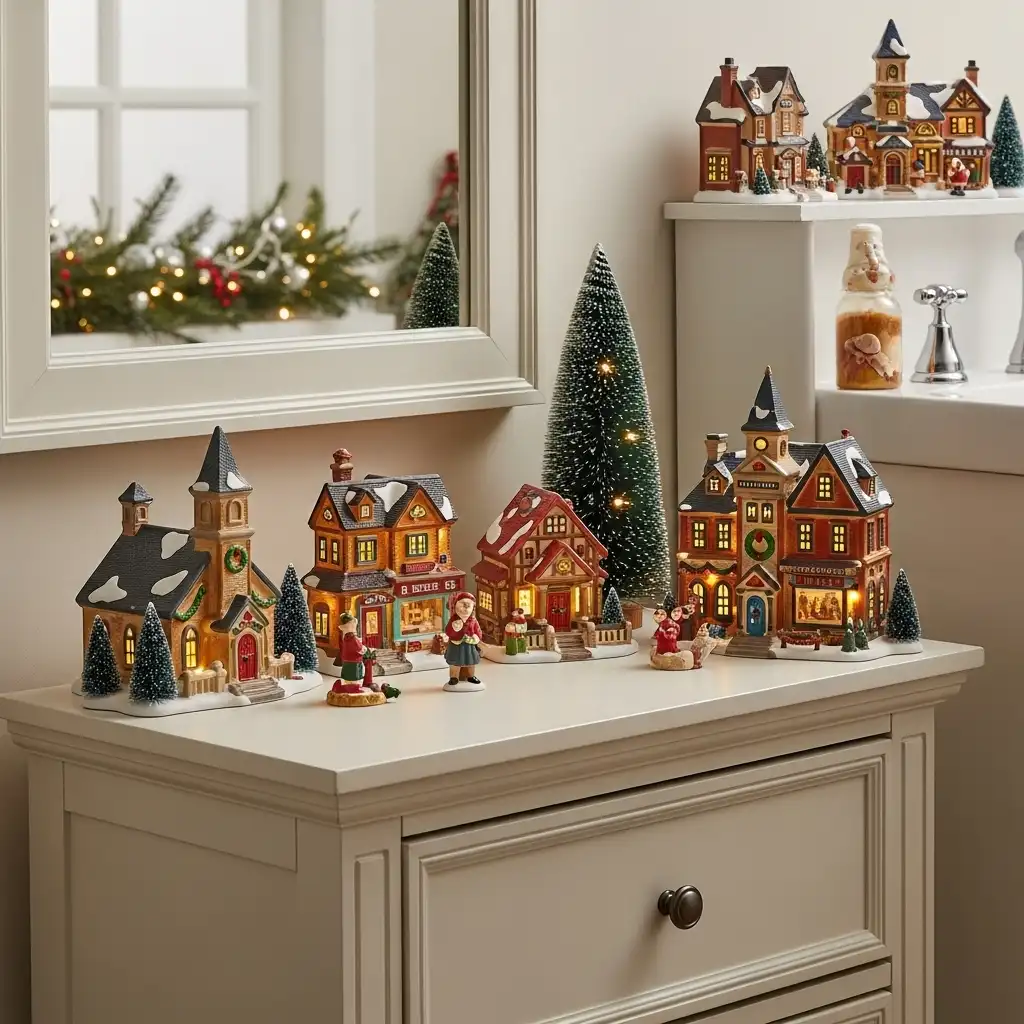
How to Create It: Choose a dresser top, bathroom counter, or nightstand for a scaled-down village display. Select just a few coordinating buildings—perhaps a church, house, and shop—and create a simple scene.
Add a small bottle brush tree, a few figurines, and gentle lighting. These intimate displays bring Christmas cheer into private spaces and are especially magical for children’s rooms. For more ideas about decorating these spaces, visit our Christmas bedroom ideas guide.
18. Interactive Children’s Village
Create a lower, accessible village display that children can enjoy up close and even interact with (under supervision).
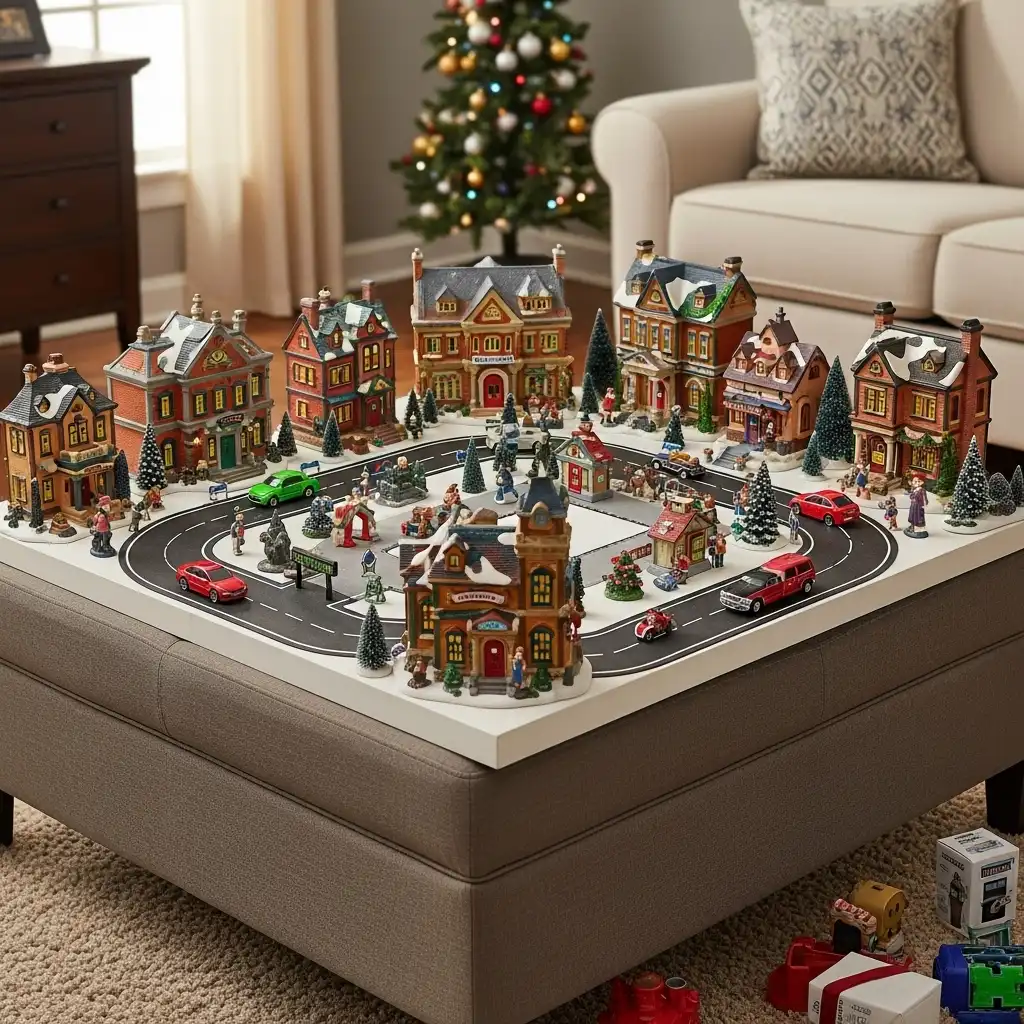
How to Create It: Set up your village on a low coffee table, sturdy ottoman, or child-height surface. Choose durable buildings rather than delicate collectibles. Create clear “streets” where toy cars can drive, and leave open spaces for play.
Include figurines at a scale that matches the child’s other toys. Make the village a play space where stories can unfold, rather than just a static display. This approach creates lasting memories and helps children develop their own love for Christmas village collecting. As they grow, they can gradually take over more of the setup and design each year.
Tips for Creating Any Village Display
Plan Your Layout First: Before placing any buildings, arrange them without snow or accessories to establish your basic town layout. Take photos from different angles to see what works best.
Layer Your Lighting: Don’t rely solely on building lights. Add string lights, spotlights, and ambient lighting to create depth and atmosphere.
Create Pathways: Leave clear streets and walking paths between buildings. Use white ribbon, actual village street pieces, or simply sweep away snow to create roads.
Vary Your Heights: Even on flat surfaces, create interest by using risers, books, or boxes under your snow cover to vary elevations slightly.
Add Abundant Accessories: Figurines, vehicles, trees, lampposts, and small details bring your village to life. Don’t be shy about adding lots of little touches.
Consider Sightlines: Arrange your village so it looks good from wherever it will be viewed most often. Turn building fronts toward viewing areas.
Use Quality Snow Products: Invest in good batting, snow blankets, or artificial snow. The base makes or breaks your village’s appearance.
Tell a Story: Think about what’s happening in your town. Are people shopping? Caroling? Skating? Create little scenes that tell stories.
Mind the Cords: Plan for power access and hide cords under your snow blanket. Use power strips positioned behind the display.
Refresh Annually: Each year, slightly rearrange your village or add new pieces to keep it fresh and exciting.
Caring for Your Village Collection
Proper Storage: Wrap each building individually in bubble wrap or tissue paper. Store in sturdy boxes with dividers. Label boxes clearly with contents.
Climate Control: Store your village in climate-controlled spaces. Extreme temperatures and humidity can damage buildings and figurines.
Dust Carefully: Use soft brushes or compressed air to clean buildings. Avoid water on painted surfaces or electrical components.
Check Lights Annually: Test all buildings before setting up your display. Replace bulbs as needed and check for damaged cords.
Document Your Collection: Take photos of each year’s display and keep an inventory of your pieces. This helps with insurance and planning future additions.
Where to Find Village Pieces
Specialty Retailers: Department 56, Lemax, and other major brands sell villages through specialty Christmas stores and online retailers.
Thrift Stores: Check regularly during the holiday season for affordable vintage and second-hand pieces.
Estate Sales: Serious collectors often have extensive villages that come up for sale.
Online Marketplaces: eBay, Etsy, and Facebook Marketplace offer both new and vintage pieces, often at competitive prices.
After-Christmas Sales: Stock up for next year during post-holiday clearance sales, often at 50-70% off.
Craft Fairs: Local artisans often create unique, handmade village pieces you won’t find anywhere else.
Frequently Asked Questions
Q: How many buildings do I need to start a village display?
You can create a charming display with as few as three to five buildings. Start with a focal point building like a church or town hall, add a couple of houses or shops, and fill in with accessories and trees. You can always add more pieces over time as your collection grows.
Q: What’s the best surface to use under my village?
The most popular options are white quilt batting, specialized snow blankets made for villages, white fleece fabric, or even white sheets. Batting looks most realistic for snow and is affordable. Avoid actual cotton balls, as they look lumpy and artificial. Whatever you choose, make sure it’s large enough to cover your entire display area.
Q: How do I make my village display look more realistic?
Focus on these details: vary your building heights, create realistic pathways and streets, add lots of small accessories and figurines, use multiple light sources, incorporate natural elements like actual twigs for bare trees, create depth with layers, and don’t make everything perfectly symmetrical. Real towns have organic layouts, so embrace some randomness.
Q: Can I mix different village brands together?
Yes, though it works best if the scales are similar. Department 56, Lemax, and similar brands are comparable in scale. The key is maintaining consistent proportions so buildings don’t look jarring next to each other. Mixing styles can actually create a more interesting, realistic town with diverse architecture, as long as the scale remains consistent.
Conclusion
Creating a Christmas village display is one of the most rewarding holiday decorating traditions. Whether you arrange a simple mantel scene or construct an elaborate multi-level winter wonderland, your village becomes a focal point that draws family and friends together to admire the details and share in the magic.
The beauty of village collecting is that it’s never finished. Each year brings opportunities to add new buildings, rearrange your layout, or try a completely different display idea. Your village grows and evolves just as your family does, with each piece potentially carrying its own story and memory.
For more inspiration to complement your Christmas village, explore our comprehensive Christmas home decor ideas to create a coordinated look throughout your home. And don’t forget that your village is just one element of your overall holiday decor—coordinate it with your other decorations for maximum impact.
This holiday season, take time to create a village display that reflects your personal style and brings joy to everyone who sees it. The tiny lit windows, the miniature Christmas trees, the small figures going about their festive business—these simple elements combine to create something truly magical that captures the heart of Christmas.
Happy village building, and may your miniature town bring you endless joy and wonder throughout the holiday season and for many years to come!